
Embedding in Wordpress(using woocommerce)

This guide outlines the process of embedding the iJewel 3D Viewer into WordPress using Twenty Twenty-Four or related themes with WooCommerce. The iJewel 3D Viewer added Model Viewer on the Product Display Page(PDP), offering high-quality rendering for jewelry and fashion items, and additional features like custom configurators, post-processing effects, AR TryOn etc
Prerequisites
- Access to your Wordpress admin portal
- Understanding of Wordpress & Woocommerce theme structure
- Basic Familiarity with HTML, CSS, and JavaScript
- iJewel3D SDK Website License. Check out the license page for more details.
TIP
If you are looking for a development team for the integration, check our Development Partners
Step 1: Install and Activate ACF Plugin
- Go to Plugins > Add New in the WordPress dashboard.
- Search for Advanced Custom Fields
- Install and activate the plugin.
TIP
This Plugin is required to create custom field for product.
Step 2: Create a Custom Field for Embedding URL
- Go to
Custom Fields > Add New. - Add a field group title
iJewel Embedding. - Click Add Field to create a new custom field.
- Field Label:
Embedding url - Field Name:
ijewel_url - Field Type: Select
URLfrom the dropdown menu.
- Under Location, set Show this field group if to:
- Post Type is equal to Product.
- Click Publish.
Step 3: Displaying Embedded viewer on the Product Page
To display the 3D model on the front-end WooCommerce product page, you need to modify your WooCommerce product template.
Modify Product Image Gallery Template (Optional)
If you want more control over how and where the custom image appears, you can override the WooCommerce product gallery template.
- Copy the WooCommerce Template:
- Copy the template from
wp-content/plugins/woocommerce/templates/single-product/product-image.phpto your theme folder underyour-theme/woocommerce/single-product/product-image.php.
- Modify the Template:
- In the copied template file, you can add your custom image logic. For example, add the custom image right before or after the existing gallery:
product-image.php
<?php
$ijewel_url = get_field('ijewel_url');

if ( $ijewel_url ) : ?>
	<div class="ijewel-viewer">
		<iframe
			src="<?php echo esc_url( $ijewel_url ); ?>"
			frameborder="0"
			mozallowfullscreen="true"
			webkitallowfullscreen="true"
			xr-spatial-tracking
			execution-while-out-of-viewport
			execution-while-not-rendered
			web-share
			allow="camera; autoplay; fullscreen; xr-spatial-tracking; web-share"
			width="540"
			height="480">
		</iframe>
	</div>
<?php endif; ?>
Adjust the iframe width and height to match your layout. This will display the viewer either before or after the main product images in the gallery.
INFO
Some theme may have custom products image gallery slider. This may require some developer attention.
Save all modified changes
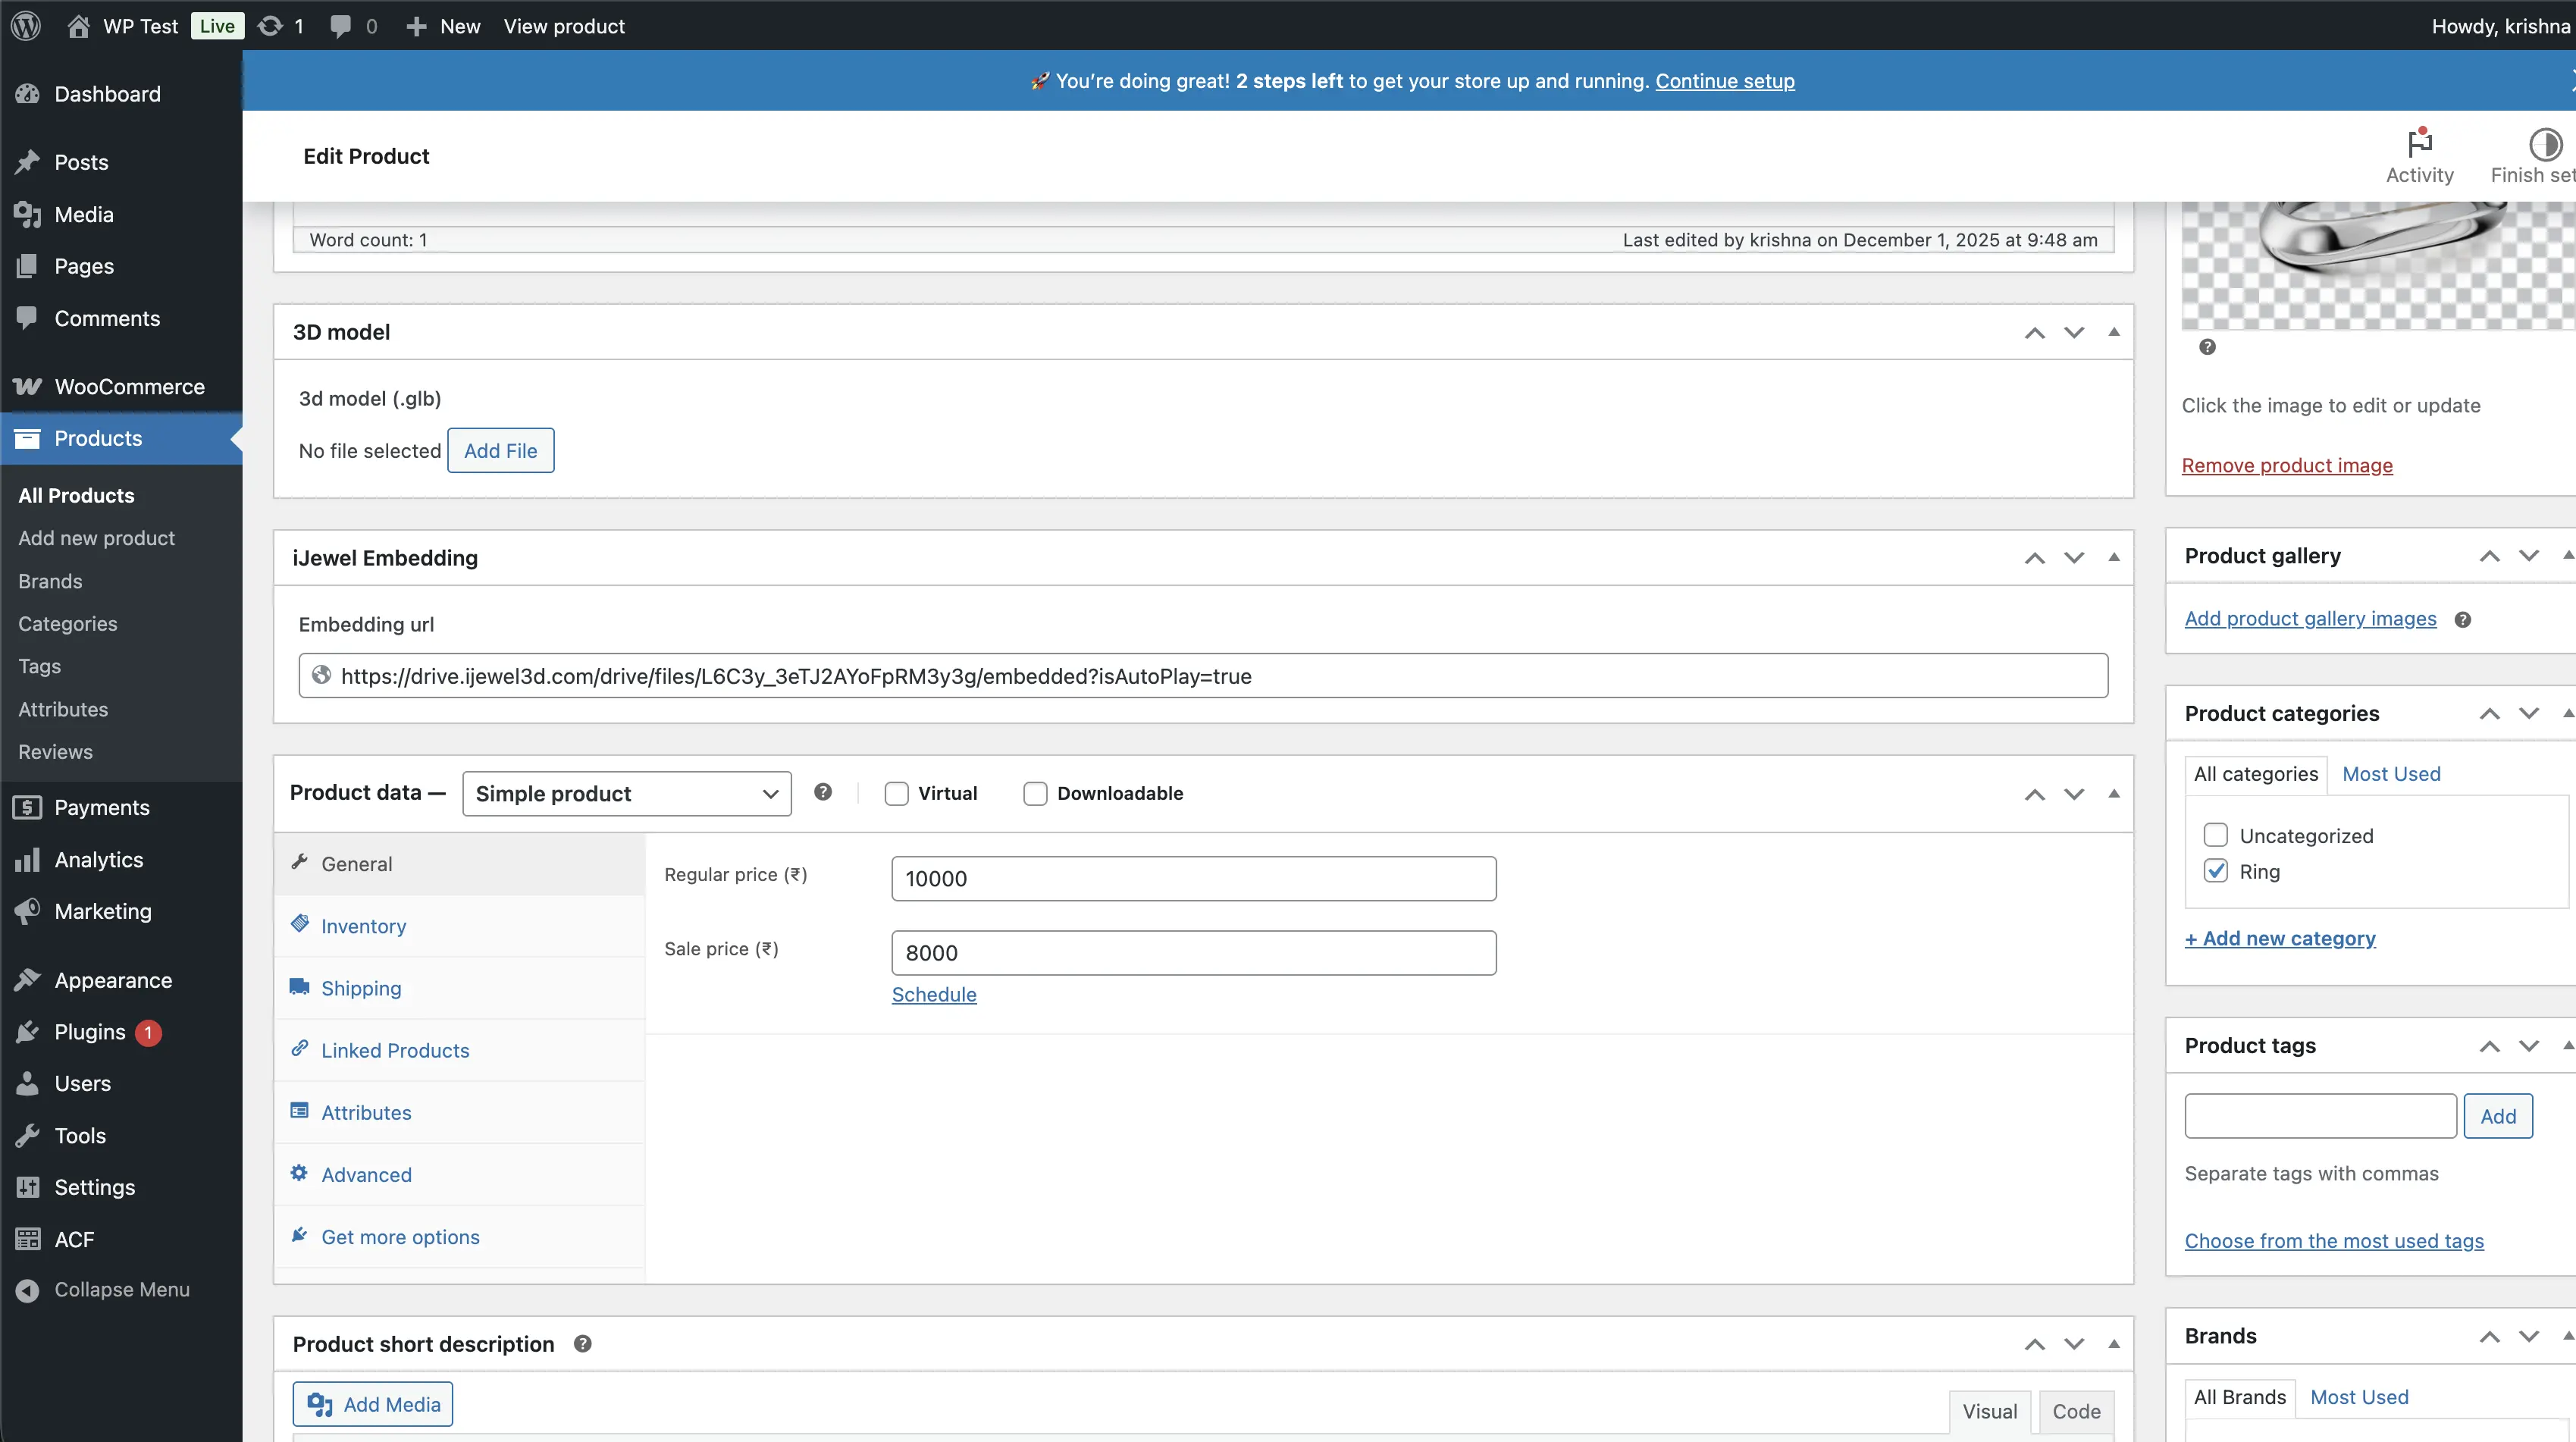
Step 4: Add Embedding URL from iJewel3D or iJewel Design to Products
Once you've done above process Add new or Edit product.
- Navigate to
WooCommerce > Products. - Choose a product, or create a new product.
- You should see an option to add/edit
Embedding url. - Save the changes
Tip
To get the embedding URL, follow this guide: Create an iJewel Viewer Embed
Step 5: Test the Integration
- Preview the product page with the 3D model and the theme.
- Verify that the iJewel viewer loads correctly and functions as expected
- Test on various devices and browsers to ensure compatibility
Troubleshooting
- If the viewer doesn't appear, check the browser console for JavaScript errors
- Ensure all file paths are correct in your theme files
- Verify that the 3D model file is in a supported format (GLB or GLTF)
Next Steps
- Explore additional iJewel SDK features and integrate them as needed
- Check out other products at iJewel3D
Remember to thoroughly test your changes before pushing the updated theme live. Regularly check for updates to the Theme, WooCommerce Plugin and the iJewel SDK to ensure compatibility and access to new features.
Contact
For any questions or assistance with the integration, or questions about the license, email us at contact@ijewel3d.com,