Prepare Ring Components
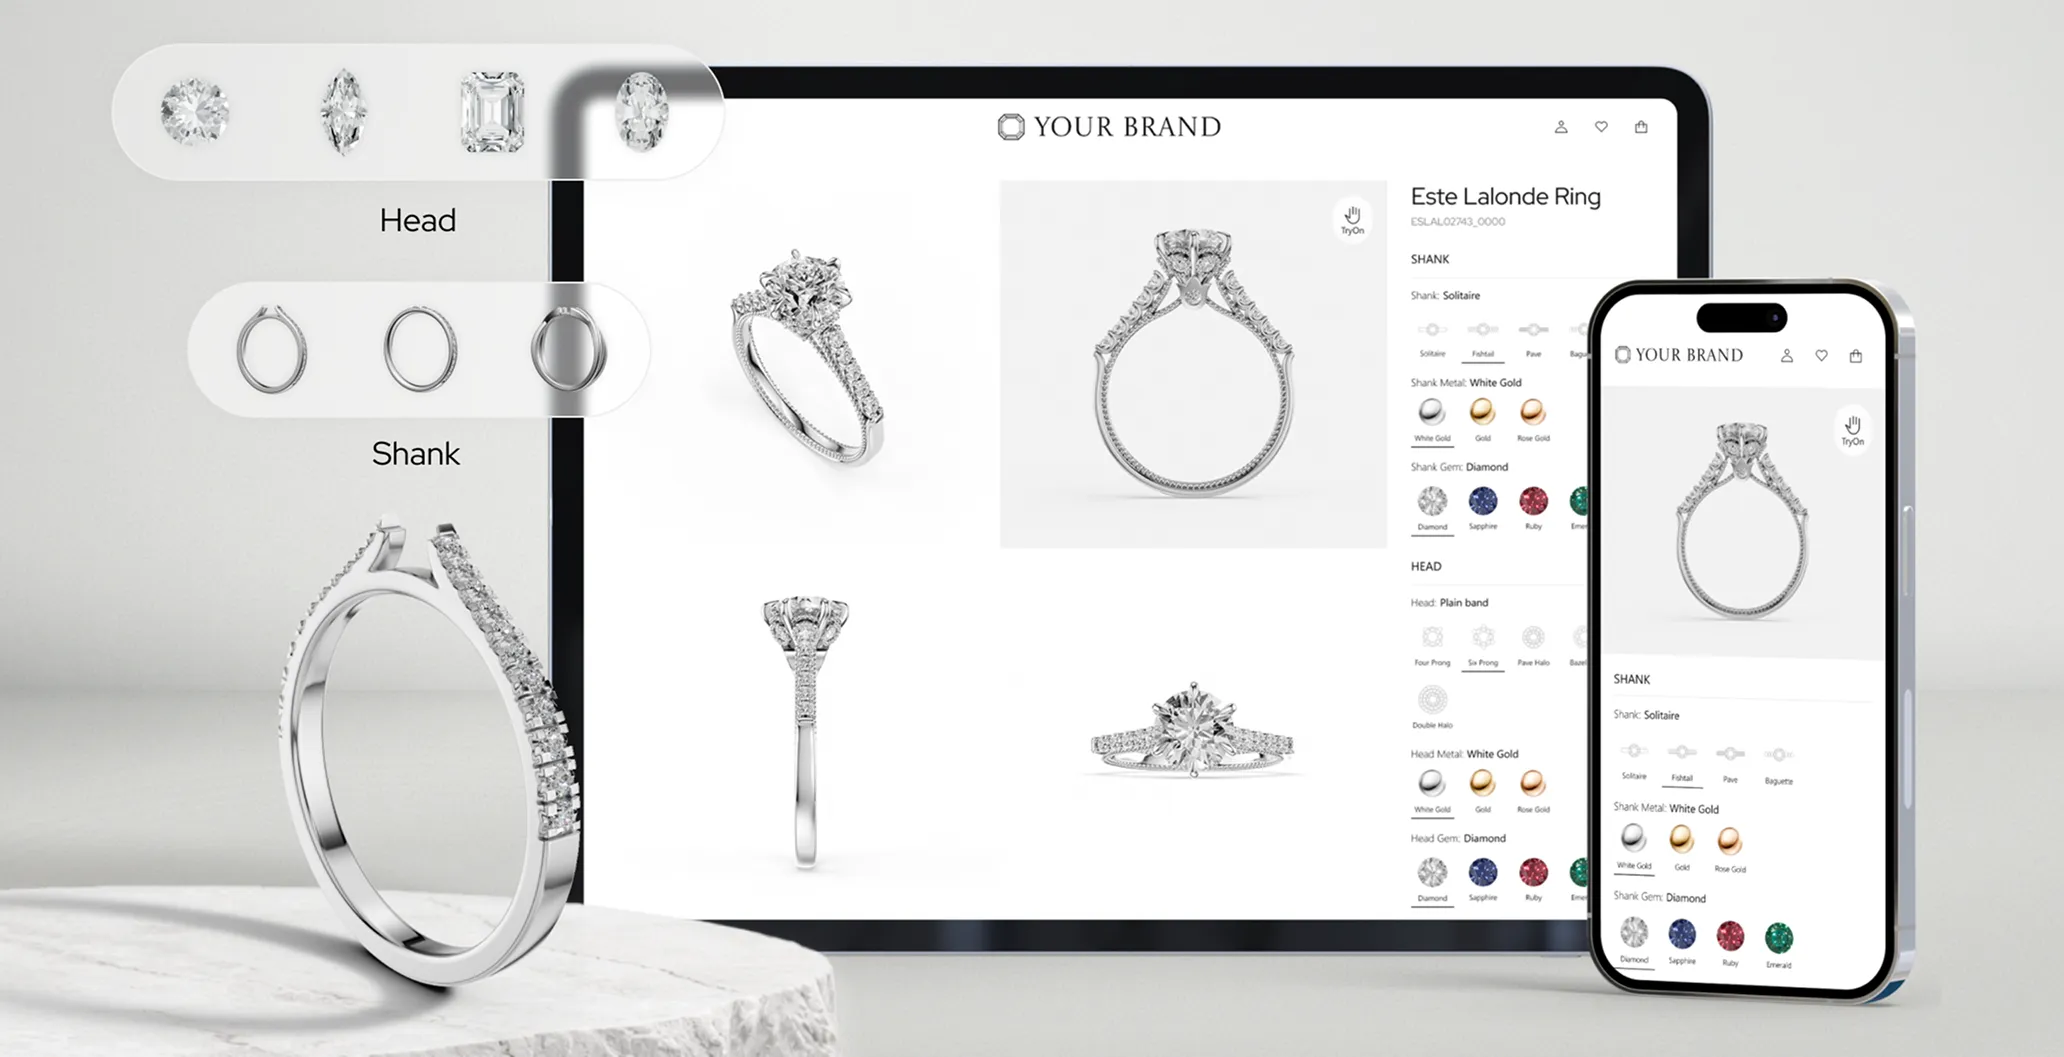
When building rings in iJewel, you don't need to model every variation from scratch. By separating a ring into Head and Shank components, you can dynamically combine them inside iJewel to generate dozens or even hundreds of unique ring designs from a small set of files.
Why Separate Components?
| Benefit | Description |
|---|---|
| Mix and Match | Combine any head with any shank |
| Fewer Models | Reduce total files needed |
| Easy Updates | Add new variations without remodeling the entire ring |
Creating Variations
Each component should have multiple variations to maximize configurability.
Head Variations
| Property | Examples |
|---|---|
| Prong Count | 4-prong, 5-prong, 6-prong |
| Diamond Shape | Round, Princess, Pear, Oval, Marquise |
| Carat Size | 0.5 ct, 1 ct, 2 ct, 3 ct |
Shank Variations
| Style | Description |
|---|---|
| Plain | Simple, smooth band |
| Pave | Small diamonds set into the band |
| Channel | Diamonds set in a channel groove |
| Split Shank | Band splits near the head |
| Cathedral | Arched supports rising to meet the head |
By combining these, iJewel can automatically generate dozens or hundreds of ring combinations from a small set of files.
Two Methods for Creating Components
These guidelines work with any modelling software, but examples here use Rhino and MatrixGold, as they are most commonly used in the jewelry industry.
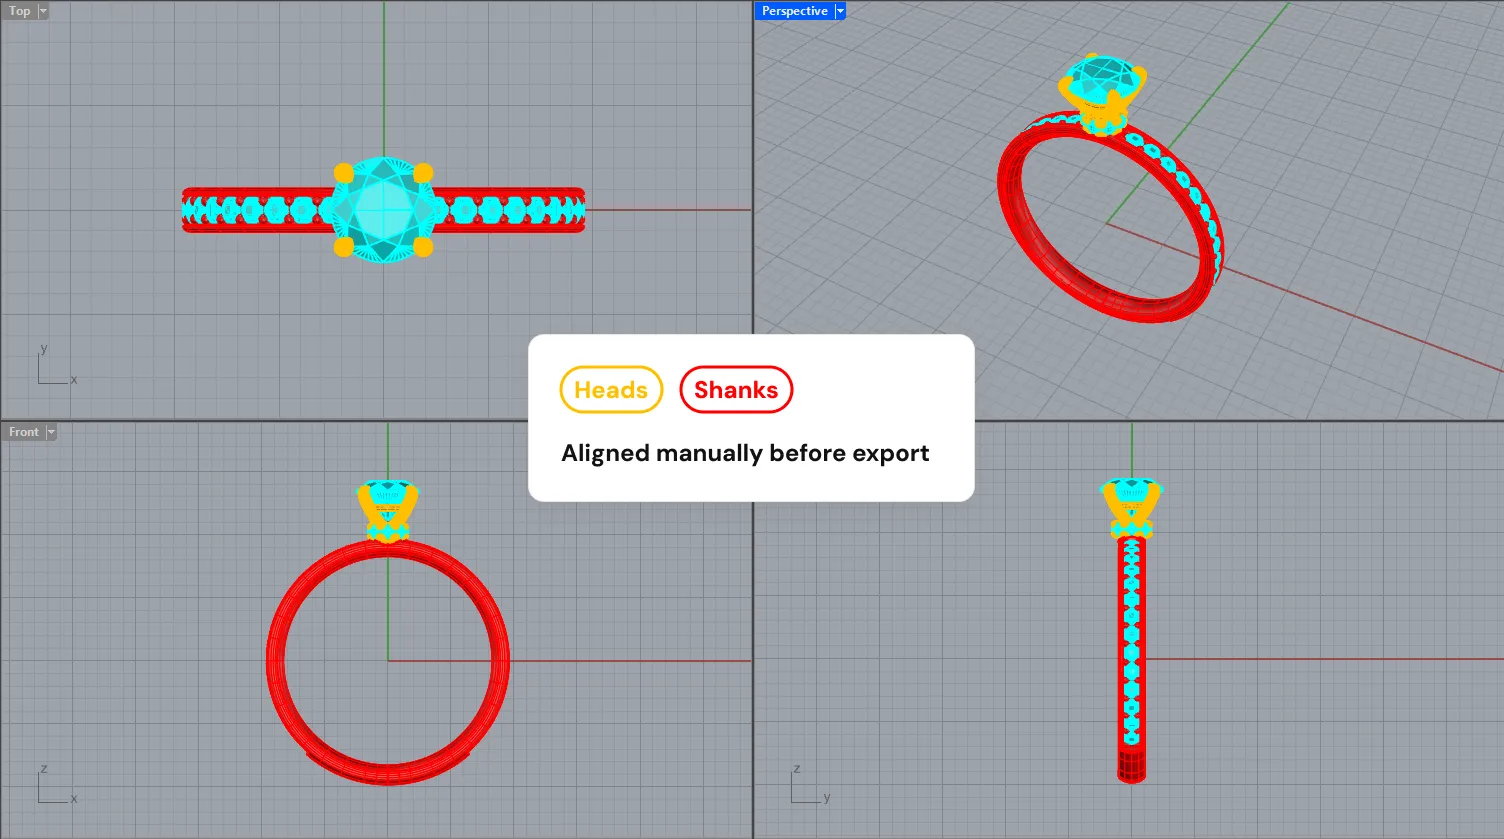
Method 1: Pre-Positioned Components
In this method:
- Each Head and Shank is modeled separately
- They are positioned correctly relative to each other in 3D space
- When combined, they already form a complete ring
When to Use
- Fixed designs with limited variations
- Simple setups
- When exact manual positioning is preferred
Method 2: Anchor-Based Auto Placement (Recommended)
In this method, exact positioning is handled by iJewel automatically using an anchor object.
Steps (Rhino Example)
- Create a cube or simple shape (anchor object)
- Place it on top of the shank, exactly where the head should sit
- Assign the anchor object to a layer named
placeholder:headlikewise it can be anything which you want to place it overplaceholder:<component-name>
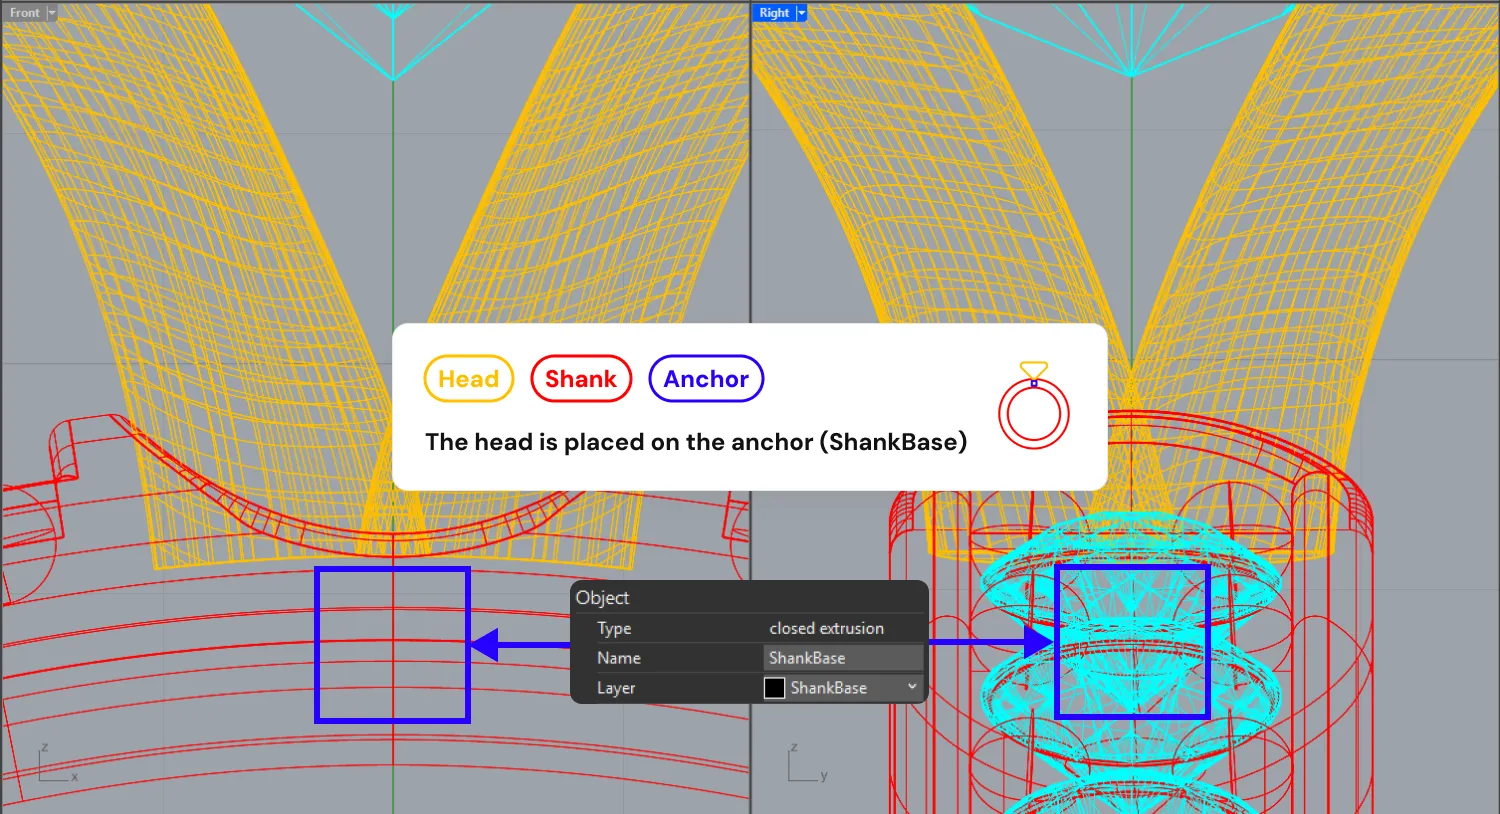
Once this is done:
- iJewel detects the
placeholder:headlayer - Any head variation is placed exactly on top of the anchor
- When shank or head changes, alignment updates automatically
Advantages
- No manual repositioning – Heads snap to the correct location
- Perfect alignment – Consistent across all variations
- Highly scalable – Ideal for large catalogs with many combinations
Naming Conventions (Recommended)
Good naming makes files easier to manage especially in large libraries.
Suggested Format
<SKU>-<DiamondShape><CaratSize>Example
H123-Rd20| Part | Meaning |
|---|---|
H123 | Head SKU identifier |
Rd | Round diamond shape |
20 | 2.0 carat size |
TIP
This naming convention is not mandatory, but strongly recommended for clean, organized workflows.
When Component Separation Is Not Needed
If you want to create complete ring variations (not configurable parts):
- Head and shank separation is not required
- Each variation should be a separate full ring model
Comparison Example
5 head styles × 5 shank styles:
| Approach | Total Models |
|---|---|
| Without separation | 25 full ring models |
| With separation | 10 models (5 heads + 5 shanks) |
WARNING
Component separation becomes extremely valuable as variations grow. For catalogs with many options, modular components save significant modeling time.
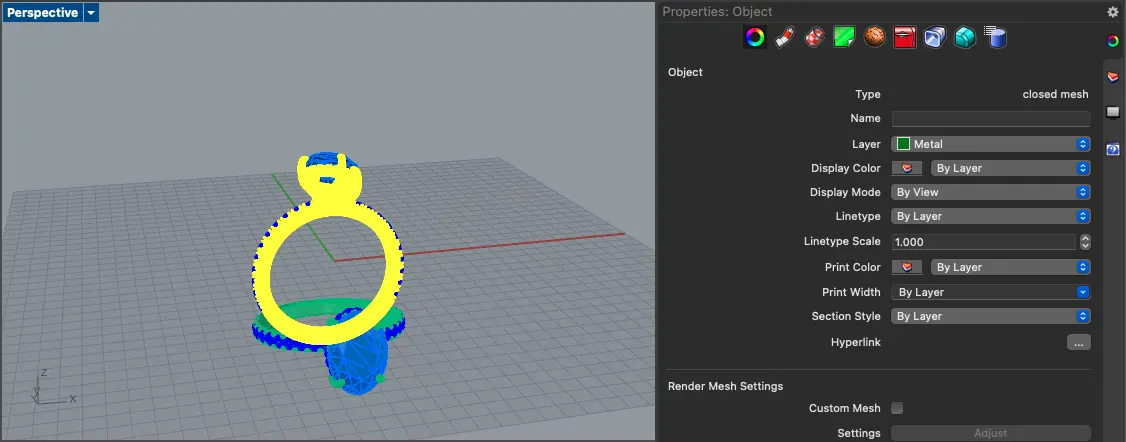
Assigning Layers in Rhino
Every 3D model in Rhino is divided into objects, and each object can have an associated layer. Proper layering is essential for iJewel to correctly identify and apply materials to different parts of your ring.
And all layers present in the 3D model:
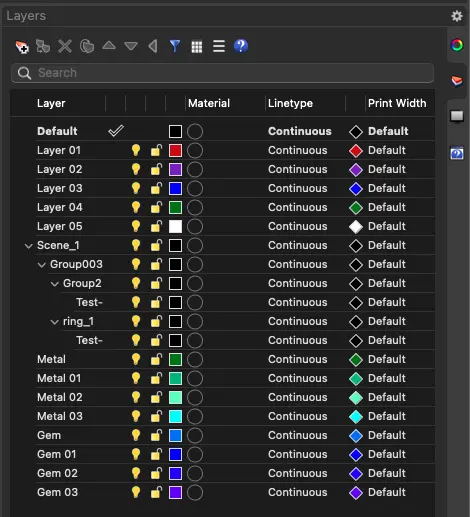
Layer Guidelines for Ring Configurator
When preparing ring components for the Ring Configurator:
- Name layers consistently across all files
- Separate diamond shapes – Put unique shapes (round, pear, marquise) in separate layers for accurate diamond cuts
- Group similar diamonds – Similar diamond shapes with transforms (rotation/scale/translation) should be in the same layer when possible
- Separate for materials – Use different layers when different materials need to be assigned
- Multi-tone metals – Create separate layers for parts that need different metals (e.g.,
Head,Shank)
Recommended Layer Names
| Material Type | Layer Name Format |
|---|---|
| Metals | Metal 01, Metal 02, ... |
| Diamonds/Gemstones | Gem 01, Gem 02, ... |
| Pearls | Pearl 01, Pearl 02, ... |
| Ceramic/Enamels | Ceramic 01, Ceramic 02, ... |
Special Layers for Ring Configurator
| Layer Name | Purpose |
|---|---|
ShankBase | Anchor point for automatic head placement |
Head | The head component (top part holding the center stone) |
Shank | The shank component (ring band) |
General Tips for Preparing 3D Models
- Use Block Instances for identical parts (similar diamonds, chain links, prongs)
- Optimize mesh resolution – Not too high (large file size), not too low (poor quality)
- Keep polygon count manageable - Aim for under 200,000 polygons per model
- Use face normals for diamonds/gems to produce accurate cuts
- For high-resolution meshes, use Rhino's
ReduceMeshcommand to lower polycount while maintaining quality
Render vs Production CAD
Production CAD files are optimized for manufacturing, not rendering. Common issues include:
- Sharp edges and prongs
- Seam artifacts
- Combined metal parts
- Penetrating surfaces
Fix these issues before using in Ring Configurator for best results.
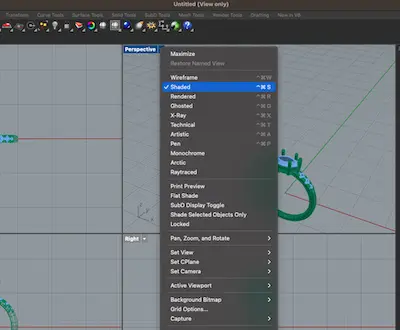
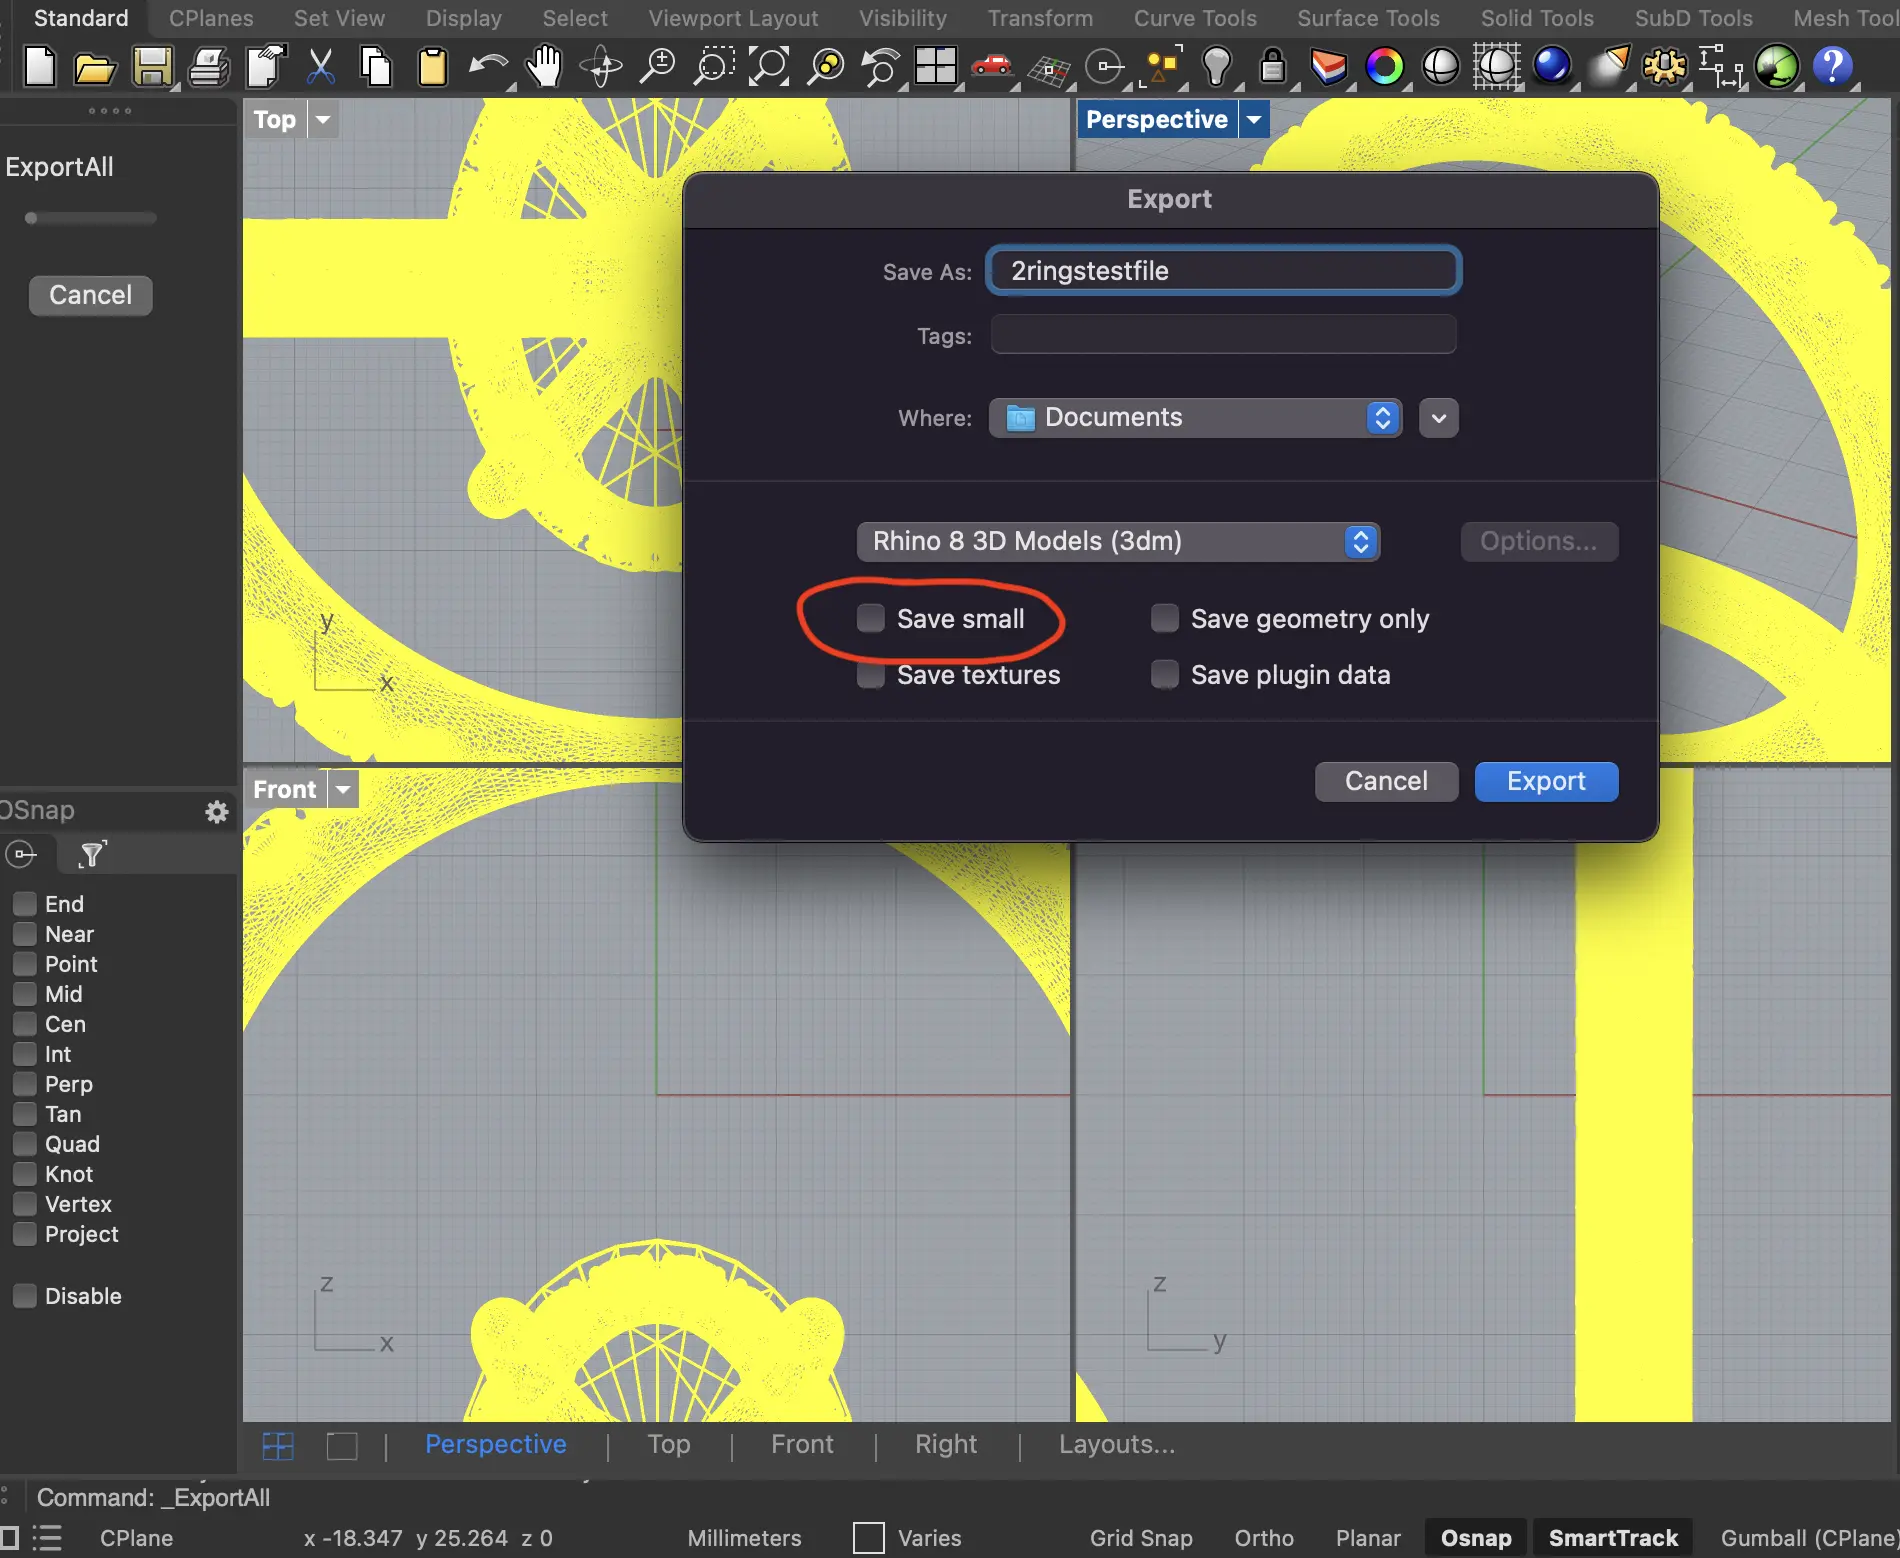
Exporting from Rhino
Switch to Shaded Mode before exporting (converts NURBS surfaces to meshes)
Export as
.3dmformatDo NOT enable "Save small" option – this removes meshes and iJewel needs meshes to render properly
Next Steps
Once your components are prepared:
- Upload and sync files to iJewel – Learn how to import your components
- Configure variations and combinations in the Ring Configurator plugin