
Using Ring Configurator
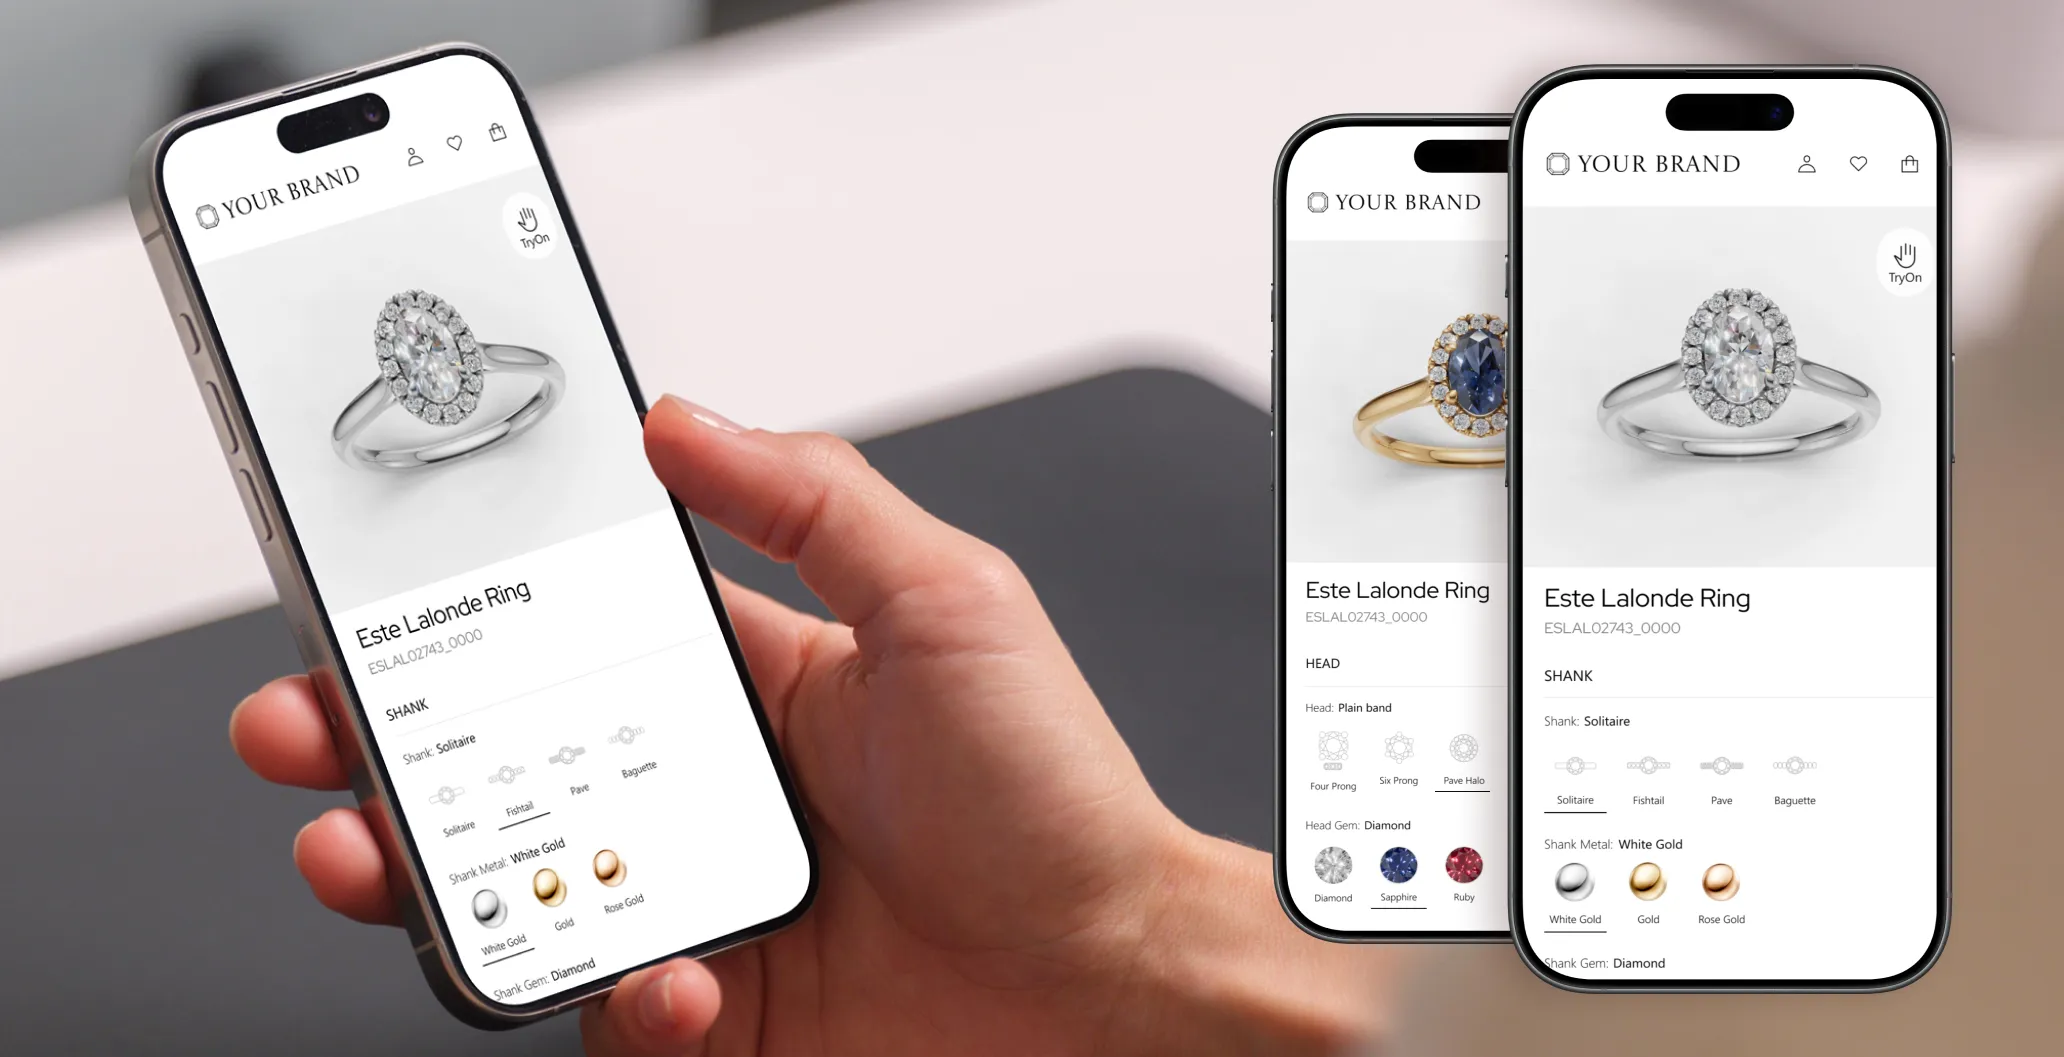
This guide covers how to deploy and use your ring configurator after setting it up in the iJewel3D platform.
Deployment Options
Once your Ring Configurator is configured, choose how the page and project are hosted:
| Option | Best For | Complexity |
|---|---|---|
| Direct Embedding | Quick integration | Low |
| Share Link | Sending to customers | None |
| Custom page with a Drive project | A custom storefront UI while Drive continues to store the project | Medium |
| Fully self-hosted project | Hosting the project JSON and assets on your own infrastructure | Advanced |
Make Your Configurator Public
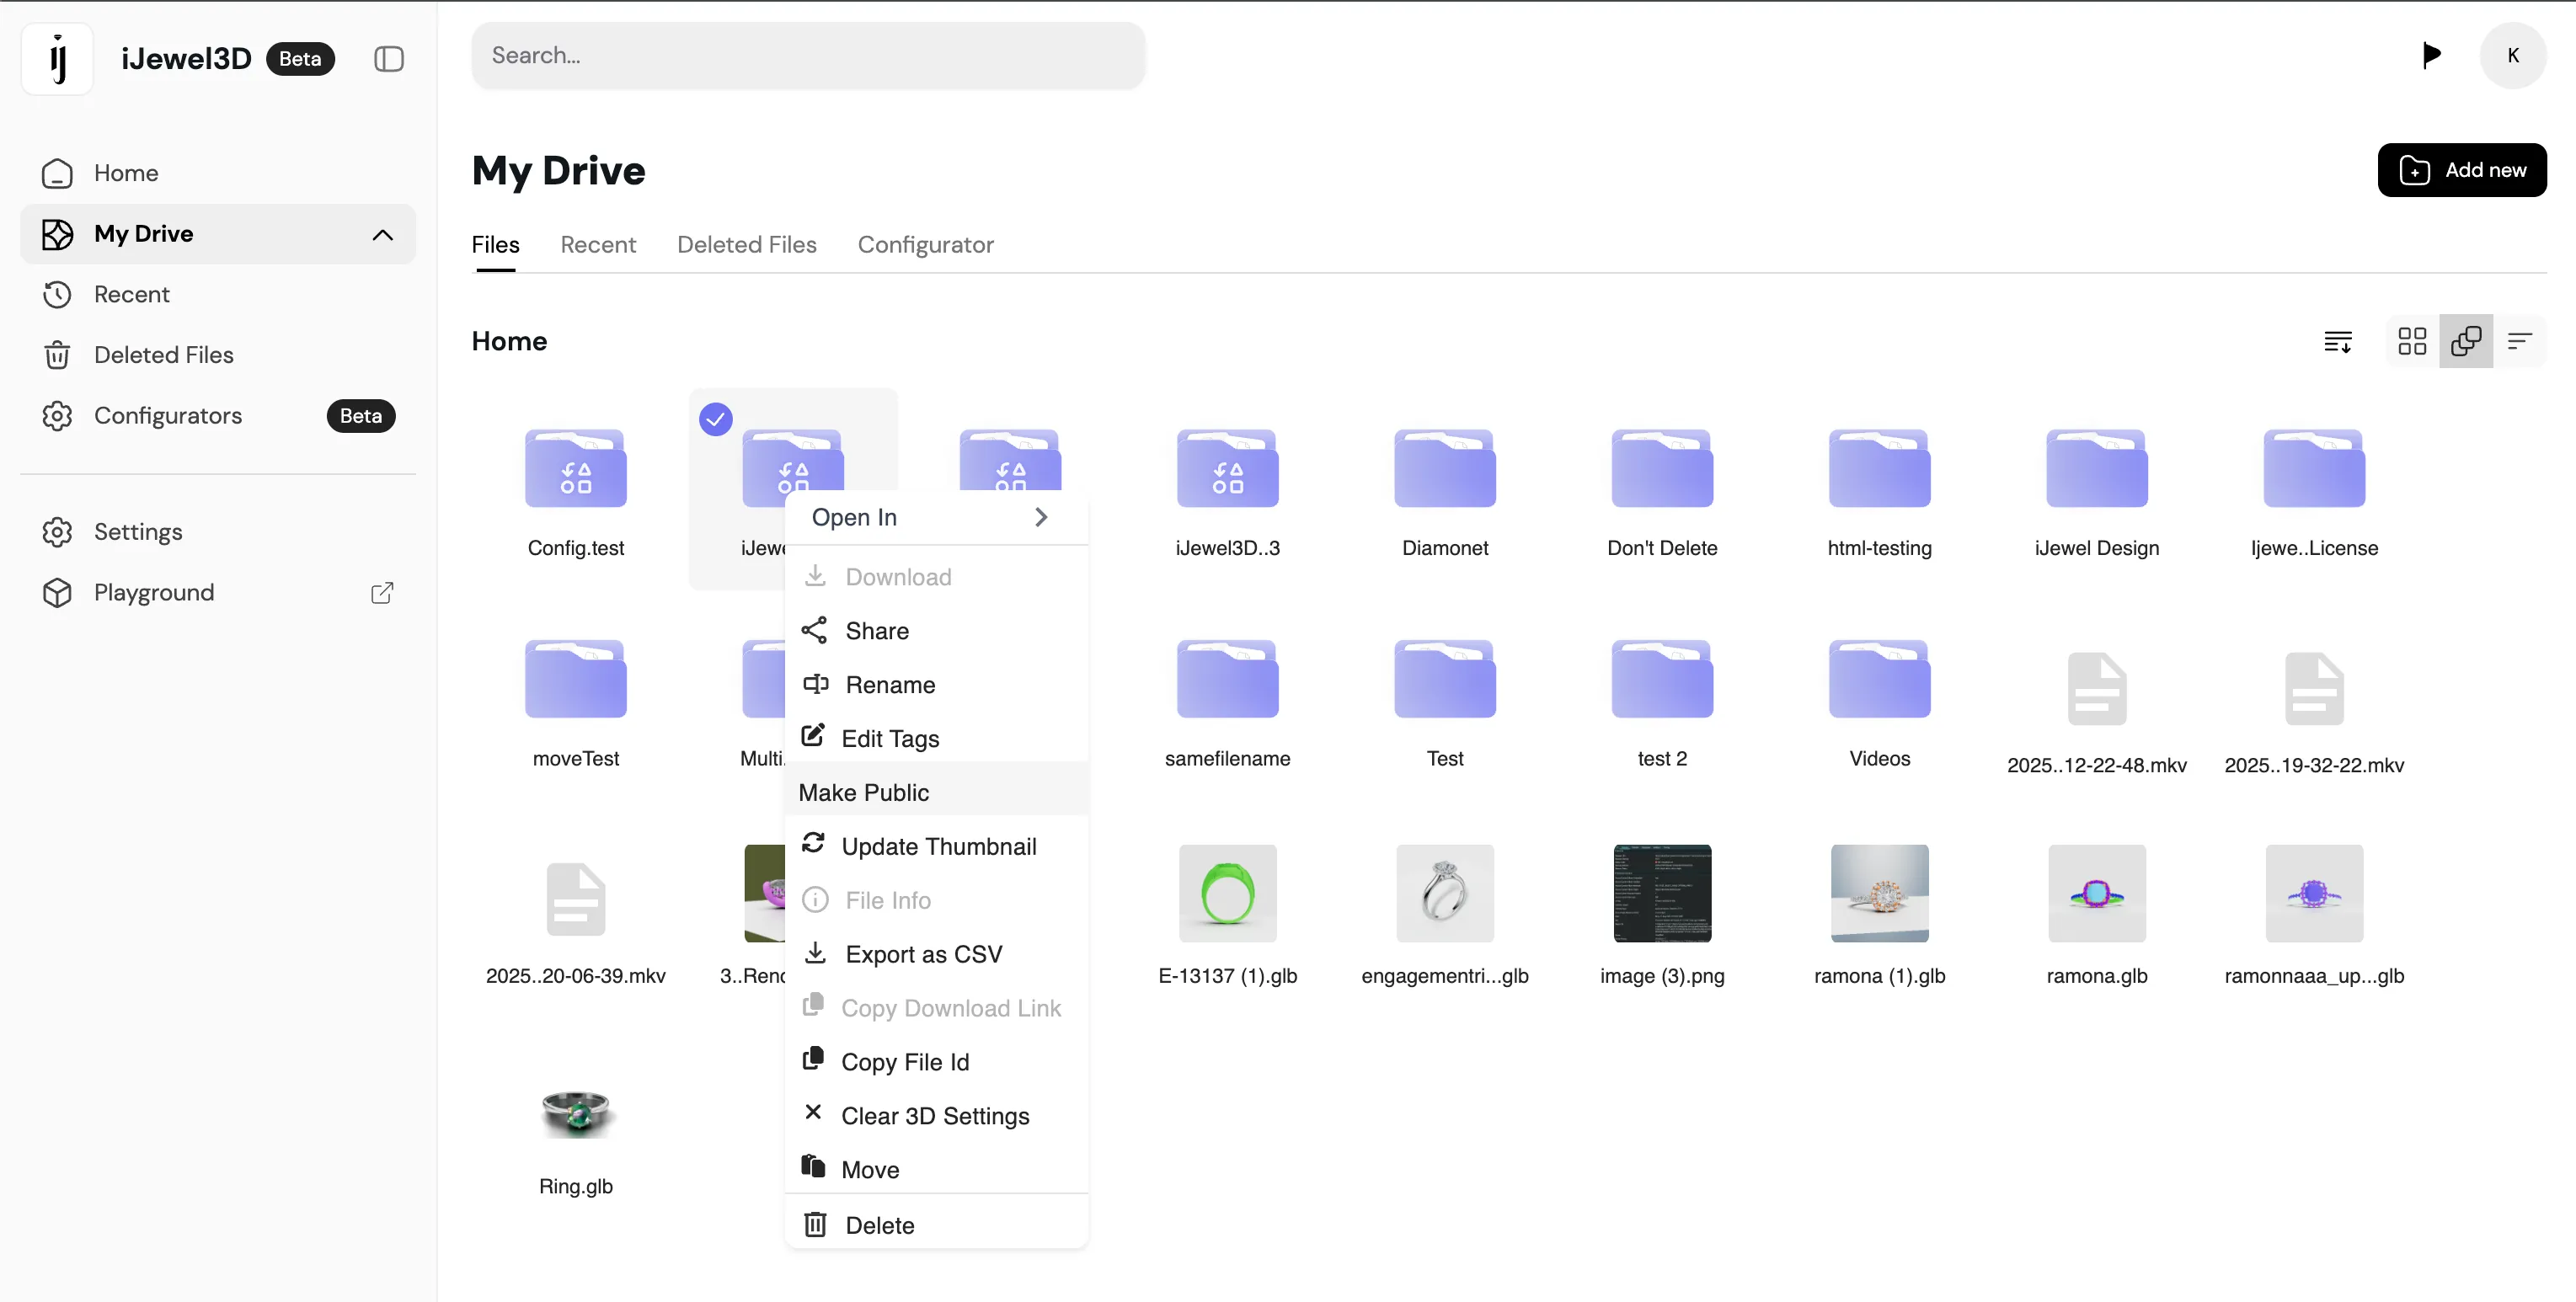
Direct embedding, share links, and loadModelById require the Drive project to be Public. By default, configurators are accessible only inside iJewel3D Platform. To make a Drive project available to a website:
- Right-click on your Configurator file in the iJewel3D platform.
- Select Make Public.
A fully self-hosted project does not load the Drive file at runtime. Its project JSON, component assets, and scene resources must instead be publicly readable from the host or CDN.
Option 1: Direct Embedding
Embed your ring configurator directly on any webpage using an iframe.
<iframe
  src="https://ijewel3d.com/<your-instance-name>/files/<your-configurator-file-id>/embedded"
  width="100%"
  height="600"
  frameborder="0">
</iframe>
Learn more about embedding configurators.
Option 2: Share Link
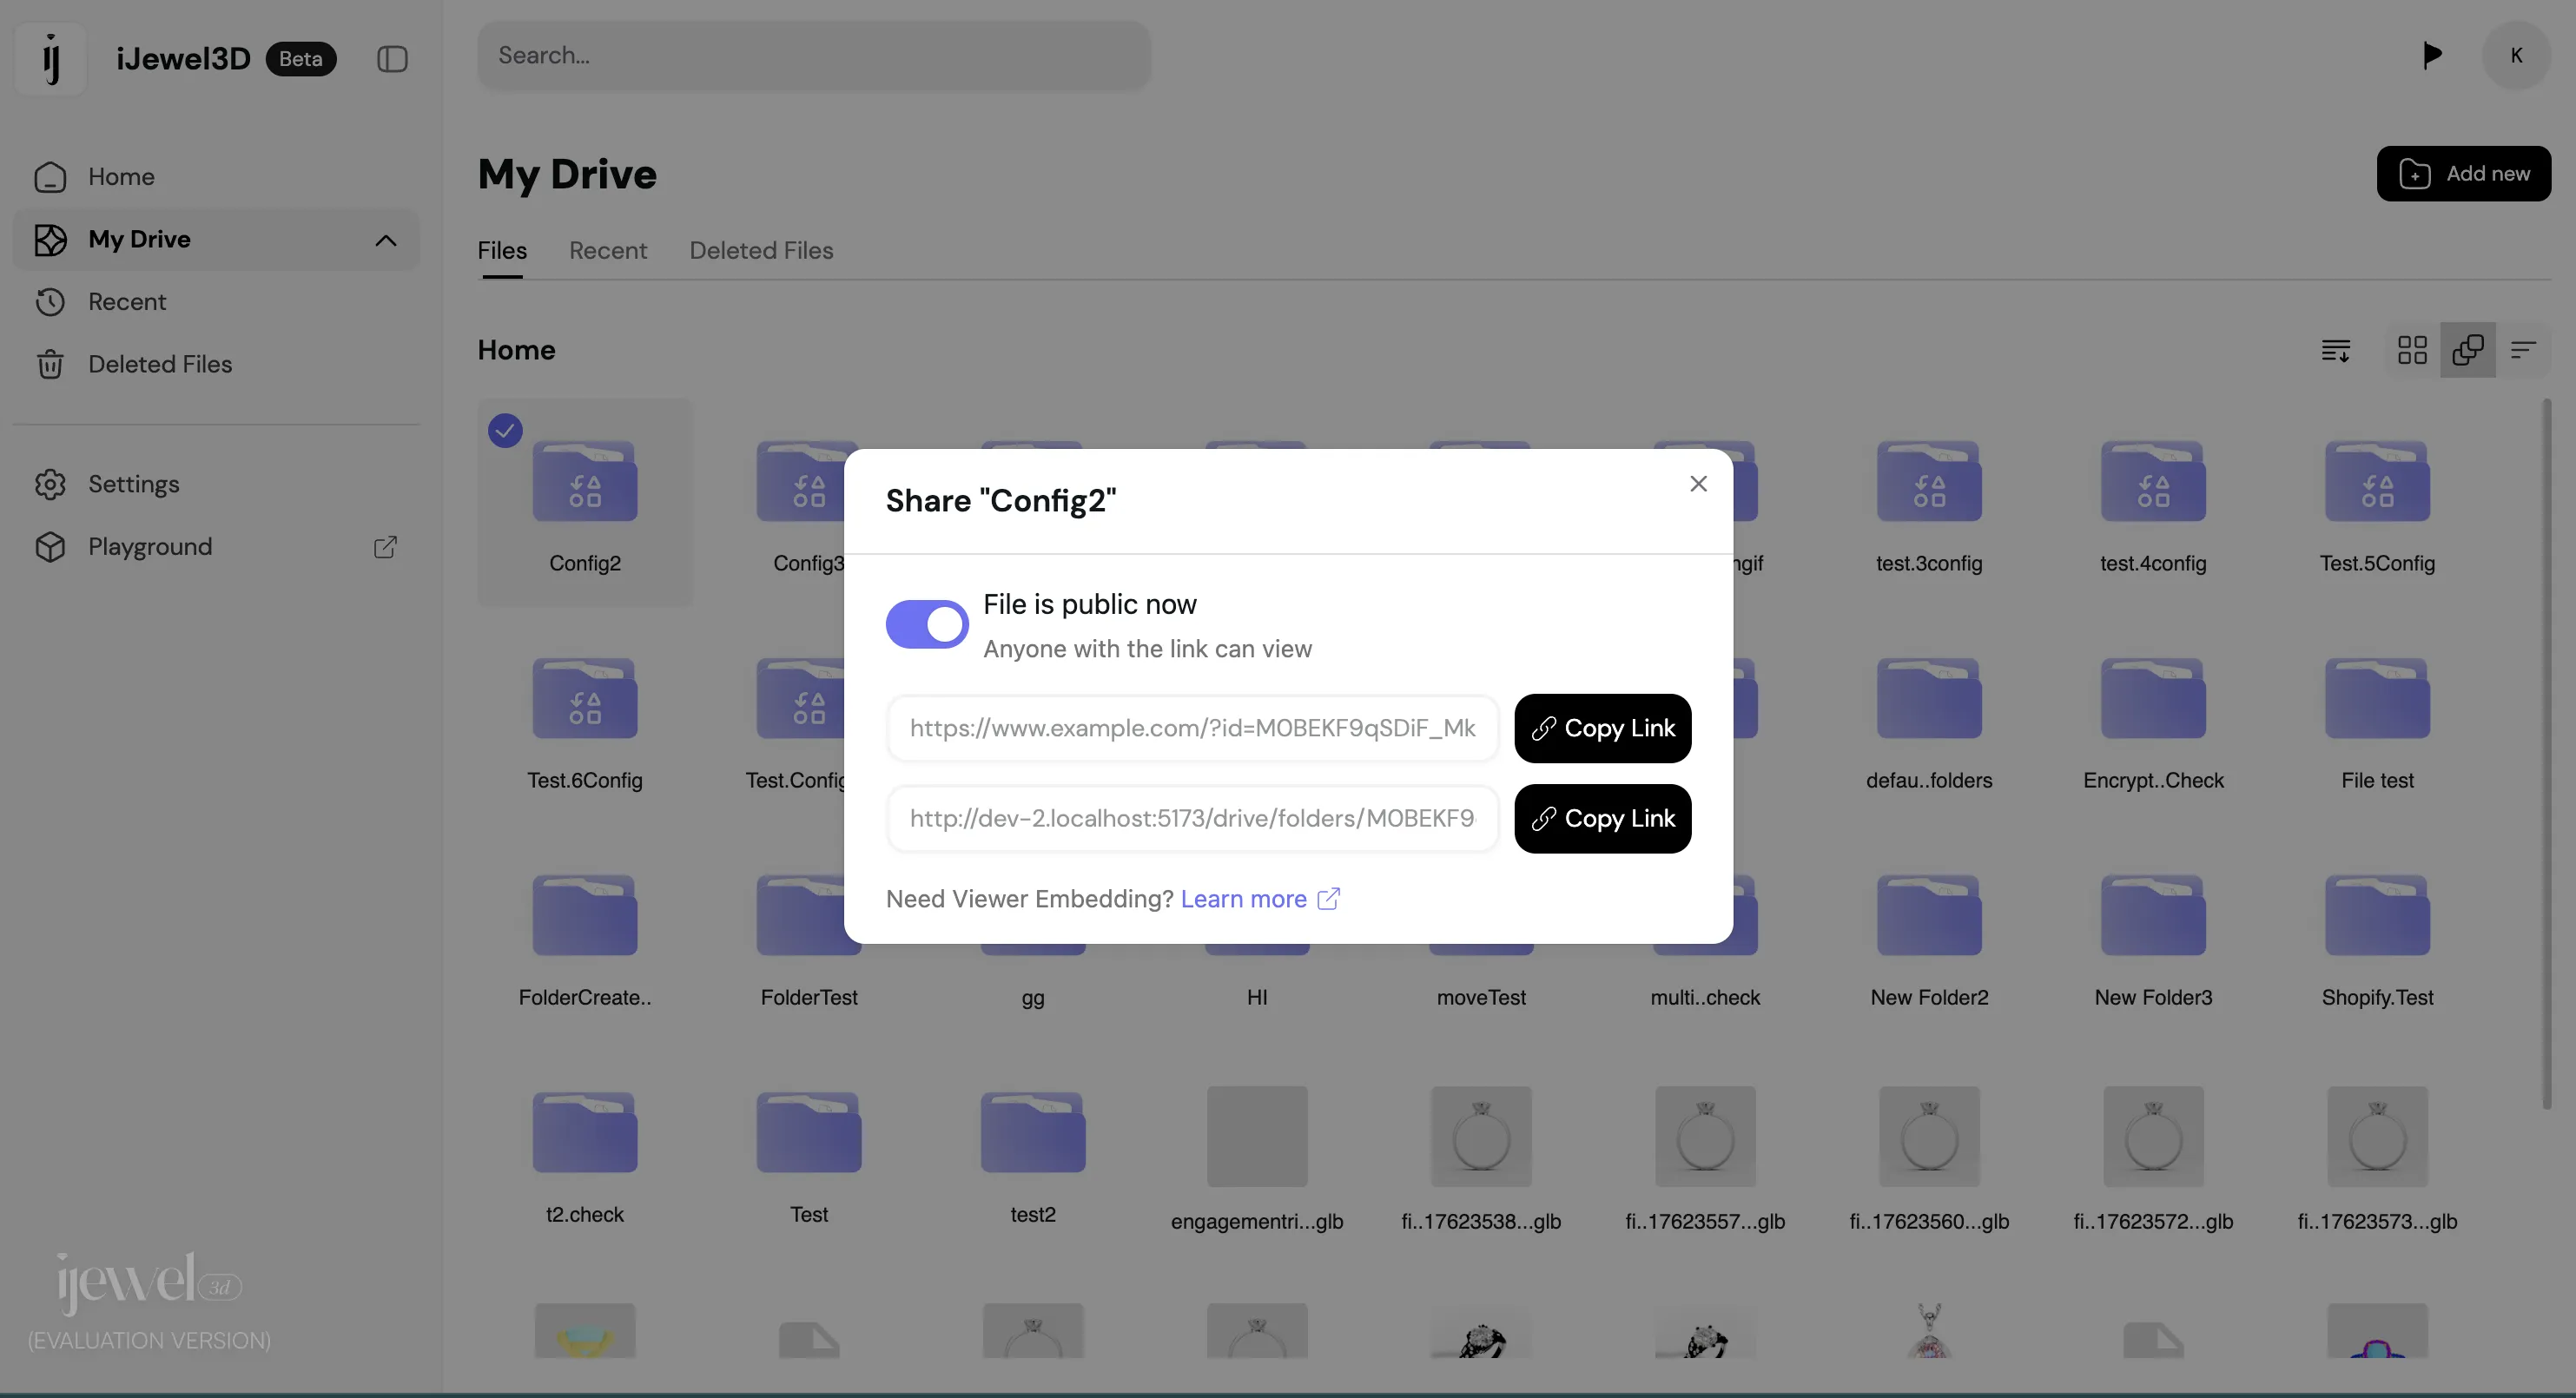
Share your configurator directly with customers using the link from the iJewel3D platform. This requires no coding.
Just right click on Ring configurator. Click on share. Copy the link and share it with your customers.
Option 3: Custom Page with a Drive Project
Host the page and custom controls yourself while Mini Viewer loads the public Ring Configurator project from iJewel3D Drive.
Prerequisites
- Your File ID from the iJewel3D platform
- Your Instance Name (provided by iJewel, e.g.,
dev-2)
Required Scripts
The mini-viewer needs webgi to run. Load webgi first, then the mini-viewer nowebgi build (the nowebgi bundle does not include webgi, so it must be provided separately):
<script src="https://releases.ijewel3d.com/libs/webgi-v0/bundle-0.22.0.js"></script>
<script src="https://releases.ijewel3d.com/libs/mini-viewer/0.6.18/bundle.nowebgi.iife.js"></script>
Multiple anchors per shank
Support for multiple anchors on a single shank (each component snapping to its own placeholder:<name> mesh) requires mini-viewer 0.6.10 or later. Use the latest version shown above to get it. See Prepare Ring Components for how to author the anchors.
Basic Setup
Create an index.html file with this minimal structure:
<!DOCTYPE html>
<html lang="en">
<head>
    <meta charset="UTF-8">
    <title>Ring Configurator</title>
    <style>
        body { font-family: sans-serif; display: flex; height: 100vh; margin: 0; }
        #viewer { flex: 2; }
        #controls { flex: 1; padding: 20px; overflow-y: auto; }
        .group { margin-bottom: 20px; border-bottom: 1px solid #ccc; padding-bottom: 10px; }
        button { margin: 5px; padding: 8px; cursor: pointer; }
        button.active { background: #000; color: #fff; }
    </style>
</head>
<body>
    <div id="viewer"></div>
    <div id="controls"><h2>Controls</h2></div>

    <!-- Load webgi first, then the mini-viewer (nowebgi build) -->
    <script src="https://releases.ijewel3d.com/libs/webgi-v0/bundle-0.22.0.js"></script>
    <script src="https://releases.ijewel3d.com/libs/mini-viewer/0.6.18/bundle.nowebgi.iife.js"></script>

    <script>
        // ============ CONFIGURATION ============
        const CONFIG = {
            fileId: 'YOUR_FILE_ID',      // Replace with your File ID
            instance: 'YOUR_INSTANCE'     // Replace with your instance name
        };

        let viewer, ringConfigurator, materialPlugin;
        const ui = document.getElementById('controls');

        // Register listeners before loading so no startup event is missed.
        window.addEventListener('ijewel-viewer-ready', ({ detail }) => {
            viewer = detail.viewer;
            ringConfigurator = viewer.getPluginByType('RingConfigurator');
            materialPlugin = viewer.getPluginByType('MaterialConfiguratorPlugin');

            // Re-render UI when components or materials change
            if (ringConfigurator) ringConfigurator.addEventListener('componentProcessed', renderUI);
            if (materialPlugin) materialPlugin.addEventListener('refreshUi', renderUI);

            renderUI();
        }, { once: true });

        async function start() {
            const miniViewer = await ijewelViewer.loadModelById(
                CONFIG.fileId,
                CONFIG.instance,
                document.getElementById('viewer'),
                {
                    showConfigurator: false,
                    showCard: false,
                    showUiButtons: true,
                    hideTryOn: false,
                }
            );

            if (!miniViewer) throw new Error('The configurator did not load.');
        }

        function renderUI() {
            ui.innerHTML = '<h2>Controls</h2>';
            renderComponents();
            renderMaterials();
        }

        // Render ring components (Heads, Shanks, etc.)
        function renderComponents() {
            if (!ringConfigurator?.components) return;

            ringConfigurator.components.forEach((component) => {
                if (!component.visible) return;

                const div = document.createElement('div');
                div.className = 'group';
                div.innerHTML = `<h3>${component.name}</h3>`;

                component.variations.forEach((variation, index) => {
                    const btn = document.createElement('button');
                    btn.textContent = variation.name || variation.title || `Variation ${index}`;

                    if (index === component.selectedIndex) btn.className = 'active';

                    btn.onclick = async () => {
                        btn.textContent = '...';
                        await component.applyVariation(variation);
                        renderUI();
                    };
                    div.appendChild(btn);
                });
                ui.appendChild(div);
            });
        }

        // Render material options (Metals, Gems, etc.)
        function renderMaterials() {
            if (!materialPlugin?.variations) return;

            materialPlugin.variations.forEach((group) => {
                if (!group.materials) return;

                const div = document.createElement('div');
                div.className = 'group';
                div.innerHTML = `<h3>${group.title}</h3>`;

                group.materials.forEach((mat, index) => {
                    const btn = document.createElement('button');
                    btn.textContent = mat.userData?.label || mat.name || mat.uuid;

                    if (group.selectedIndex === index) btn.className = 'active';

                    btn.onclick = async () => {
                        await materialPlugin.applyVariation(group, mat.uuid);
                        renderUI();
                    };
                    div.appendChild(btn);
                });
                ui.appendChild(div);
            });
        }

        start().catch((error) => {
            console.error('Configurator setup failed:', error);
        });
    </script>
</body>
</html>
Configuration Variables
| Variable | Description |
|---|---|
fileId | Your ring configurator's unique ID from the iJewel3D platform |
instance | Your client identifier provided by iJewel (e.g., drive) |
Add Try-On to the custom page
Configure Try-On on the Drive project with Open In → Editor or Open In → Playground, then save it. loadModelById receives the saved top-level tryonConfig; do not duplicate that configuration in the page. Mini Viewer 0.6.18 or later groups the visible head, shank, stones, and other components as one assembled ring for the Try-On session and restores the configurator afterward.
The example already uses showUiButtons: true and hideTryOn: false, so the button appears when the Drive project enables Try-On. See Prepare a Try-On Project for fitting instructions.
Option 4: Fully Self-Hosted Project
If your website also hosts the Ring Configurator project JSON and component assets, pass that complete project object to new ijewelViewer.Viewer(...). Add the saved tryonConfig at the top level of that project. Mini Viewer uses the configuration and prepares the customer's assembled ring when its standard Try-On button is selected.
Create the fit with Open In → Editor or Open In → Playground, then copy the saved tryonConfig through your normal project export. If the project does not pass through iJewel3D Platform, see RingTryonPlugin setup mode. For a custom Try-On button, use the public Configurator Try-On helpers after loading the saved configuration with tryon.fromJSON().
Core Concepts
The RingConfigurator Plugin
The RingConfiguratorPlugin manages ring components (heads, shanks, bands) and their variations.
// Get the plugin
const ringConfigurator = viewer.getPluginByType('RingConfigurator');

// Access components
ringConfigurator.components.forEach(component => {
    console.log(component.name);           // "Heads", "Shanks", etc.
    console.log(component.variations);     // Available variations
    console.log(component.selectedIndex);  // Currently selected index
});

// Apply a variation
await component.applyVariation(variation);
The MaterialConfigurator Plugin
The MaterialConfiguratorPlugin handles material changes (metals, gems, finishes).
// Get the plugin
const materialPlugin = viewer.getPluginByType('MaterialConfiguratorPlugin');

// Access material groups
materialPlugin.variations.forEach(group => {
    console.log(group.title);      // "Metal", "Gem", etc.
    console.log(group.materials);  // Available materials
});

// Apply a material
await materialPlugin.applyVariation(group, material.uuid);
Events
| Event | Plugin | Description |
|---|---|---|
componentProcessed | RingConfigurator | All components finished loading |
refreshUi | MaterialConfigurator | Materials updated, refresh UI |
ijewel-viewer-ready | Window | Viewer is initialized and ready |
Viewer Options
Customize the viewer by passing options to loadModelById:
ijewelViewer.loadModelById(fileId, instance, container, {
    showConfigurator: false,    // Hide default configurator UI
    showCard: false,            // Hide product card
    transparentBg: false,       // Use solid background
    showLogo: true,             // Show brand logo
    hideFullScreen: true,       // Hide fullscreen button
    hideResetView: true,        // Hide reset view button
    hideFitScene: true,         // Hide fit scene button
    hideRotateCamera: true,     // Hide camera rotation controls
    hideCameraViews: true,      // Hide camera view presets
    brandingSettings: {
        enable: true,
        showLoadingScreenLogo: true
    }
});
Advanced: Using Tags for Filtering
Variations can include tags for filtering (e.g., by shape or carat size):
function parseVariationTags(variation) {
    const tags = variation.tags || [];
    let shape = null, size = null;

    tags.forEach(tag => {
        if (tag.startsWith('shape:')) shape = tag.split(':')[1];
        if (tag.startsWith('size:')) size = tag.split(':')[1];
    });

    return { shape, size };
}

// Usage: Group heads by diamond shape
const groups = {};
component.variations.forEach(variation => {
    const { shape } = parseVariationTags(variation);
    if (shape) {
        if (!groups[shape]) groups[shape] = [];
        groups[shape].push(variation);
    }
});
Ready-Made Templates
All templates are open-source and available on GitHub: iJewelTemplates/ringconfigurator
We provide pre-built templates that you can use instantly — just pass your fileId and instanceName as query parameters in the URL. No coding required to get started!
How It Works
Append your credentials to any template URL like this:
https://ijewel3d.github.io/iJewelTemplates/ringconfigurator/simple/ring-configurator.html?fileId=YOUR_FILE_ID&instanceName=YOUR_INSTANCE_NAMEReplace YOUR_FILE_ID and YOUR_INSTANCE_NAME with the values from your iJewel3D platform.
Available Templates
Simple Ring Configurator
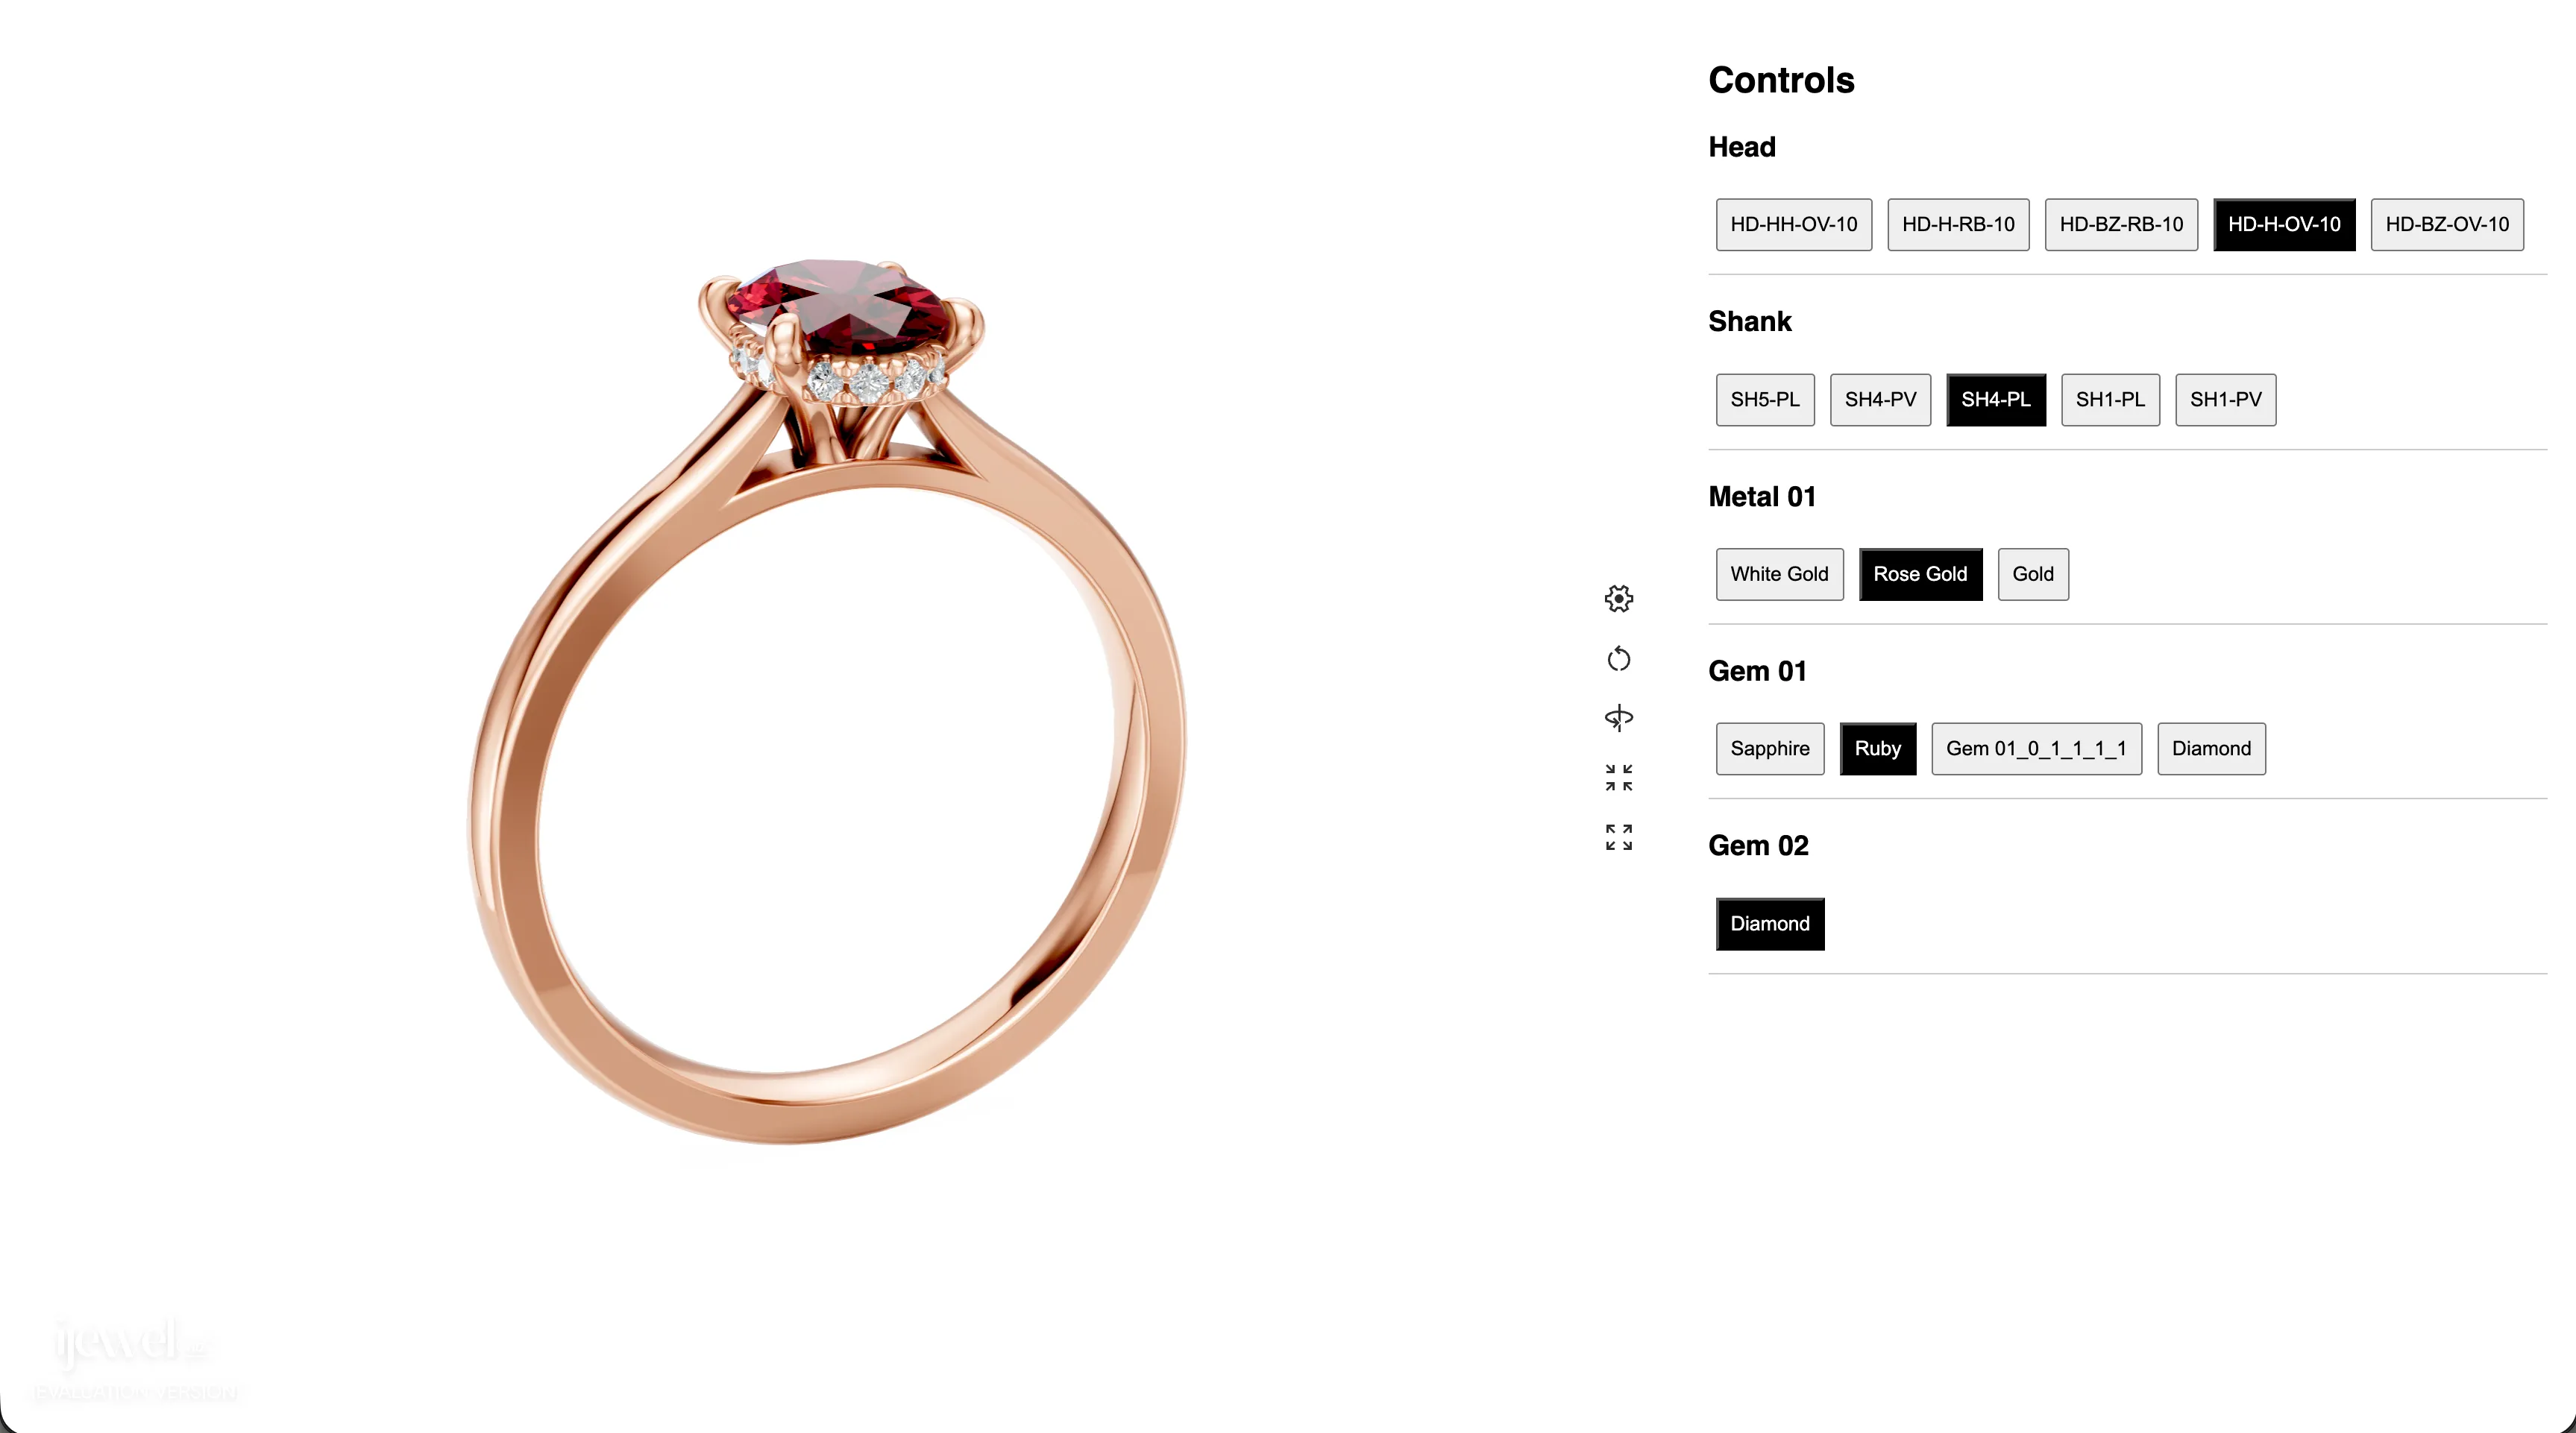
A minimal, clean configurator with basic component and material controls.
Configurator with Size & Shape
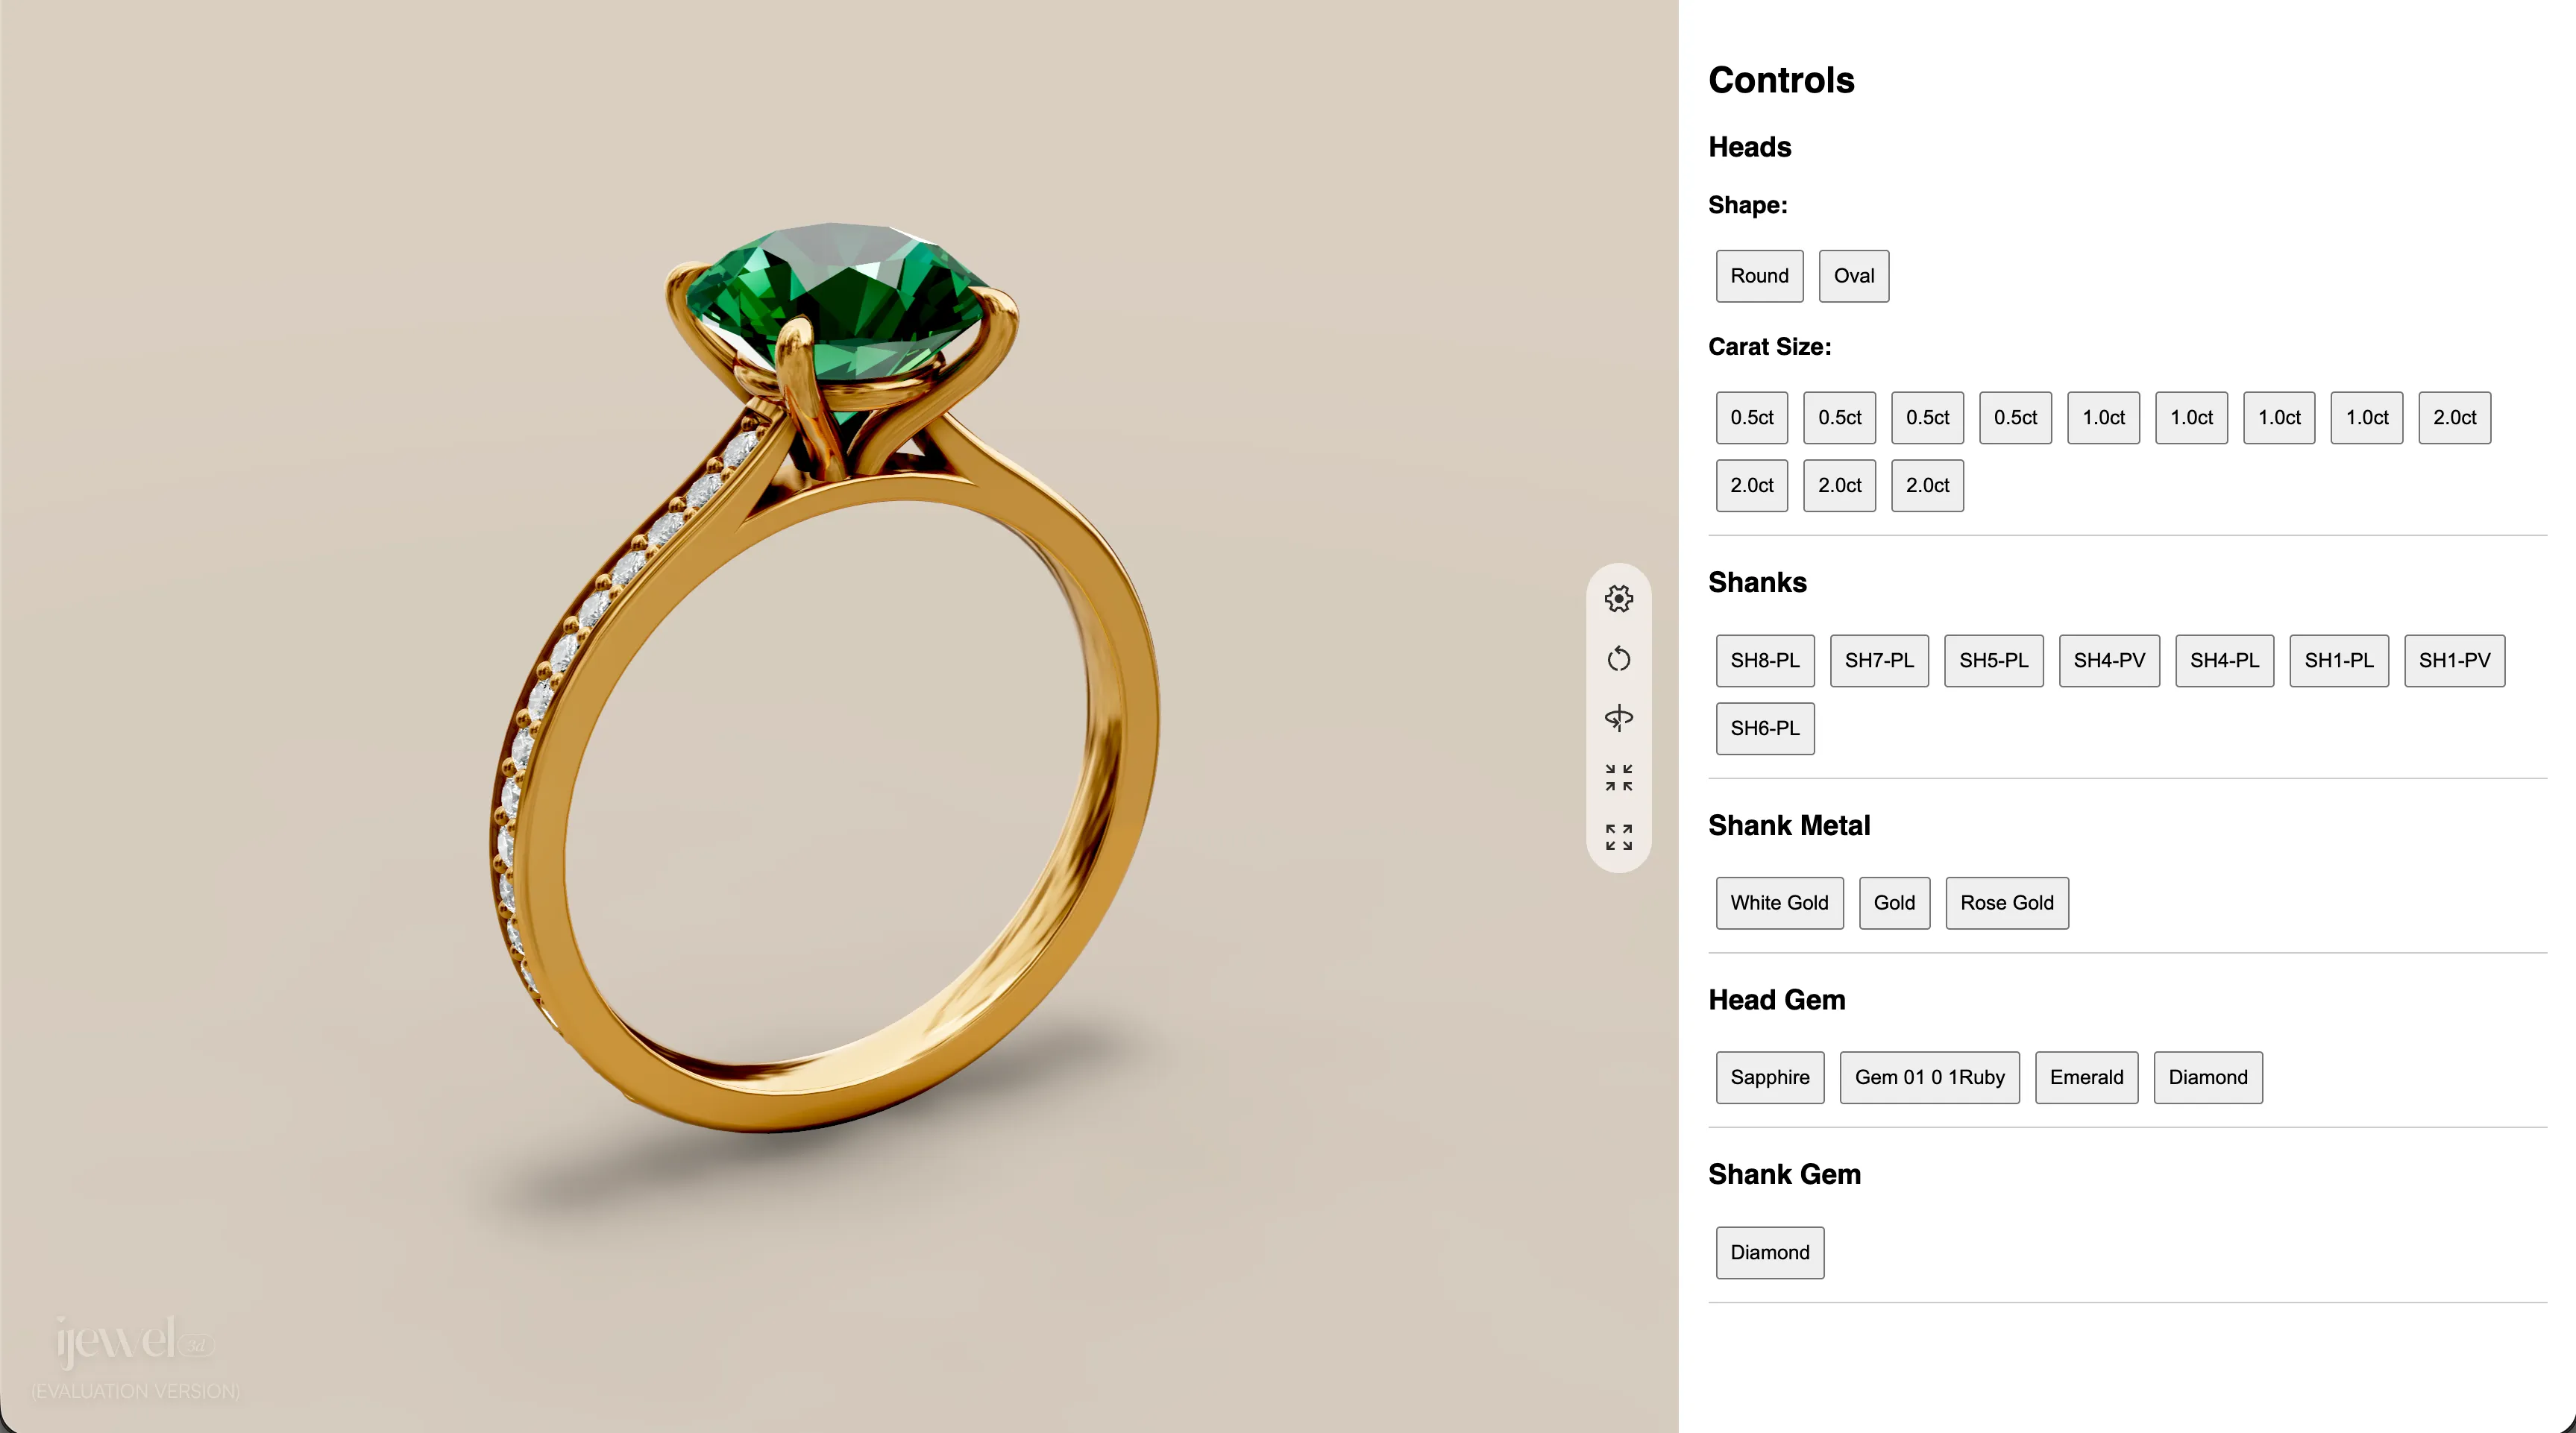
Adds size and shape filtering using tag-based grouping.
Advanced Template
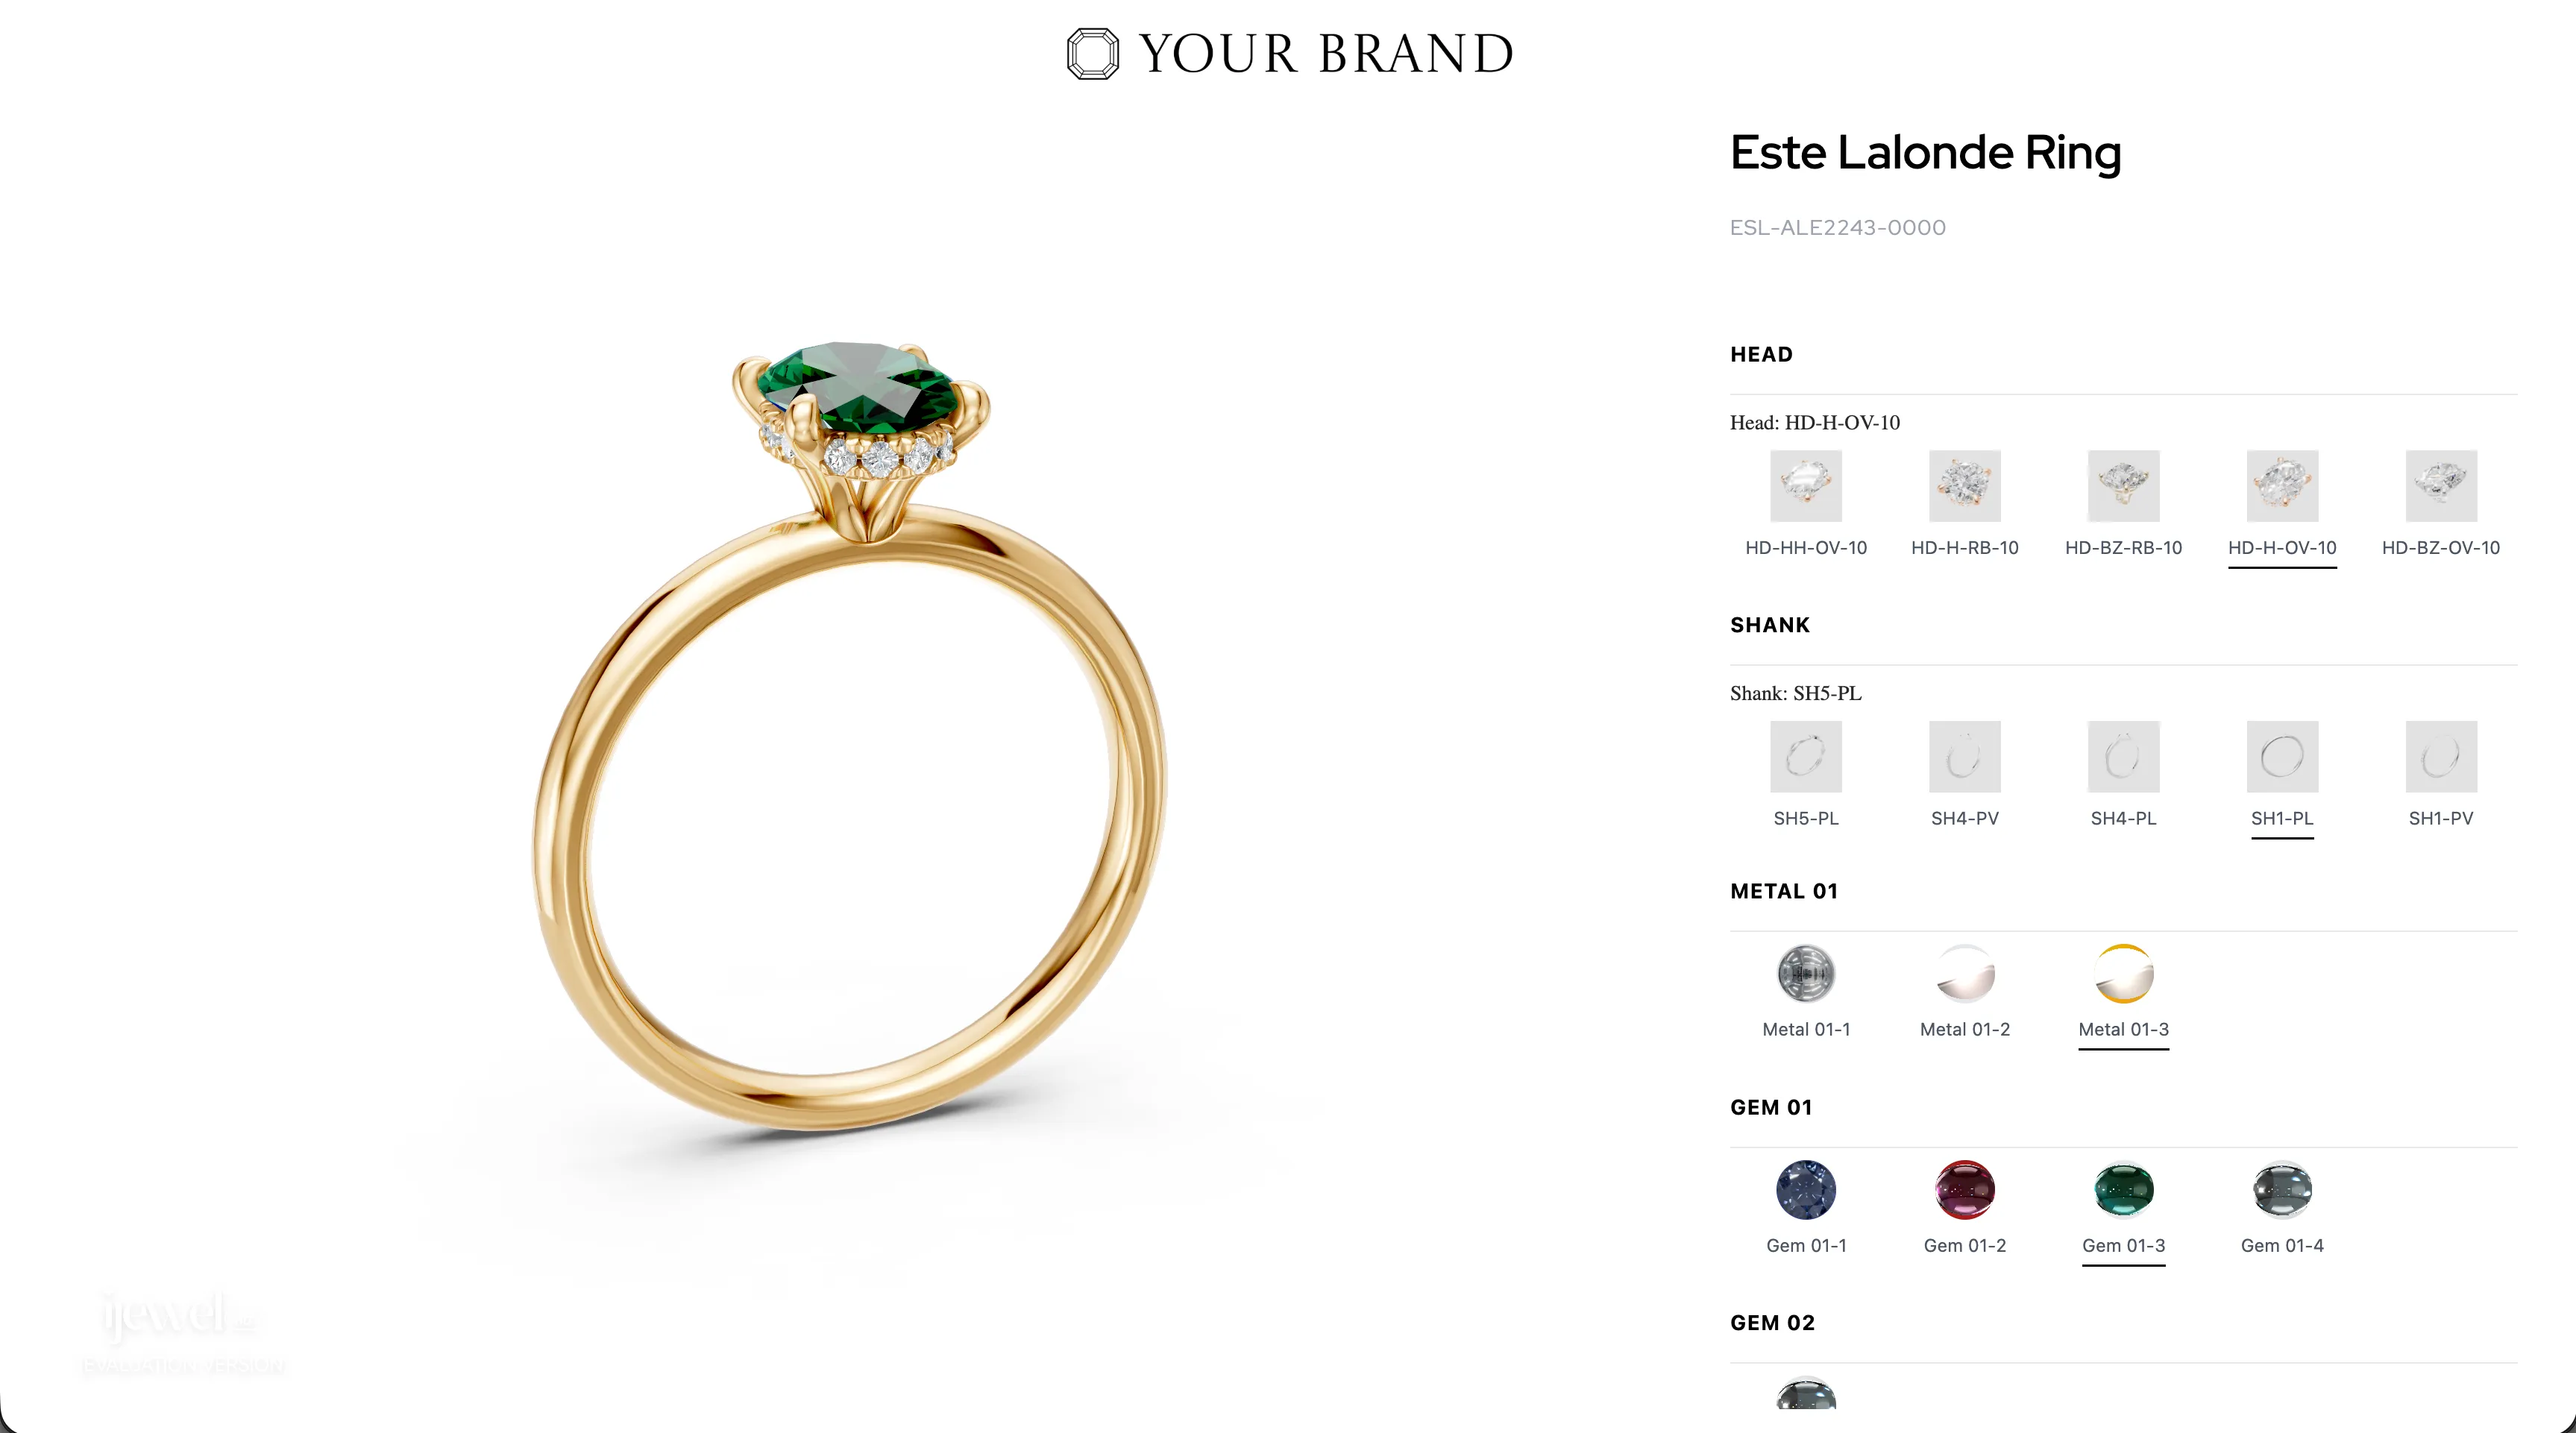
A feature-rich configurator with a polished UI and advanced controls.
Advanced Template v2
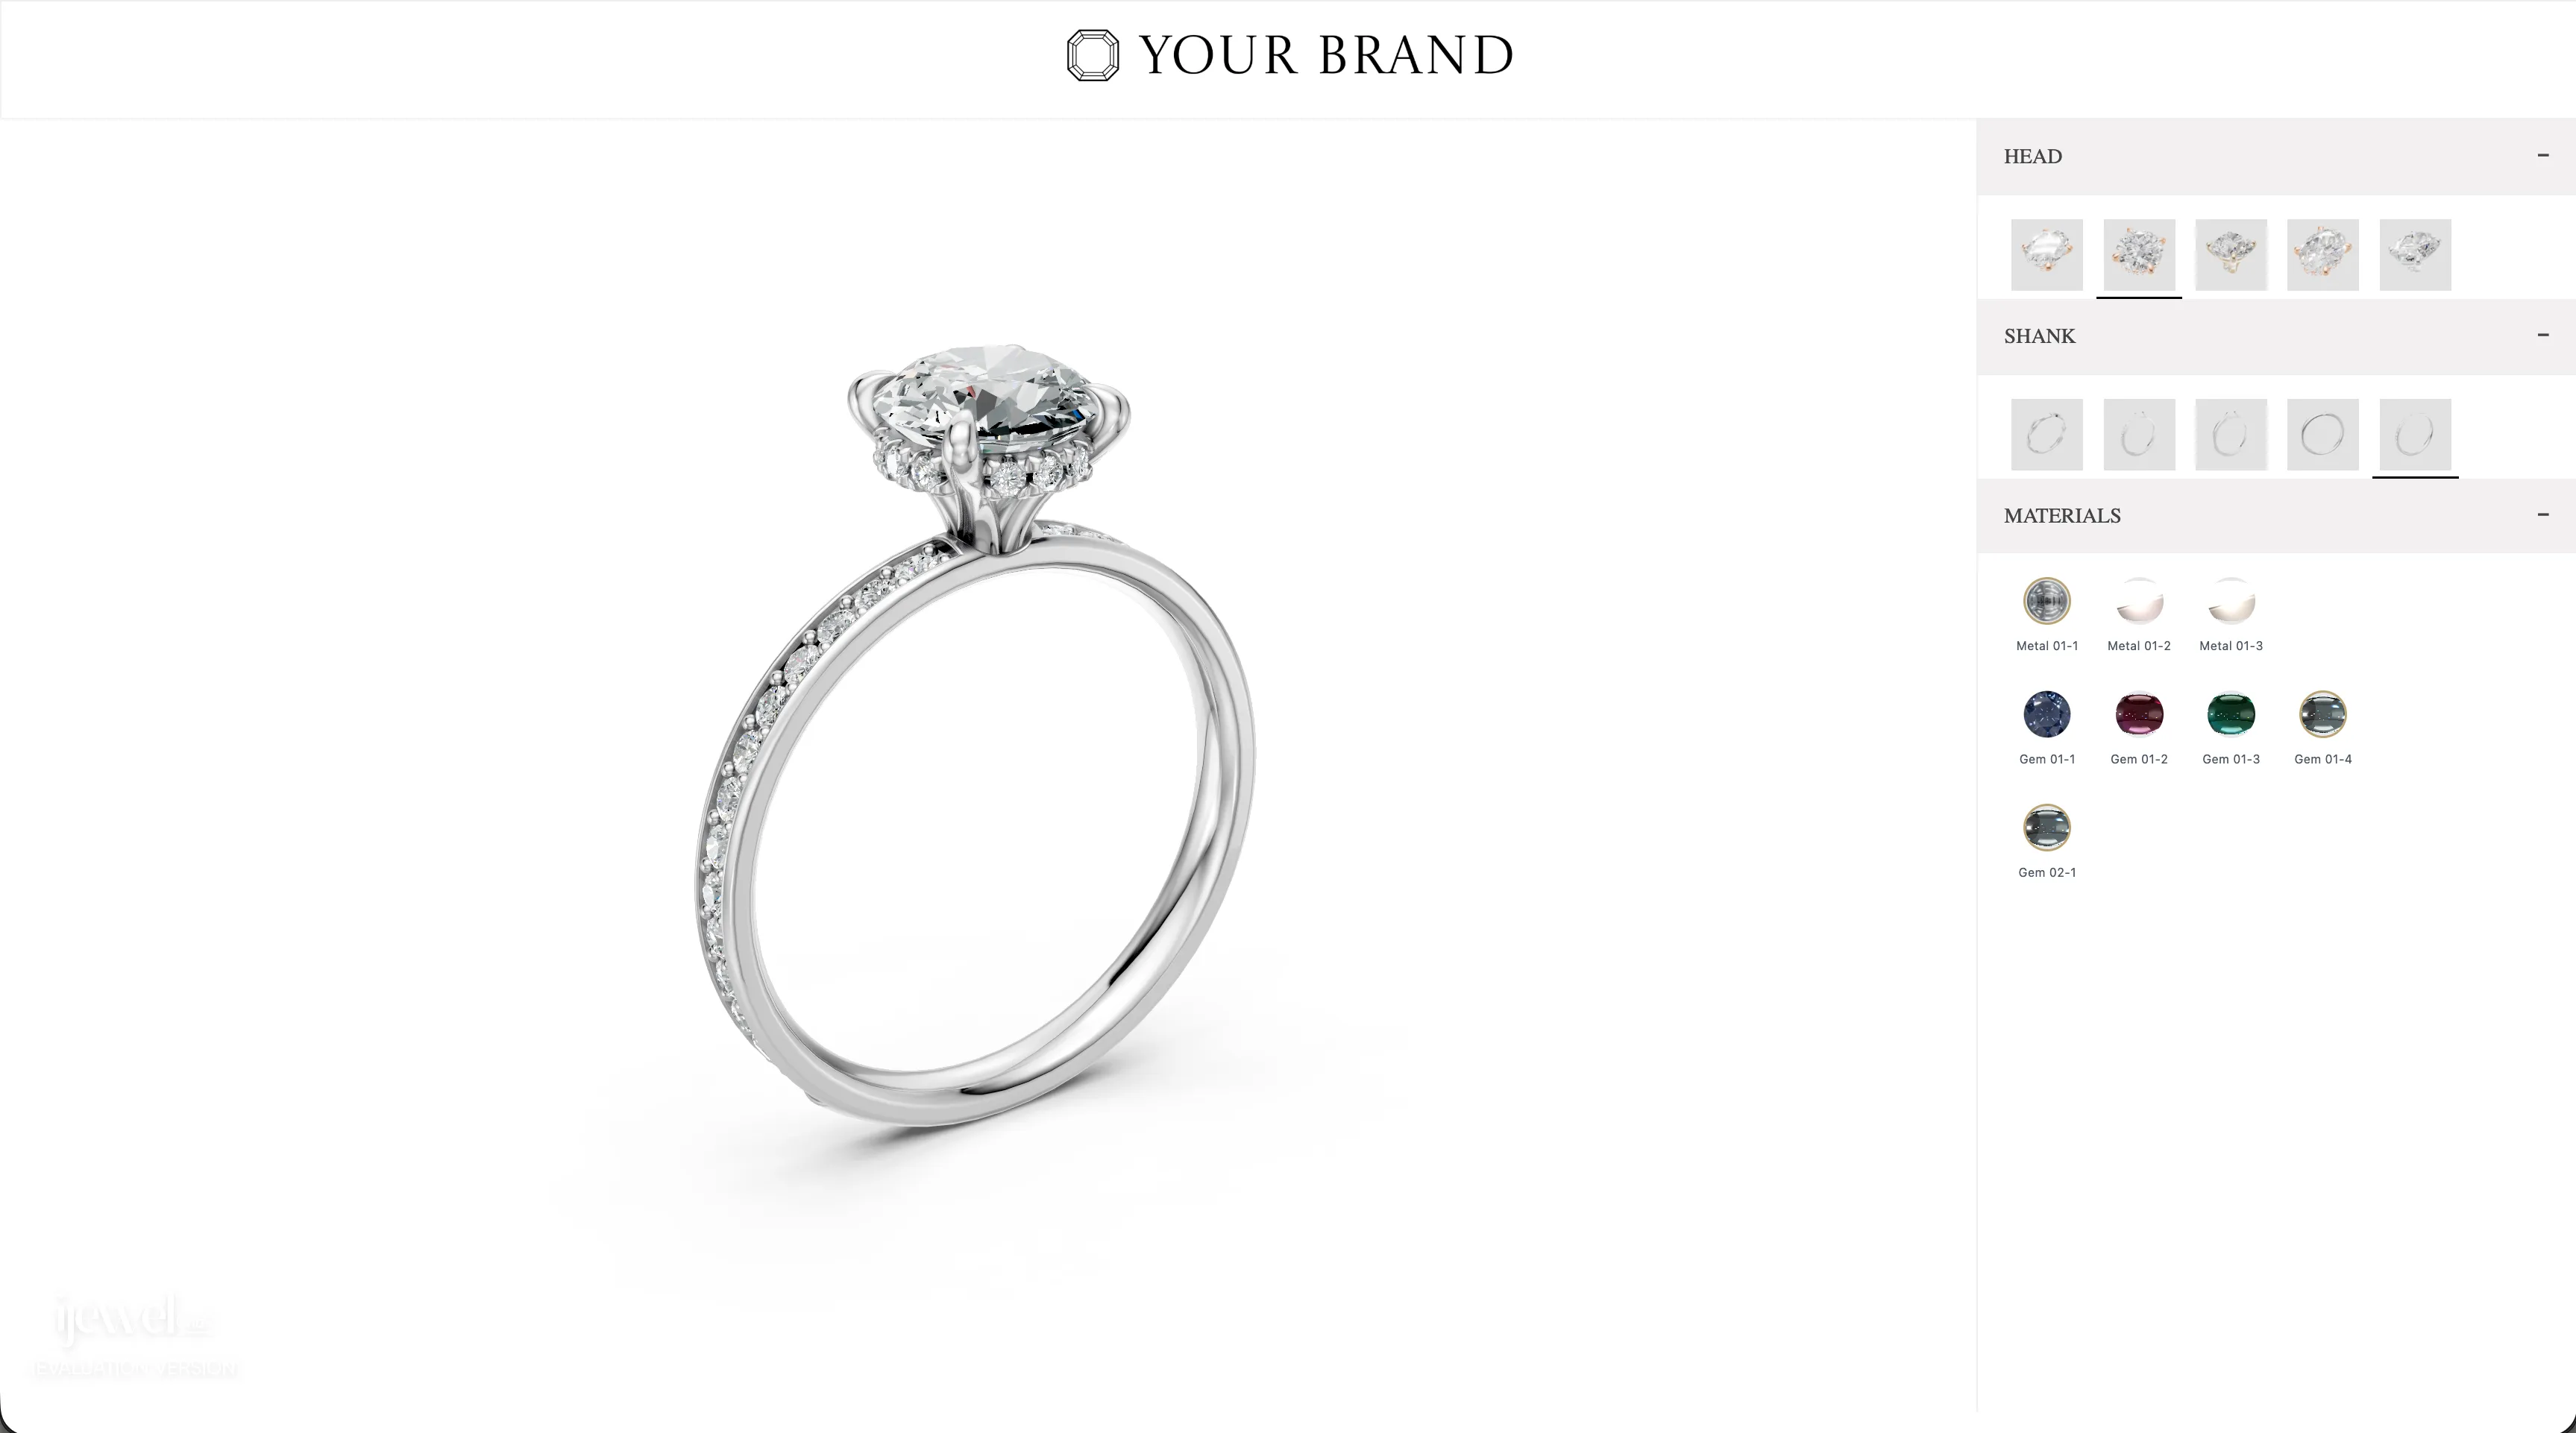
The latest version of the advanced template with an updated design and improved UX.
Quick Start
Pick any template above, append ?fileId=YOUR_FILE_ID&instanceName=YOUR_INSTANCE_NAME to the URL, and open it in your browser to instantly preview your ring configurator with your own 3D models.
Example
If your File ID is abc123 and your instance name is drive, open:
https://ijewel3d.github.io/iJewelTemplates/ringconfigurator/advanced/template-v2.html?fileId=abc123&instanceName=driveThis will load the Advanced Template v2 with your ring configurator data rendered in real-time.
Next Steps
- Review the full RingConfigurator Plugin API
- Learn about embedding configurators
Contact
For questions or assistance, email us at contact@ijewel3d.com