
Script Tag (Direct Integration)
Two maintained direct-integration examples are available:
| Starting point | Live page | Source code |
|---|---|---|
| Complete project with the built-in Wedding Band UI | Open live | View source |
Published Drive file loaded with loadModelById | Open live | View source |
Add the Wedding Band Builder directly to your website with a single script tag. You get full JavaScript access to the viewer and API on the same page, with no iframes or message passing needed.
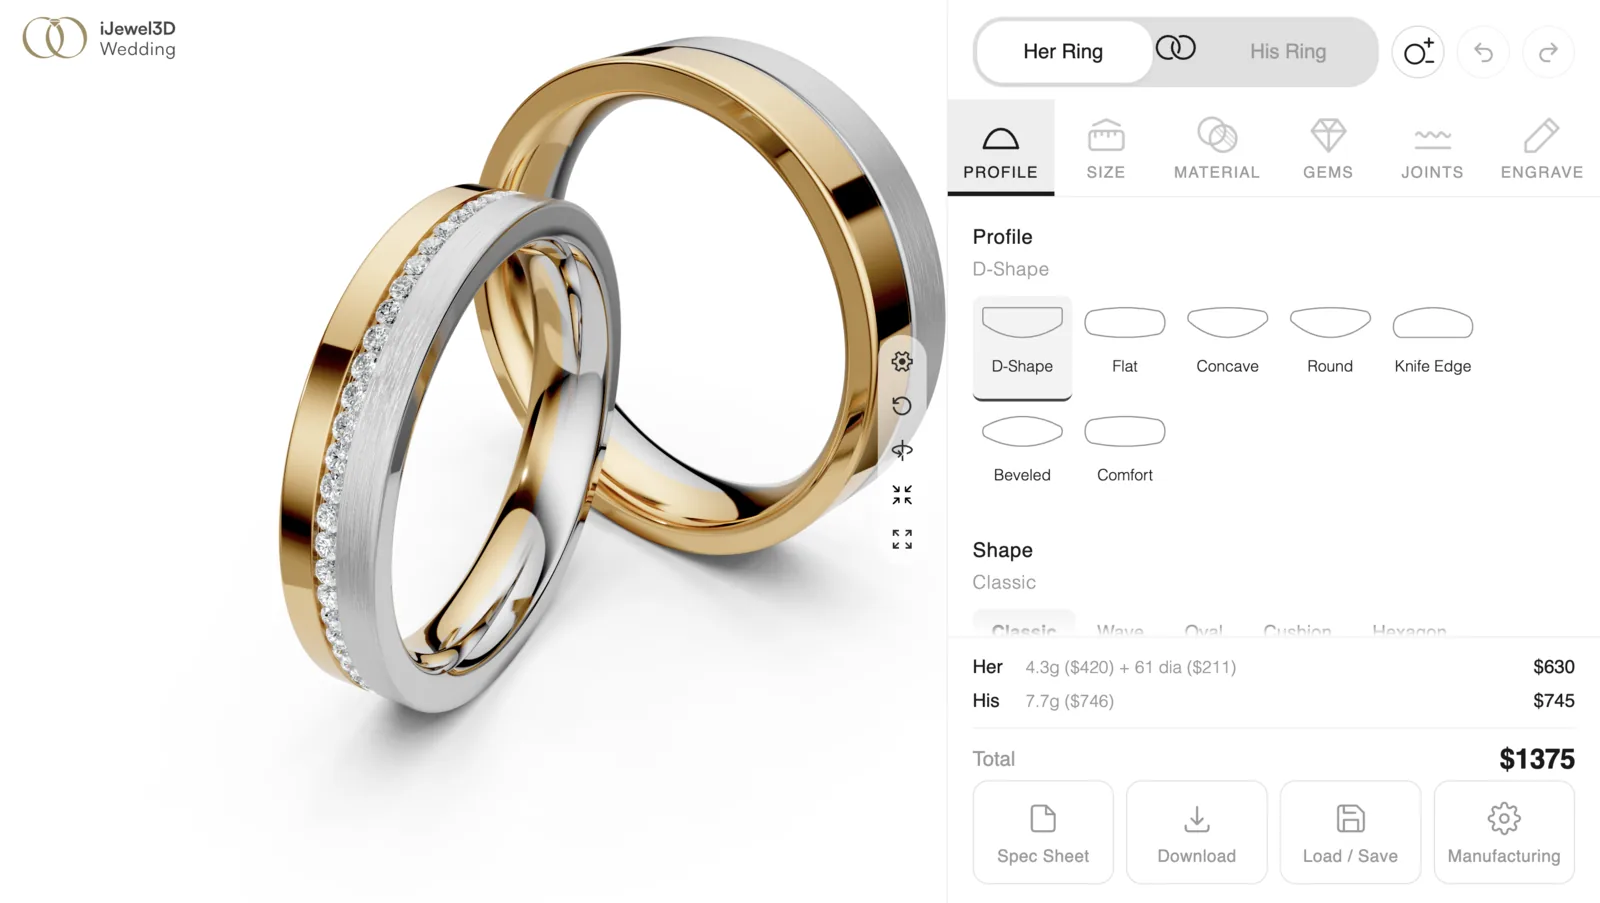
What a direct integration renders: the 3D viewer and the built-in configuration panel, on your own page.
When to Use This
- You own the page and can add
<script>tags - You want direct JavaScript access to the API (no postMessage overhead)
- You want the built-in UI panel, or plan to build a custom one
Make Your Configurator Public
This step assumes the Wedding Band project already exists. If it does not, build and publish it first with Create a Project.
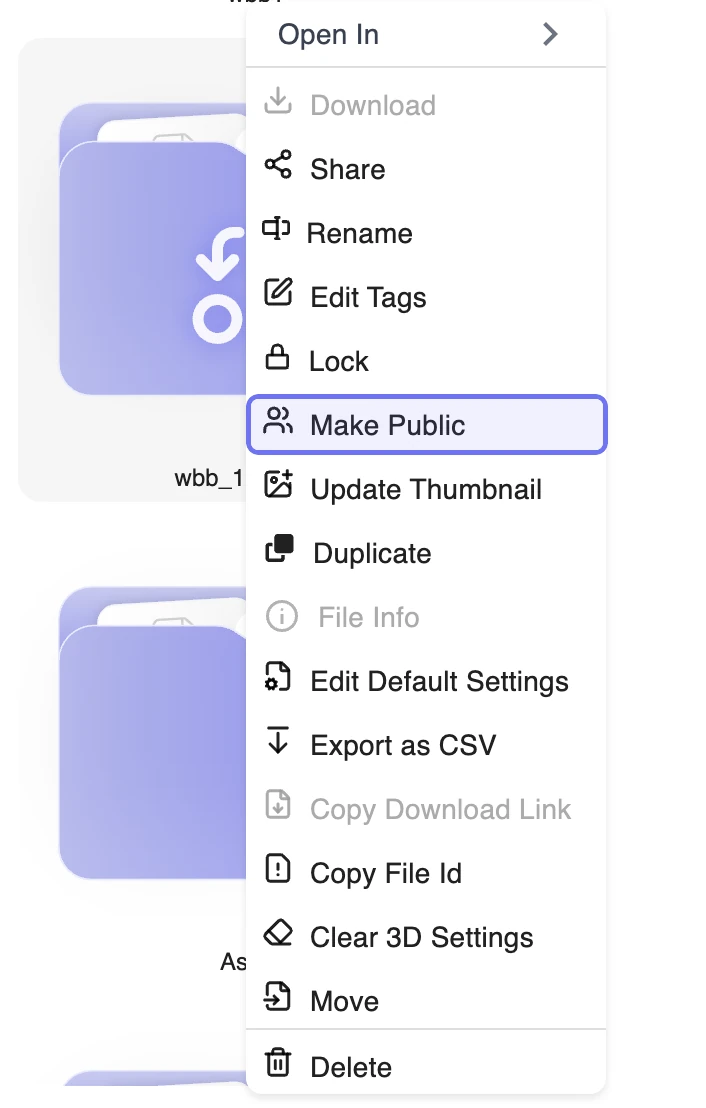
Before embedding, make your configurator accessible:
- Open iJewel3D Dashboard
- Right-click your Wedding Band Configurator file
- Select Make Public
Quick Start
1. Add the script and create a container:
<script src="https://releases.ijewel3d.com/libs/webgi-v0/bundle-0.22.0.js"></script>
<script src="https://releases.ijewel3d.com/libs/mini-viewer/0.6.18/bundle.nowebgi.iife.js"></script>
<div id="viewer-root" style="width: 100%; height: 600px;"></div>
2. Initialize the viewer:
<script>
  new ijewelViewer.Viewer(document.getElementById('viewer-root'), {
    name: 'Wedding Band Builder',
    version: 'v5',
    basePath: 'https://your-cdn.com/wbb-assets/',
    plugins: {
      WeddingBandBuilder: {
        manifestUrl: 'wedding-band-project.json',
      },
    },
  }, {
    showCard: false,
    showSwitchNode: false,
    showUiButtons: true,
    showConfigurator: false,
    showZoomButtons: true,
    enableZoom: true,
    hideWbbUi: false,
  });
</script>
3. Access the API:
window.addEventListener('ijewel-viewer-ready', async (e) => {
  const viewer = e.detail.viewer;
  const api = viewer.getPluginByType('WeddingBandBuilder').controller;

  // Change ring properties
  api.setWidthMultiplier(1.1);
  await api.setMaterialRef(1, {
    base: 'yellow', variant: '18k', finish: 'polished',
  });

  // Listen for price changes
  api.events.on('price:updated', (data) => {
    document.getElementById('price').textContent = `$${data.pricing.totalUsd.toFixed(2)}`;
  });
});
See the documented complete example, or start from either maintained live template above.
Headless Mode (Custom UI)
Set hideWbbUi: true in the viewer options to hide the built-in panel and build your own controls:
{
  showCard: false,
  showConfigurator: false,
  hideWbbUi: true,
}
The 3D viewer renders full width with no overlaid UI. You control everything through the API by populating dropdowns from catalog methods, wiring controls to setters, and listening for events.
See Custom UI (Headless) for a full guide on building custom controls.
Theming
Customize the built-in panel's appearance to match your brand:
api.setTheme('luxury-gold');

// Or with custom colors and fonts
api.setTheme({
  preset: 'modern-minimal',
  colors: { primary: '#2E5B3C', background: '#F5F7F5' },
  fonts: {
    body: "'Cormorant Garamond', serif",
    googleFonts: ['Cormorant+Garamond:wght@400;500;600'],
  },
});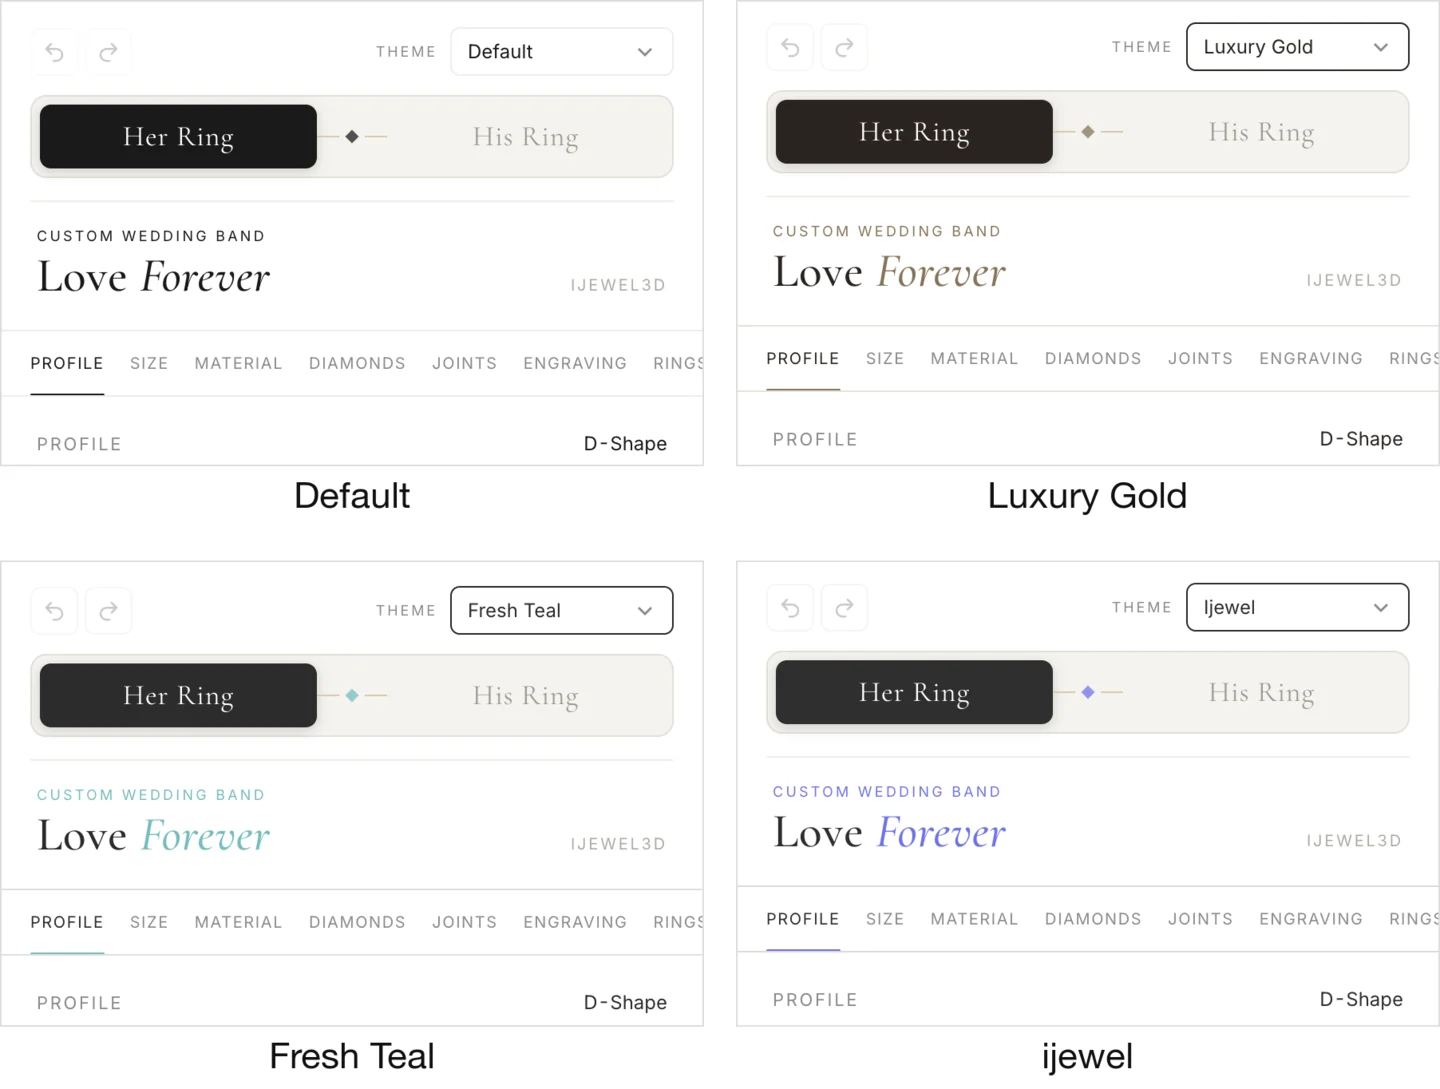
Available presets: default, luxury-gold, modern-minimal, dark, rose-elegant, coral-modern, fresh-teal, minimal-blue, warm-beige, classic-gold, ijewel. See Theming & Branding for full customization options.
Framework Examples
| Framework | What You Get | Example |
|---|---|---|
| Vanilla JS | Plain HTML/JS, no build step | View example |
| React | Component + hooks, headless variant | View example |
| Vue 3 | Composable + SFC, headless variant | View example |
| Next.js | Client component, App Router + Pages Router | View example |
| Angular | Service + Component, RxJS observables | View example |
| Svelte | Component with slots, headless variant | View example |
Error Handling
api.events.on('error', (err) => {
  console.error(`[${err.source}] ${err.message}`);
});
Multiple Viewers
You can have multiple viewers on one page. Each gets its own API instance:
const viewer1 = new ijewelViewer.Viewer(root1, project1, options);
const viewer2 = new ijewelViewer.Viewer(root2, project2, options);
Configuration Reference
Project Options
| Property | Type | Description |
|---|---|---|
name | string | Display name shown in the loading screen |
version | string | Project version (use 'v5') |
basePath | string | Base URL for resolving asset paths in the manifest |
plugins.WeddingBandBuilder.manifestUrl | string | URL to the manifest JSON file (relative to basePath) |
Viewer Options
| Property | Type | Default | Description |
|---|---|---|---|
showCard | boolean | false | Show the product info card |
showSwitchNode | boolean | false | Show the model switcher |
showUiButtons | boolean | true | Show viewer control buttons (quality, reset view, etc.) |
showConfigurator | boolean | false | Show the generic configurator panel (not needed since WBB has its own) |
showZoomButtons | boolean | true | Show +/- zoom controls |
enableZoom | boolean | true | Allow scroll/pinch zoom |
hideWbbUi | boolean | true | Hide the built-in Wedding Band panel; set to false to show it |
Container Sizing & Mobile Layout
Container Sizing
The viewer fills its container. Make sure the container has explicit dimensions:
/* Full viewport */
#viewer-root { width: 100vw; height: 100vh; }

/* Fixed size */
#viewer-root { width: 800px; height: 600px; }

/* Responsive (4:3 aspect ratio) */
#viewer-root { width: 100%; height: 0; padding-bottom: 75%; position: relative; }
DANGER
The viewer fills its container. If the container has zero height, nothing renders. Always set height explicitly:
<div id="viewer" style="width: 100%; height: 600px;"></div>This is the most common cause of a blank viewer.
Mobile Responsiveness
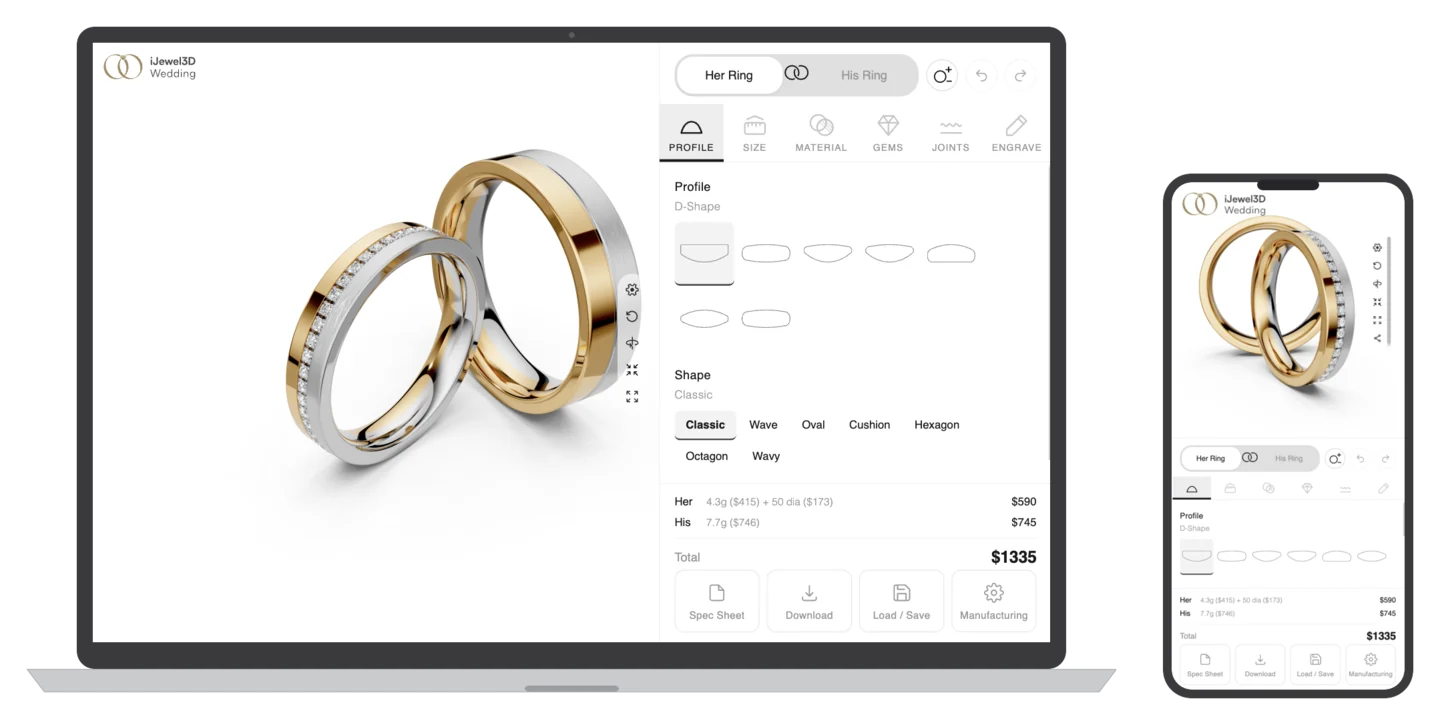
The built-in panel automatically switches to a stacked layout on screens narrower than 768px. The 3D viewer sits on top and the configuration panel goes below, each taking 50% of the viewport height. Tab labels collapse to icons only.
URL Parameters
The viewer page accepts these query parameters:
| Parameter | Default | Description |
|---|---|---|
manifest | wedding-band-project.json | URL to the manifest JSON file |
basePath | (viewer page directory) | Base URL for resolving asset paths |
ui | true | Set to false for headless mode |
Next Steps
- Custom UI (Headless) to build a fully custom UI
- Theming & Branding to customize the look and feel
- API Reference for complete method documentation
- Pricing Engine to configure the pricing engine