Scene Hierarchy
The Scene Hierarchy gives you a complete overview of every 3D object in your scene. It displays the parent-child structure of your model, lets you select individual objects by name, and allows you to hide or show any object — which is especially useful when working with complex jewelry assemblies.
Where to Find It
The Hierarchy is located on the right panel, inside the ![]() Picking tab. It is the first section you see when you open this tab.
Picking tab. It is the first section you see when you open this tab.
Click on the Hierarchy section header to expand the full tree view of your scene.
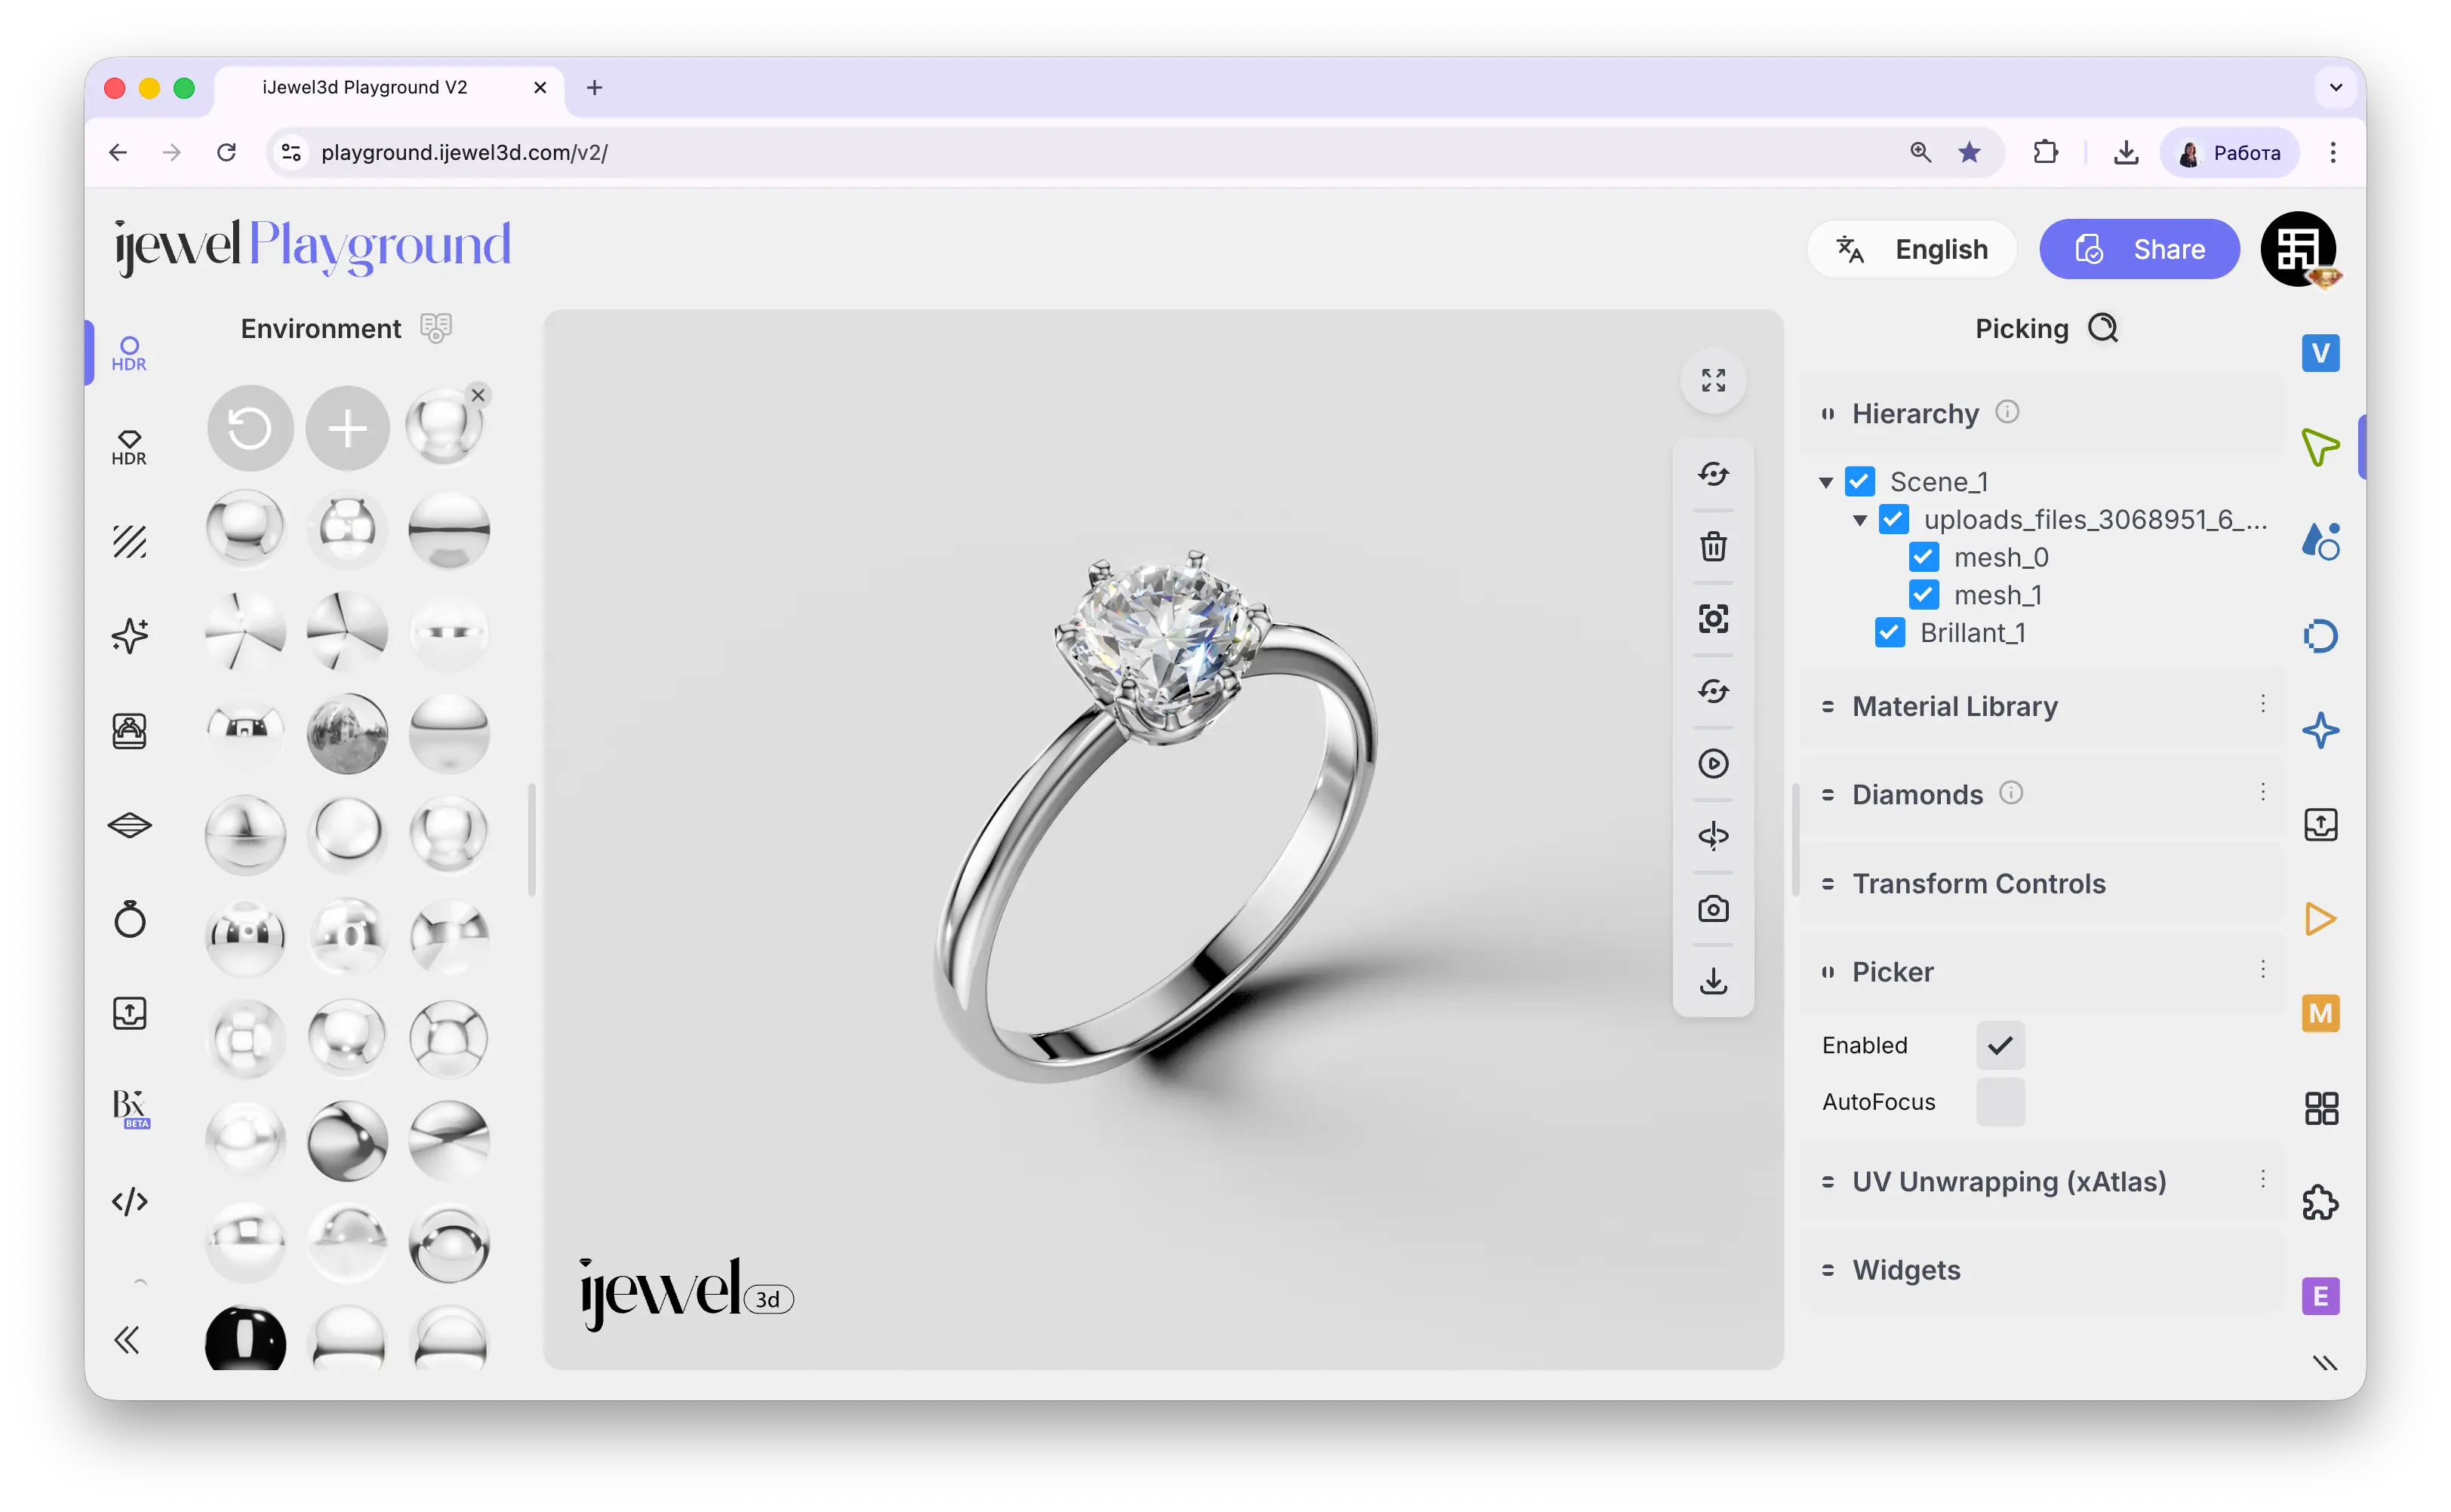
Selecting Objects
Clicking on an object name in the hierarchy selects that object in the scene. The selected object will be highlighted in the 3D viewport, and its properties will become available for editing.
This is particularly useful when:
- An object is hard to click in the viewport because it's small or hidden behind other objects
- You need to select a parent group rather than an individual mesh
- You want to quickly navigate between different parts of a complex model
TIP
You can also select objects by clicking directly on them in the 3D viewport. See Selecting Objects for more details.
Hiding and Showing Objects
Each object in the hierarchy has a checkbox next to its name. Toggling this checkbox controls the object's visibility:
- Checked — the object is visible in the scene
- Unchecked — the object is hidden from the scene
Practical Use Cases
Exporting Without Certain Objects
Hiding objects in the hierarchy directly affects what gets included when you export your model. Combined with the Only Visible export option, you can:
- Hide the objects you don't want to export (e.g., hide all stones, keep only the band)
- Go to export and enable Only Visible
- The exported
.glbfile will only contain the visible objects
This is a powerful way to split a complex scene into separate files or to create variations of the same model without duplicating the original.
TIP
Use Only Visible together with Hierarchy to control exactly which parts end up in the exported file. See Export Models — Splitting Scenes for more details.
Working with Transform Controls
After selecting an object through the hierarchy, you can use Transform Controls to move, rotate, or scale it directly in the viewport. This is especially useful for repositioning individual stones or adjusting specific parts of an assembly.
Debugging Material Assignments
Selecting an object in the hierarchy helps you see exactly which material is applied to it. This is useful when you need to change materials on a specific part of the model — for example, applying a different metal only to the prongs while keeping the band unchanged. You can also import custom materials (.pmat and .dmat files) and apply them to selected objects by drag & drop.
Related Pages
- UI Overview — Full interface layout including the right panel
- Selecting Objects — Different ways to select objects in the viewport
- Export Models — Export your scene as
.glb, including visibility-based filtering - Transform Controls — Move, rotate, and scale objects in the scene
- Import Models — How to bring 3D models into Playground