UI Overview
The iJewel Playground interface is designed to give you both speed and control while working with your 3D models. Whether you're a beginner or a professional 3D artist, this page will help you understand where everything is and how the interface is organized.
Interface Layout
The Playground is divided into three main areas:
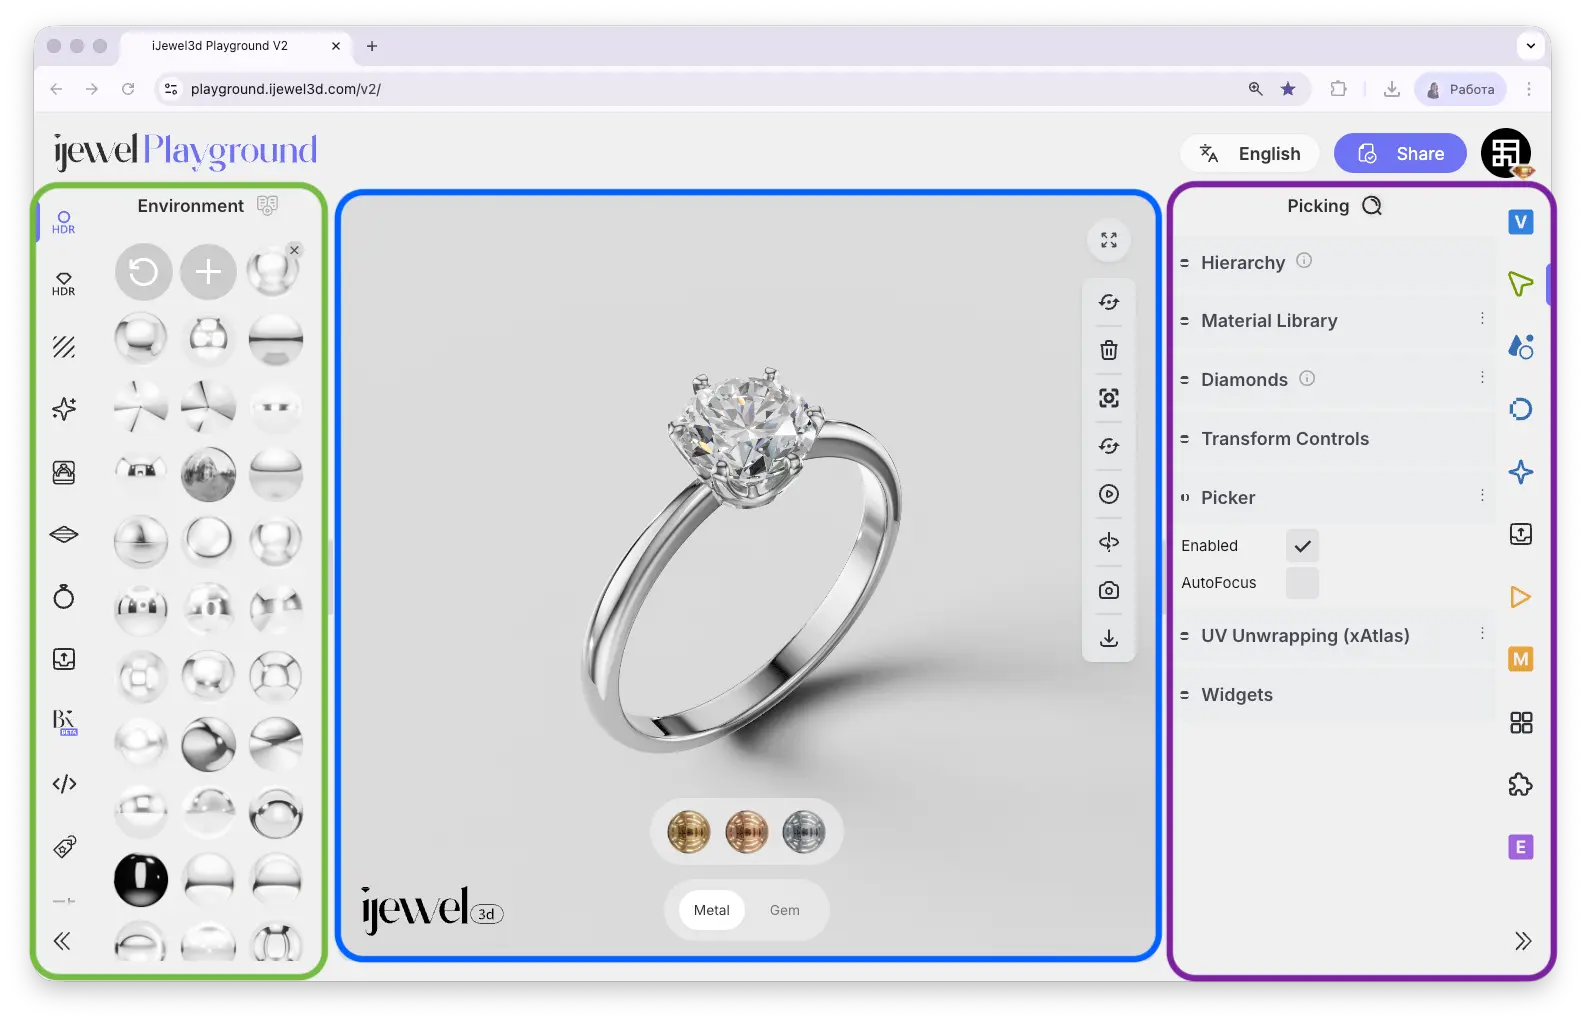
- Left Panel — Presets & quick settings for fast, professional results
- Canvas (Center) — The live 3D viewport where your models are displayed
- Right Panel — Professional tools with full control over every setting
TIP
The left panel is designed for speed — ready-made presets you can apply with one click. The right panel is for precision — complete control over every detail. Both panels work together to give you the perfect balance between convenience and customization.
Canvas (3D Viewport)
The canvas is the central area where your 3D model is displayed in real-time.
Welcome Screen
When no model is loaded, you'll see the welcome screen with options to get started:
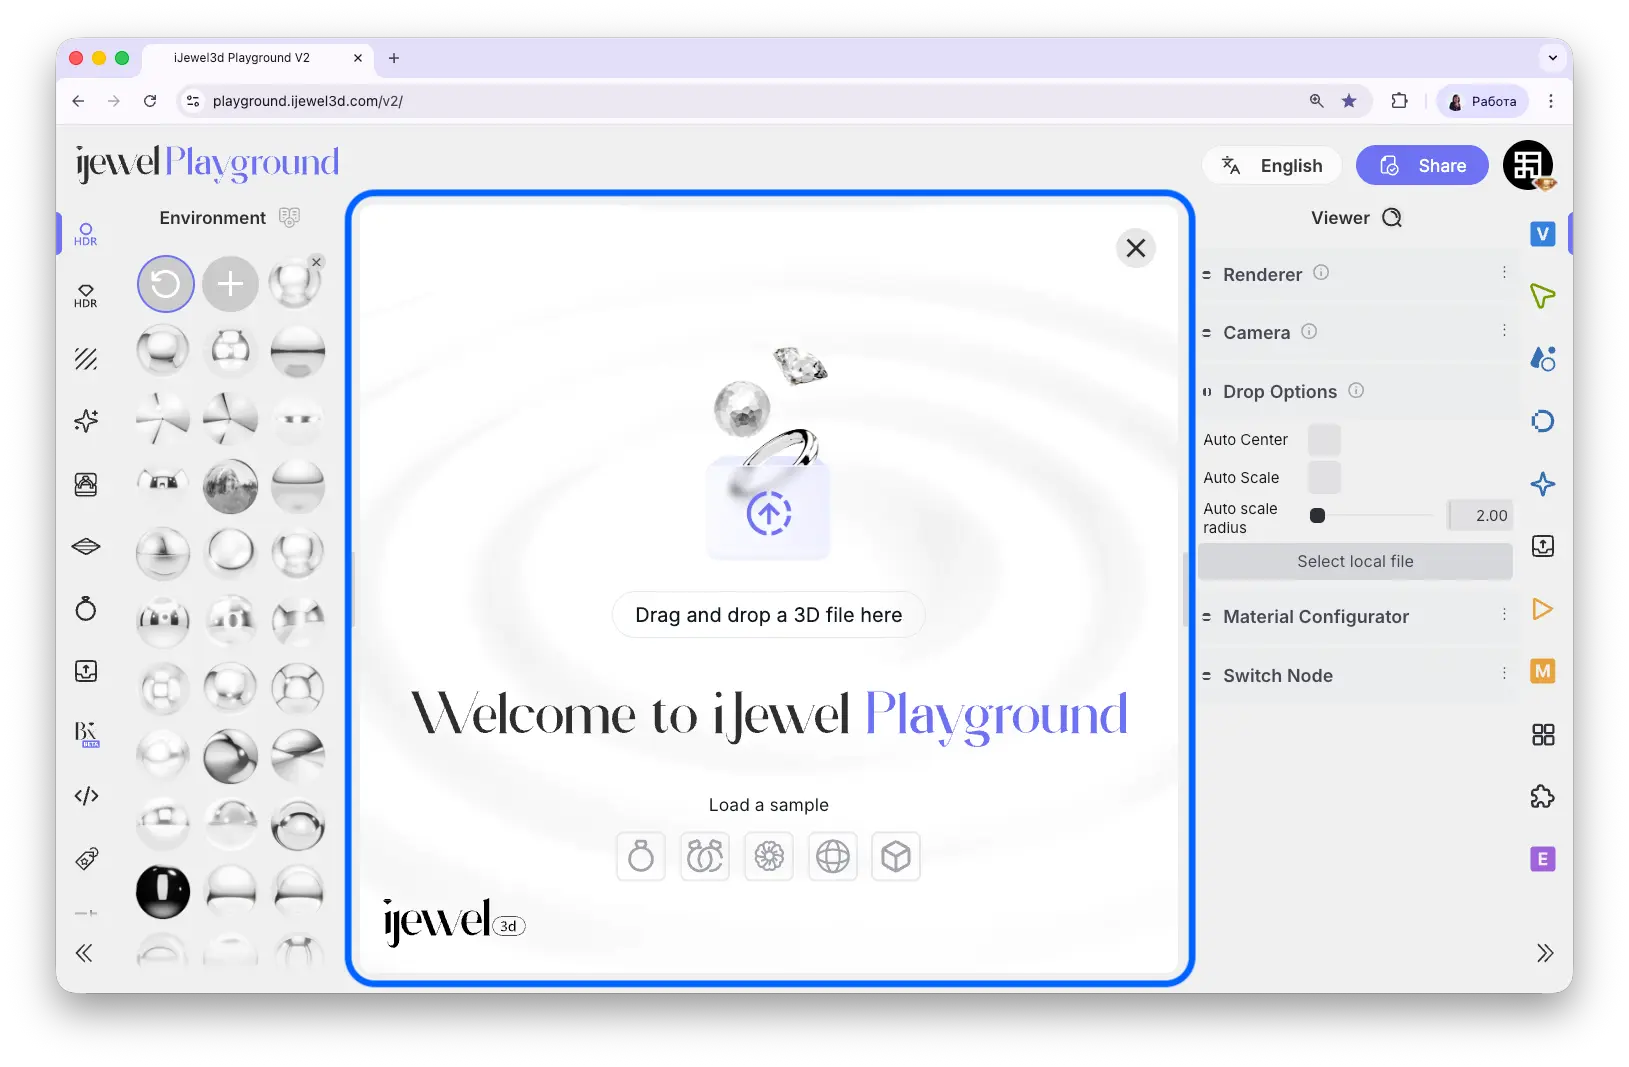
- Drag and drop a 3D file directly onto the canvas
- Select local file from the right panel to browse your files
- Load a sample — click one of the sample models at the bottom to start experimenting right away
Navigation Controls
Once a model is loaded, you can navigate the 3D scene:
| Action | Mouse | Touch (Mobile/Tablet) |
|---|---|---|
| Rotate | Click & drag | Drag with one finger |
| Zoom | Scroll wheel | Pinch with two fingers |
| Reposition | Hold Shift + drag | Drag with two fingers |
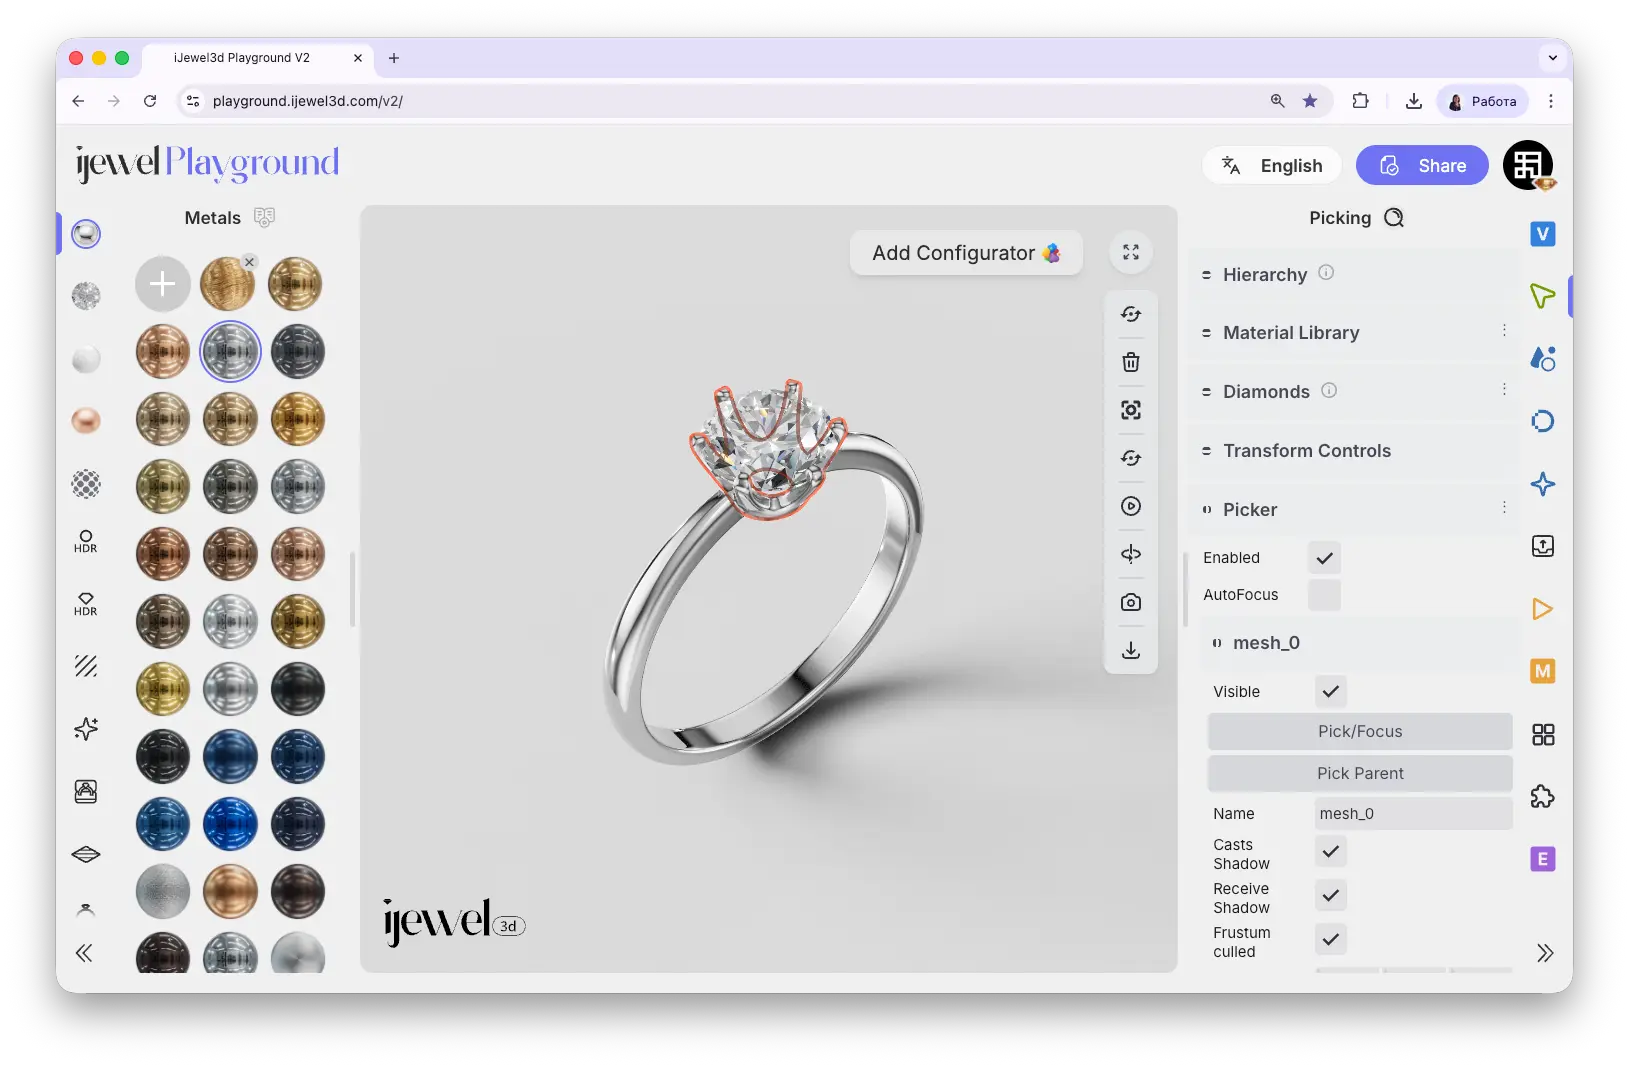
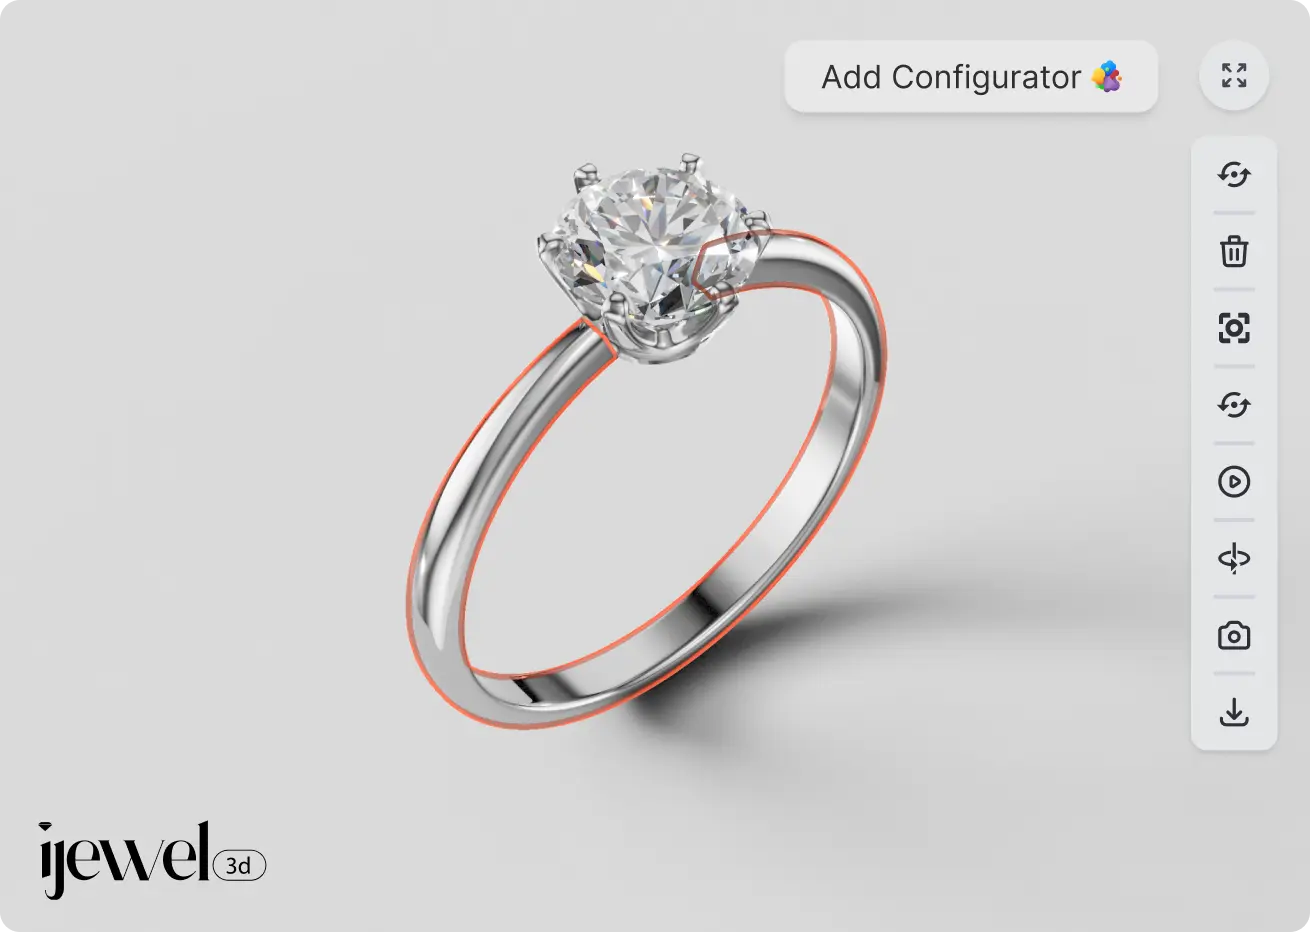
Selecting Objects
To select an object, simply click on it. The selected object will be highlighted with an orange outline. Once selected, you can apply materials, add configurators, and adjust settings for that specific object.
TIP
Click on empty space to deselect the current object.
Canvas Toolbar
The toolbar is located on the right side of the canvas, providing quick access to common actions:
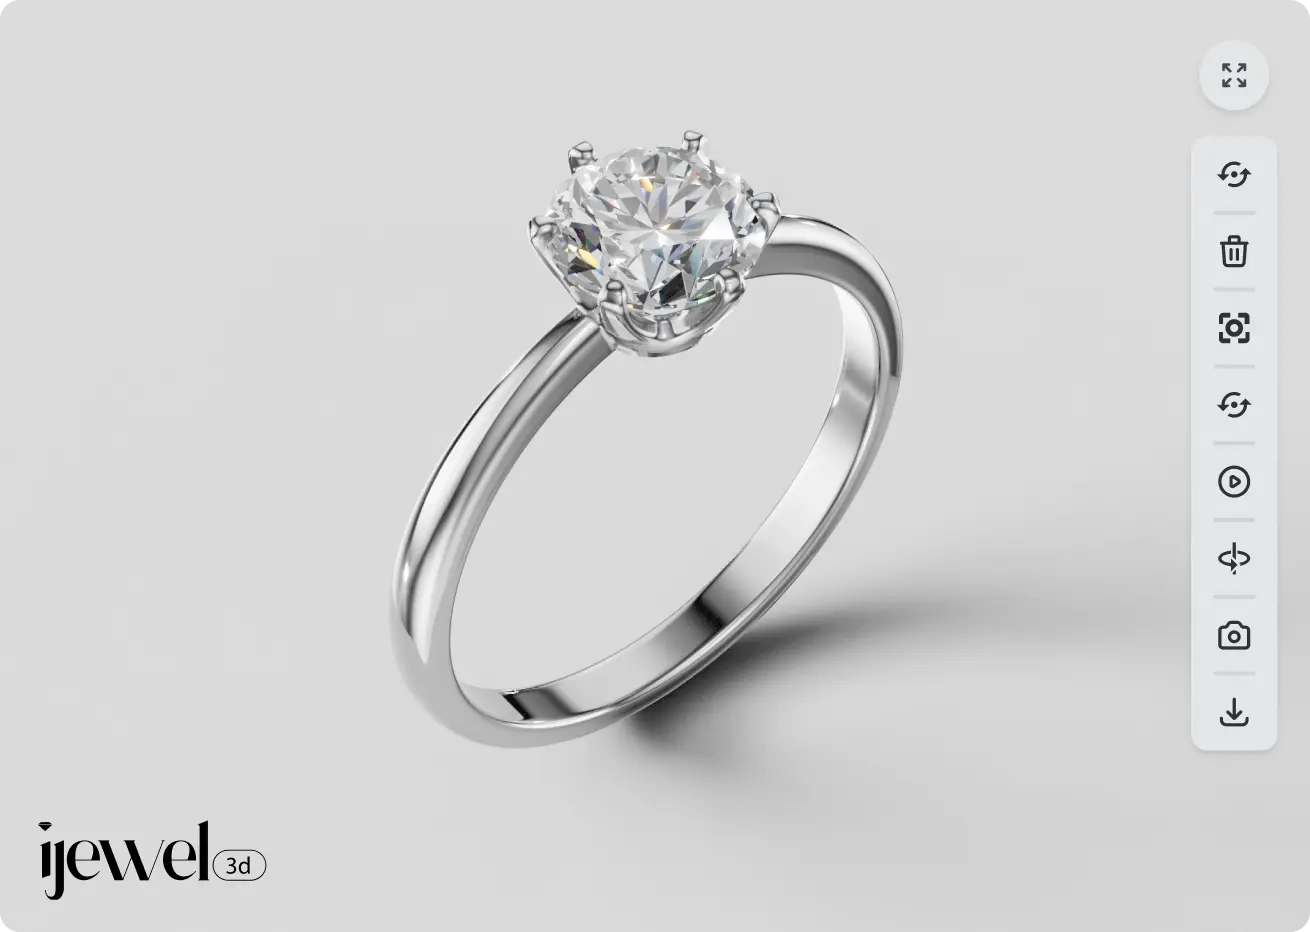
TIP
Fit Object to Scene is one of the most useful tools. Editing a specific diamond? Select it, click this button, and the canvas frames it perfectly. Click on empty space and use it again to frame your entire scene.
Material Configurator (Canvas)
When you select an object on the canvas, an Add Configurator button appears at the top-right of the canvas. This lets you create interactive material options that your clients can switch between in real-time.


How it works:
- Select an object on the canvas — the "Add Configurator" button appears at the top-right
- Click Add Configurator — a popup appears on the canvas showing the material library (5 categories: Metals, Gems, Ceramics, Pearls, Other)
- Enter a name (Label) for the configurator at the top of the popup (e.g., "Metal" or "Gem") — this label helps you organize multiple configurators in a scene
- Click materials to add them — each selected material appears at the bottom of the canvas
- Click a selected material again to remove it from the configurator
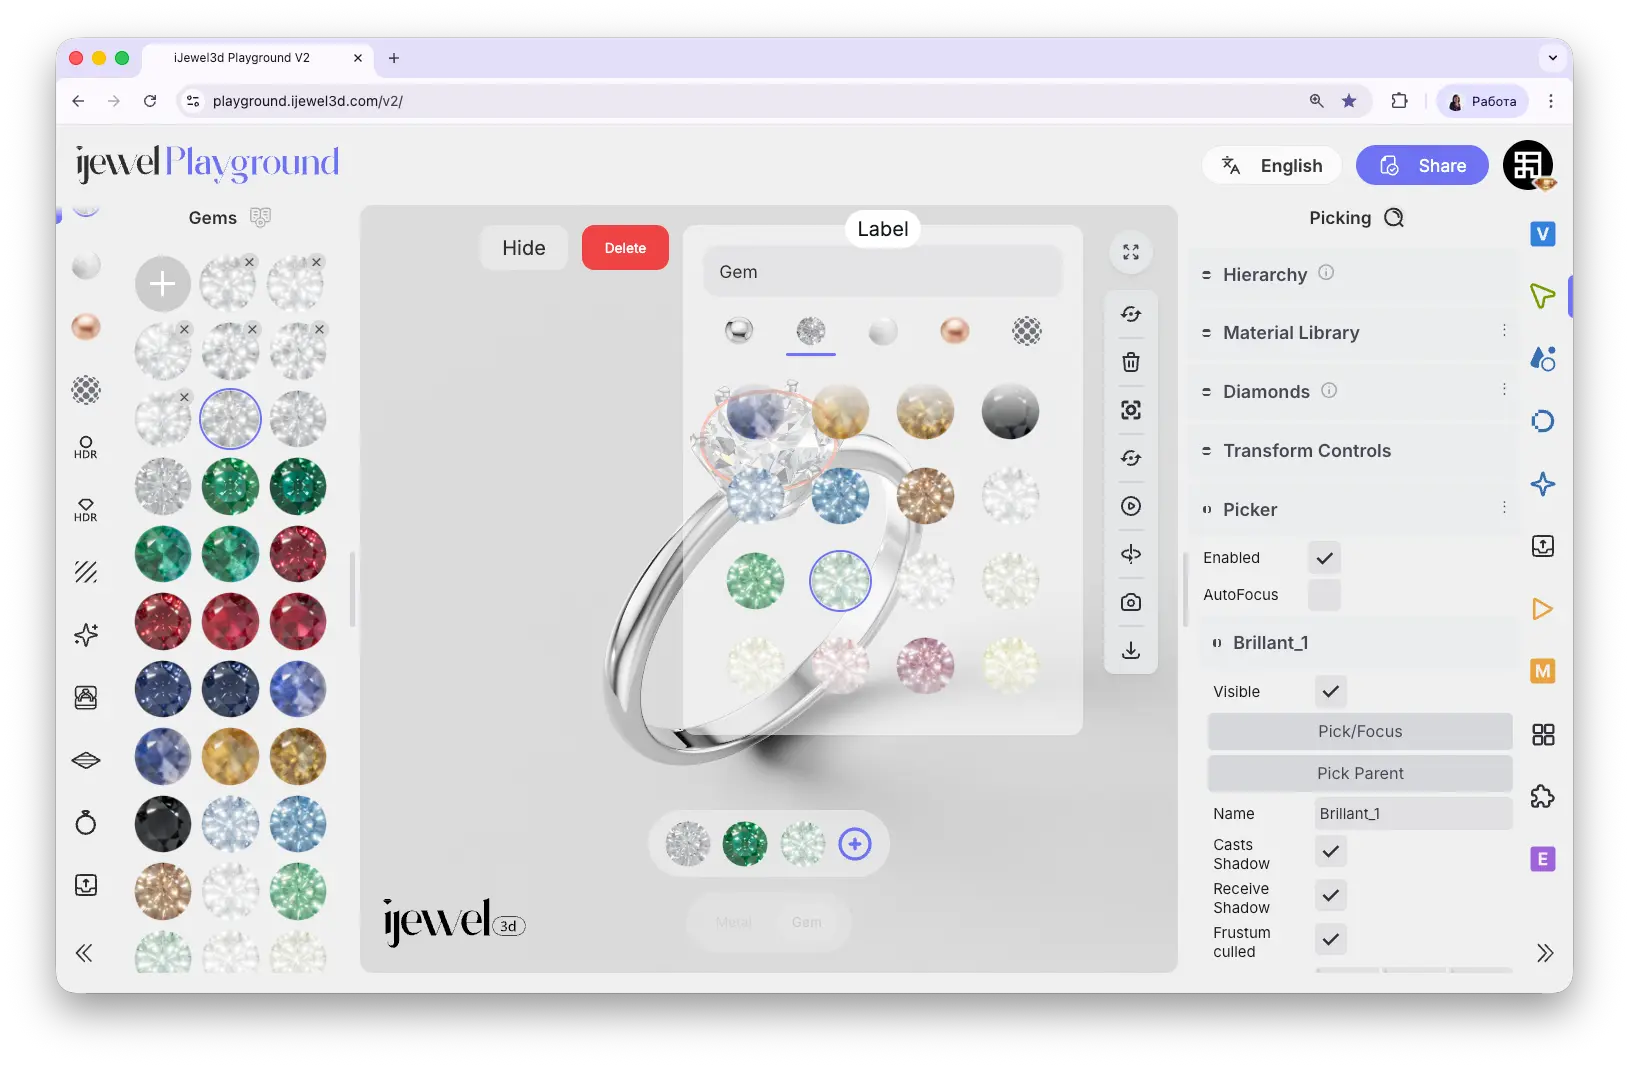
Once configured, the material options appear at the bottom of the canvas. Your clients can click to switch between materials in real-time.

TIP
You can create multiple configurators for different objects in the same scene — for example, one for metals and one for gemstones. The configurator name helps you identify which is which.
Left Panel — Presets & Quick Settings
The left panel provides ready-to-use presets for fast, professional results. These are designed to save you time — instead of adjusting dozens of settings manually, just click a preset and your scene is instantly transformed.
Left Panel — Material Library
When you select an object on the canvas, a set of material category icons appears at the top of the left panel. This is the Material Library — an extensive collection of ready-to-use materials organized by category.
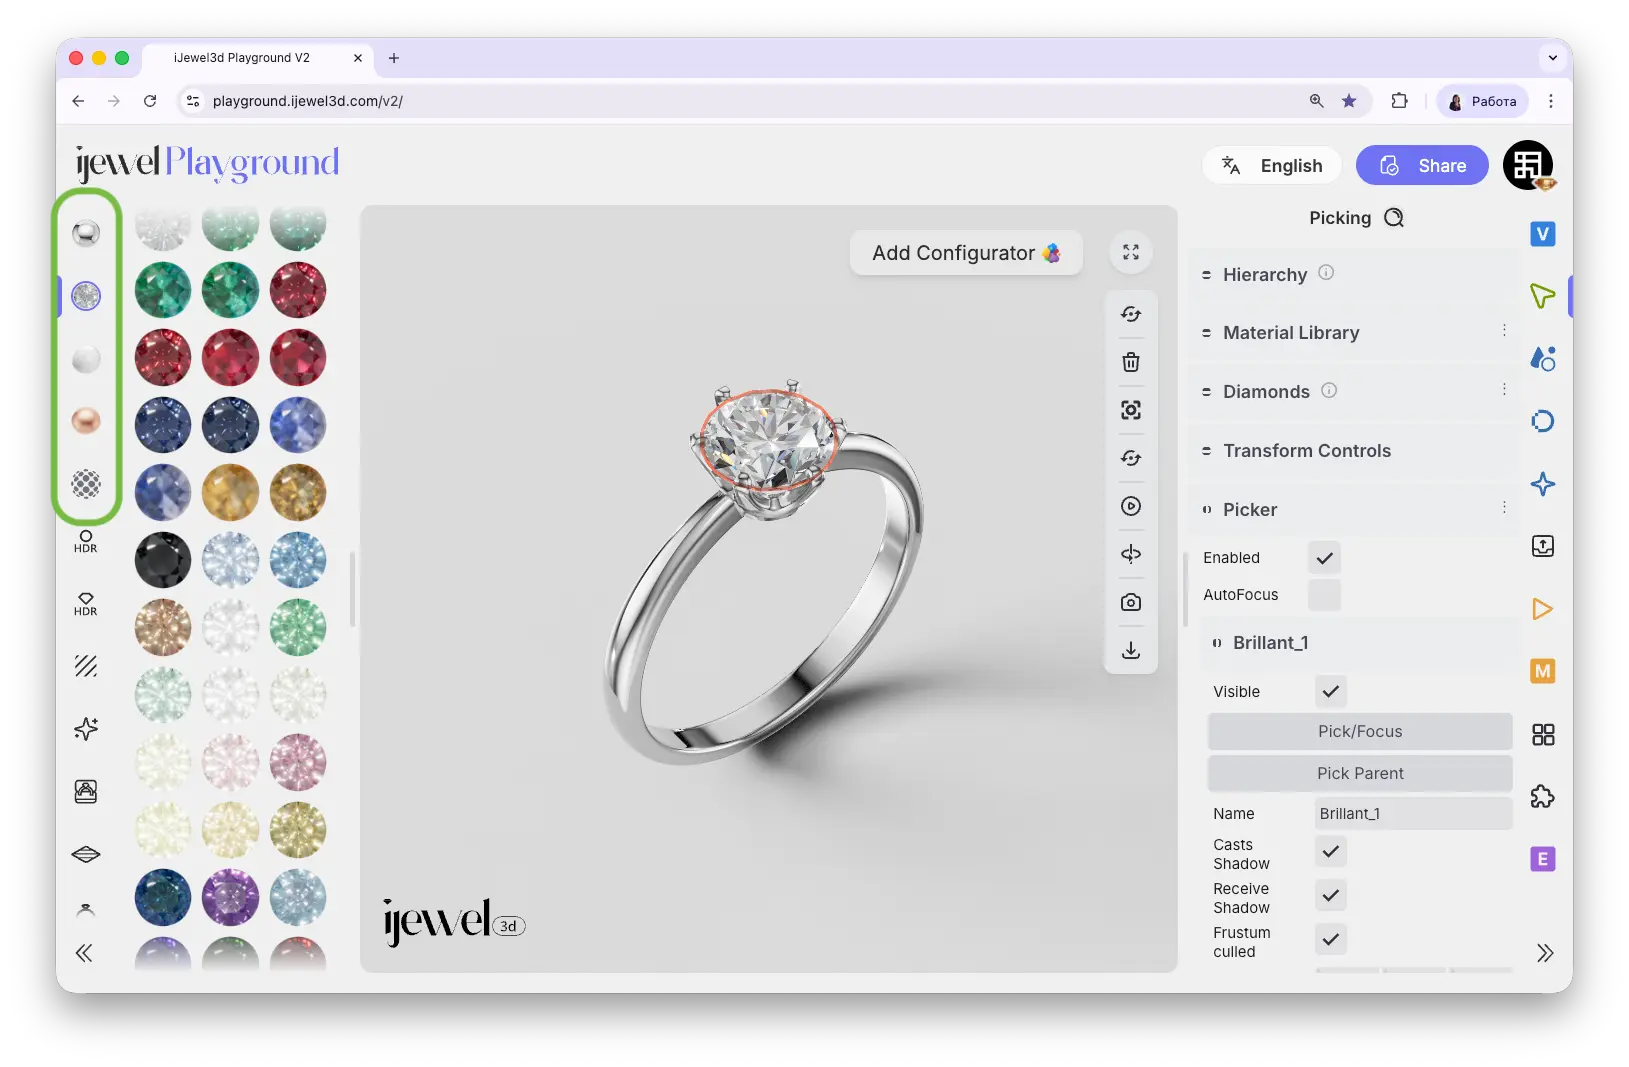
Simply click any material to apply it instantly to the selected object.
Right Panel — Professional Tools
The right panel contains every setting available in Playground, organized into tabs. The icons are arranged vertically on the far right side of the screen.

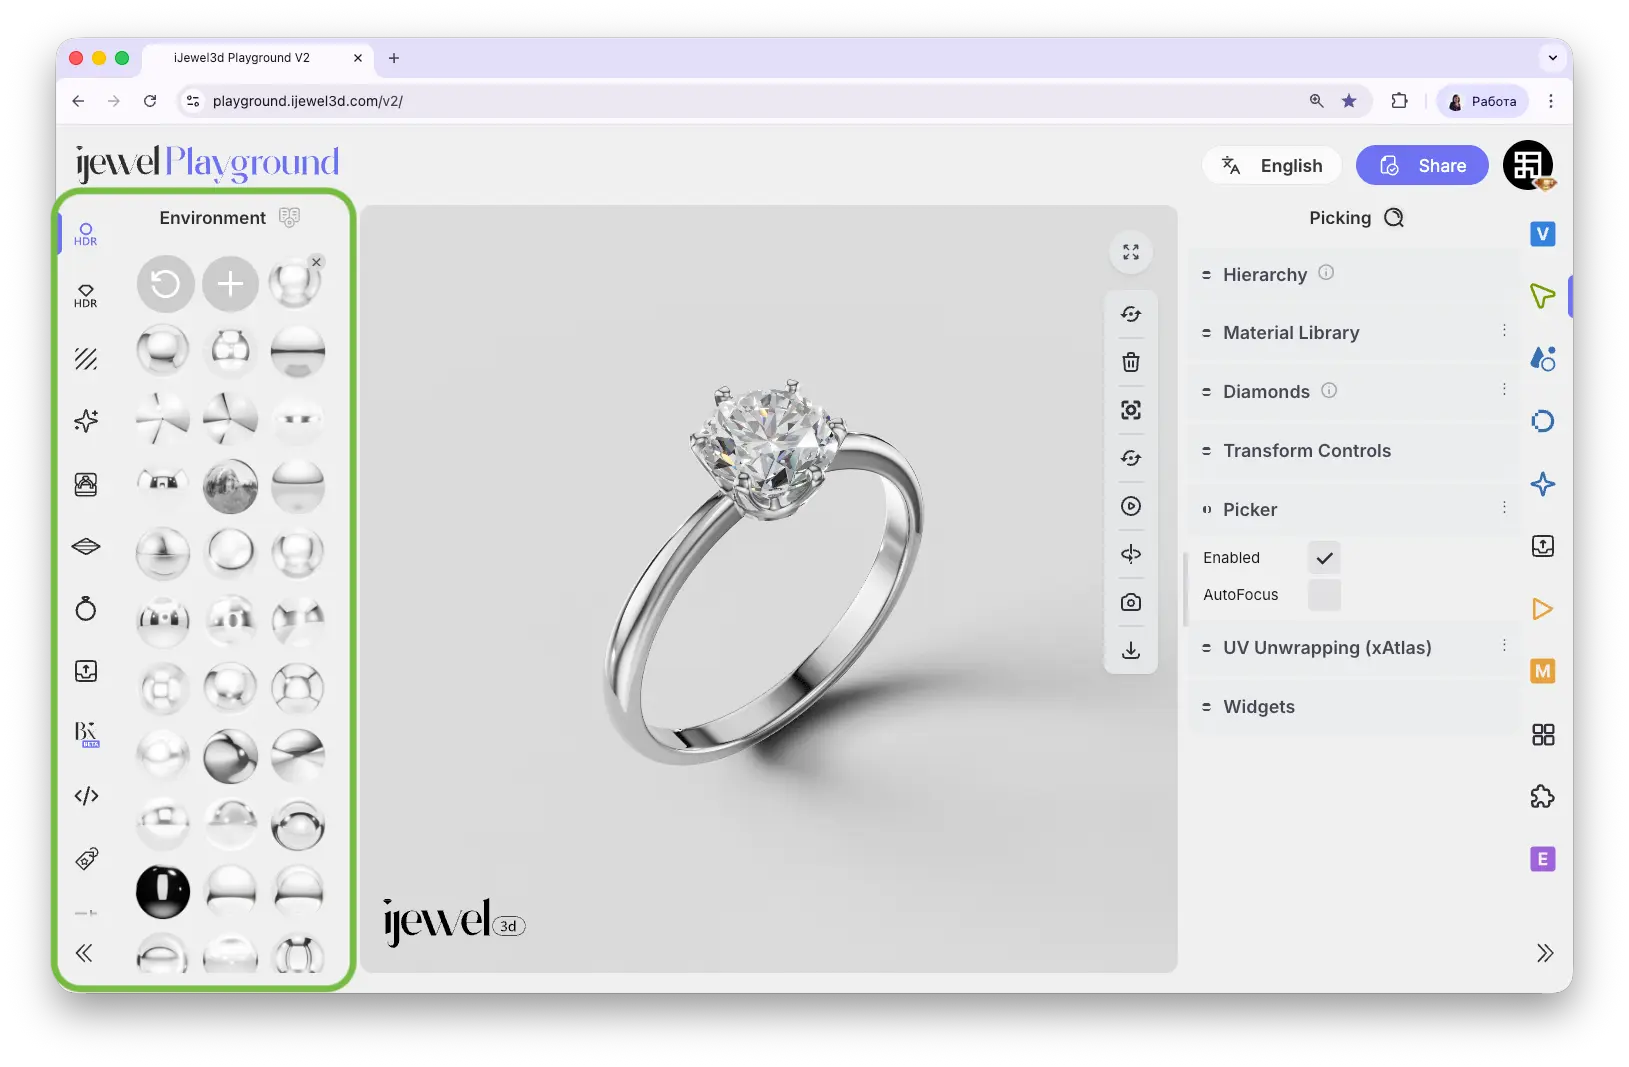
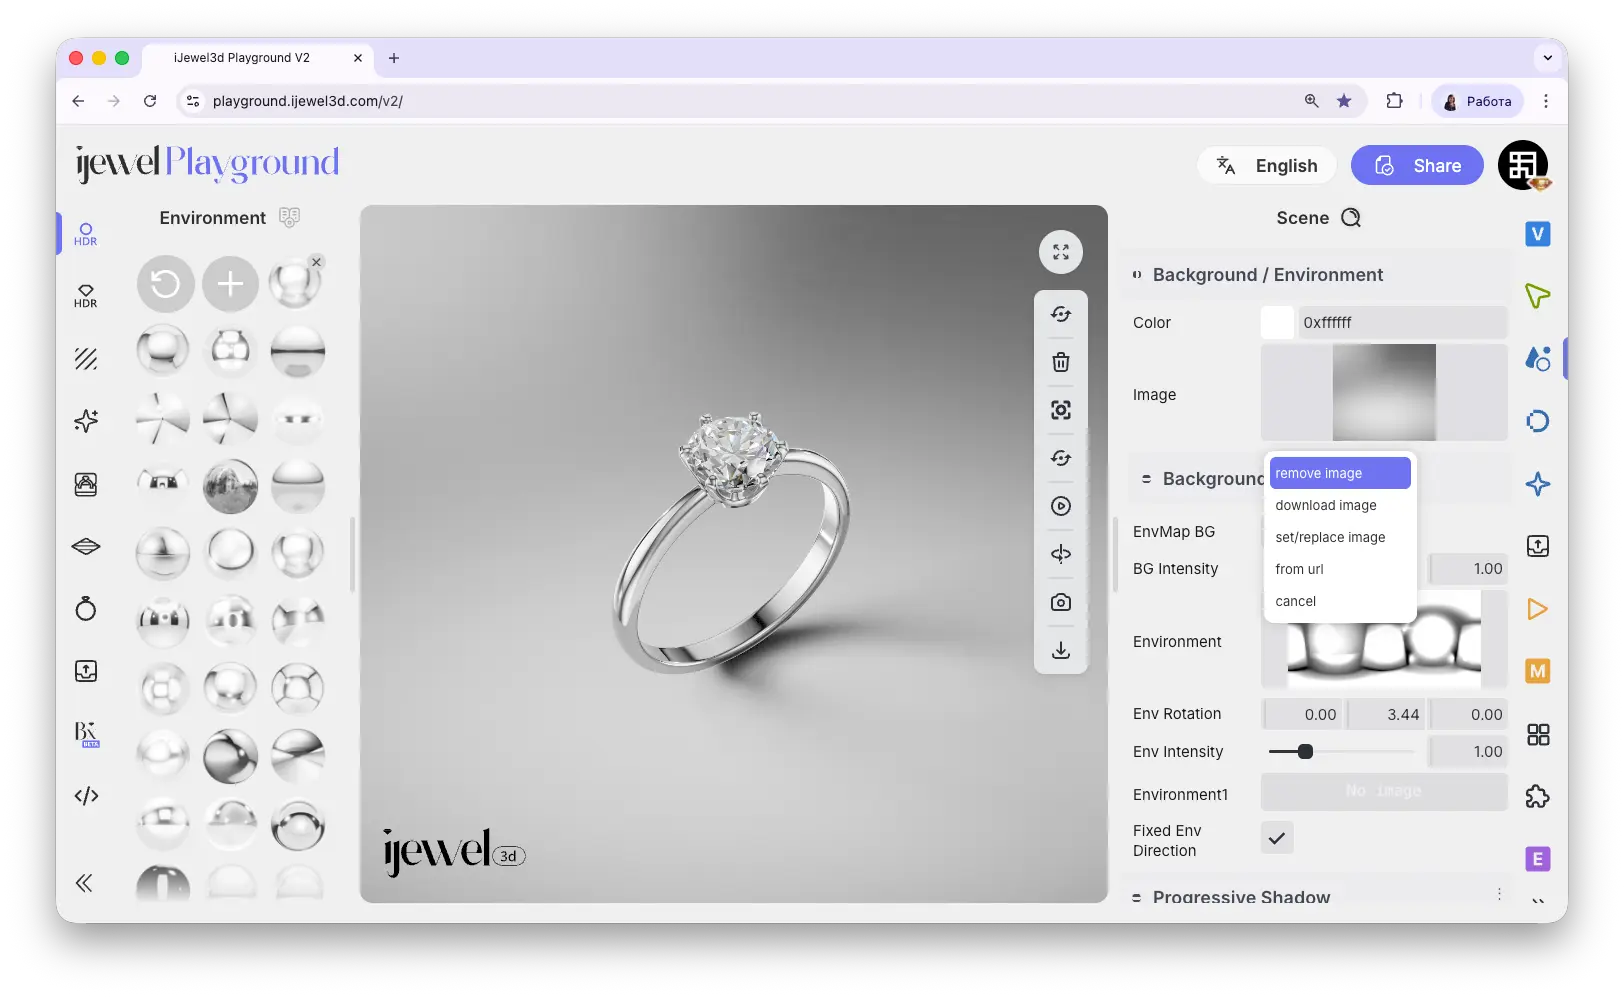
Image Input Menu
Many settings across the right panel use image inputs — for textures, background images, environment maps, and more. When an image is loaded in any of these inputs, clicking on the image thumbnail opens a context menu with the following options:
What's Next?
Now that you know where everything is, here are the recommended next steps:
- Quick Start — Set up your first scene in minutes
- Importing Your First Model — Learn how to bring your 3D designs into Playground
- Renderer Settings — Improve your render quality
- Export Images — Save high-resolution renders
- Export Videos — Create turntable and camera animations