Camera Views
Camera Views lets you save specific camera positions and animate smooth transitions between them. This is one of the most important features for presenting jewelry — you can set up a front view, a top-down angle, a close-up on the stone, and then animate between them with a single click.
You can use Camera Views in two ways: save a single position as a "home" angle that viewers can always return to, or create a sequence of multiple views to showcase your piece from every angle with cinematic transitions.
Where to Find It
This section is located on the right panel, inside the ![]() Animations tab, in the Camera Views section.
Animations tab, in the Camera Views section.
You can also use the ![]() Loop Camera Views button on the top toolbar to start looping through all saved positions.
Loop Camera Views button on the top toolbar to start looping through all saved positions.
How to Create Camera Views — Step by Step
Step 1: Position Your Camera
Navigate in the canvas to find the angle you want to save. You can rotate the model by dragging, zoom in/out with scroll, and hold Shift + drag to pan left/right. For more details on canvas navigation, see UI Overview.
Step 2: Save the Position
In the Camera Views section, click the Add Current View button. A new entry called "Camera View" will appear at the top of the list. This saves the exact camera position, target, and orientation.
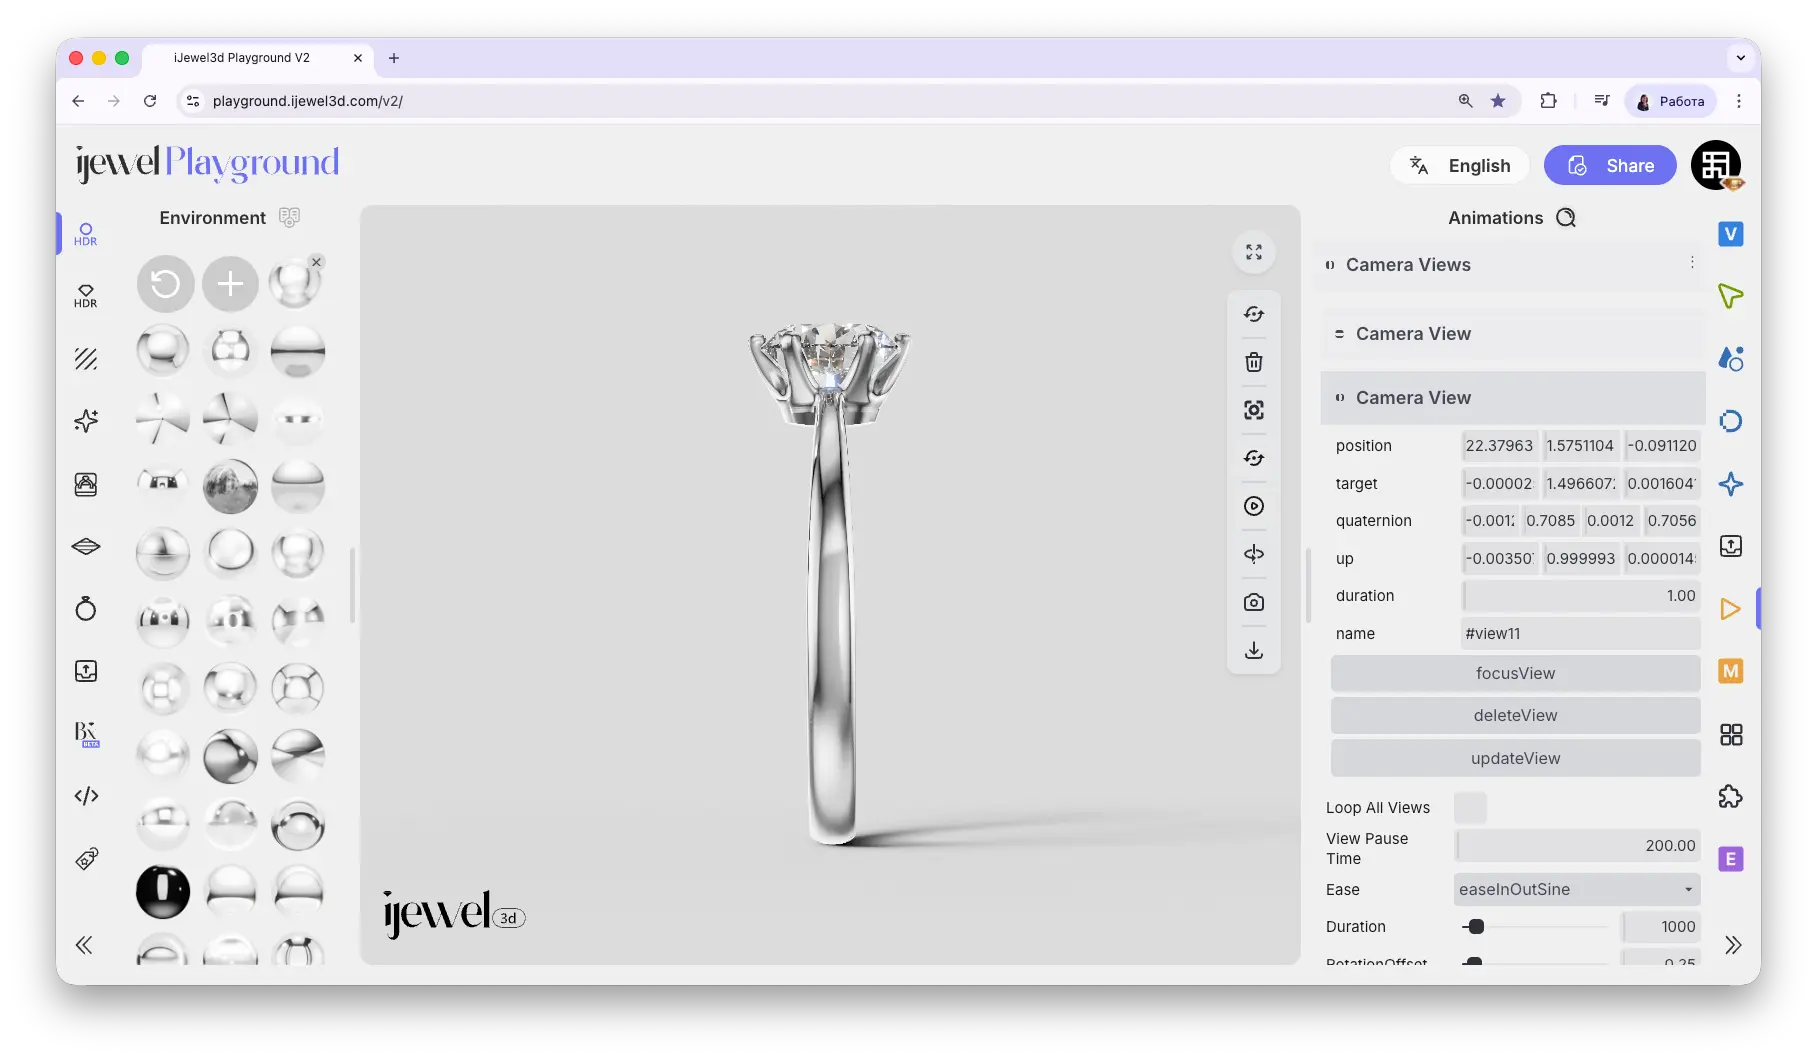
Step 3: Review the Saved View
Click on the saved view to expand it. You will see the stored coordinates (Position, Target, Quaternion, Up), plus Duration, Name, and three action buttons: Focus View, Delete View, and Update View.
Click Focus View to fly the camera to this saved position. The transition speed depends on the Duration setting — if you want an instant jump with no animation, set Duration to 0.
Step 4: Add More Views
Rotate your model to a new angle (for example, a top-down view) and click Add Current View again. A second Camera View entry will appear. Repeat this for as many views as you need — front, side, top, close-up on a detail, etc.
Step 5: Animate Between Views
Click the Animate All Views button in the main settings. The camera will smoothly transition through all saved positions in order.
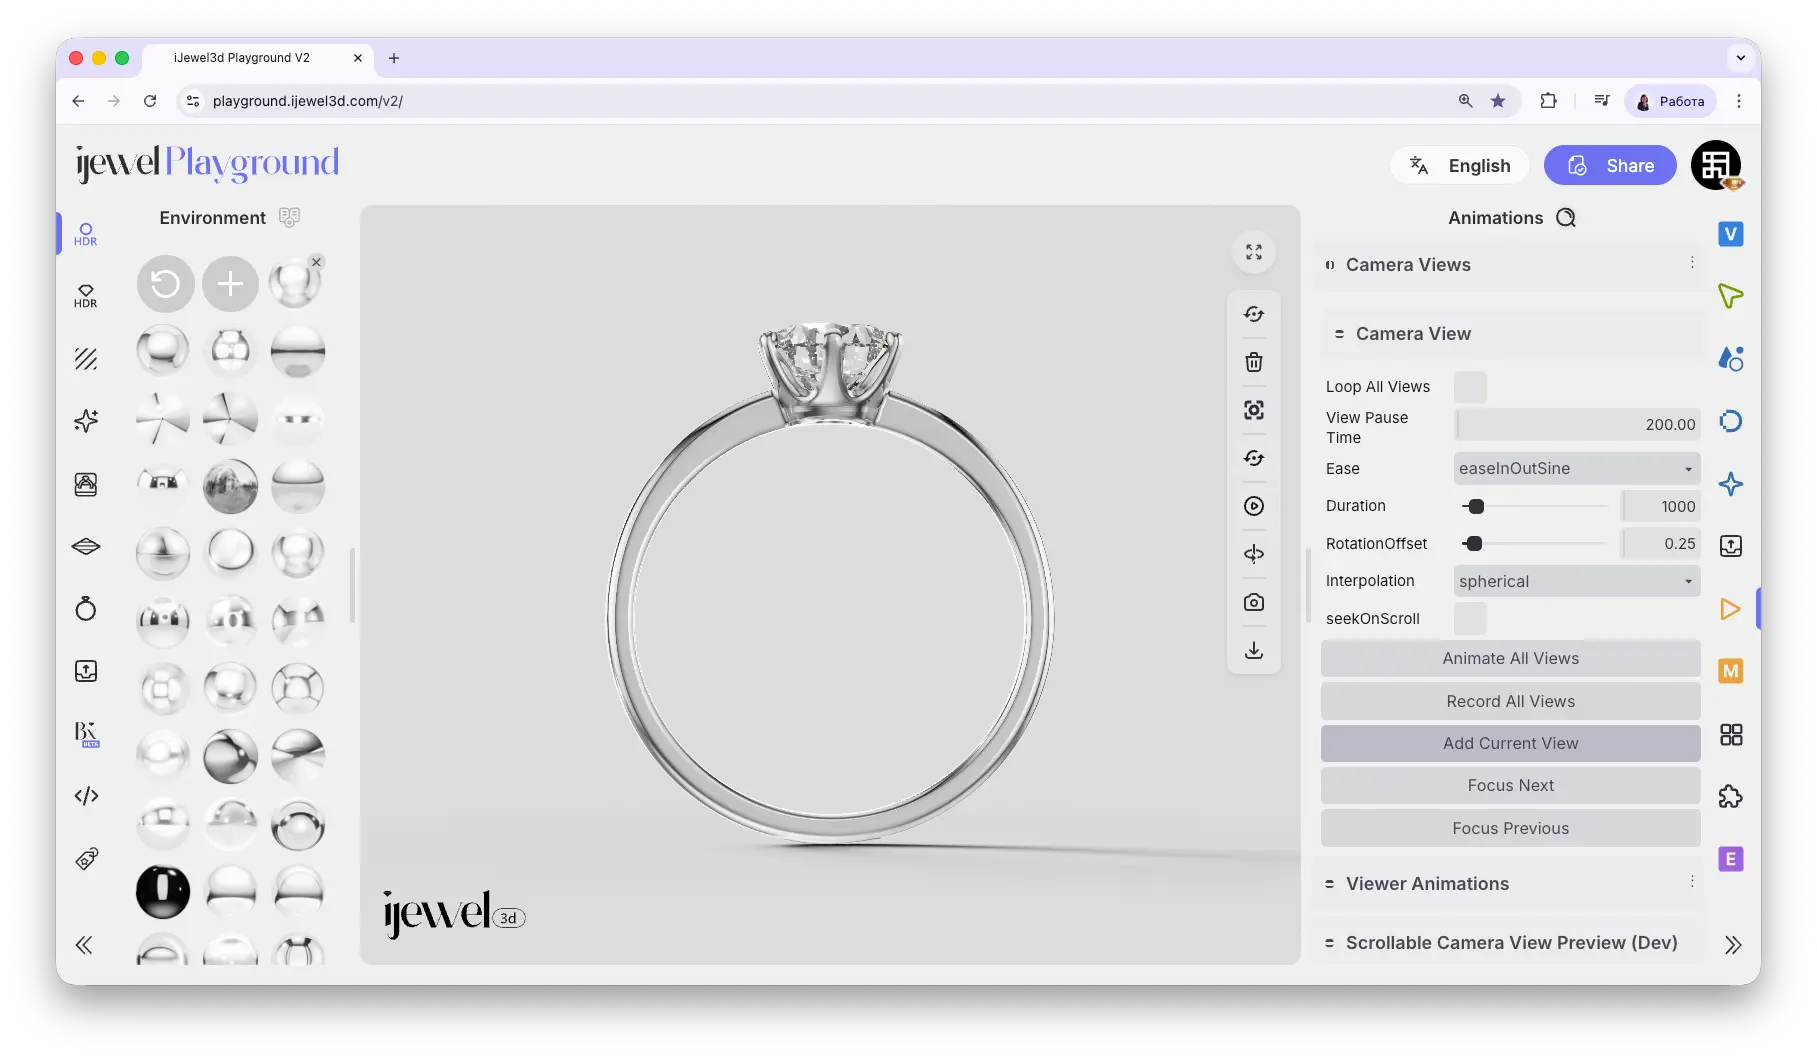
To fine-tune the animation, adjust these key settings:
- Duration — increase for slower, more cinematic transitions
- Ease — controls the acceleration curve. easeInOutSine is the most popular choice for smooth, natural motion
- Interpolation — Spherical is the most commonly used for camera movements
- Loop All Views — enable to loop continuously, so the last view transitions back to the first
Use Cases
Single view as a home position — If you want your product page to always start from a specific angle, save just one Camera View. Users can rotate the model freely, and the scene can always snap back to this starting position.
Multiple views for product showcase — Create 3–4 or more Camera Views to highlight different details of your jewelry: front face, top-down, side profile, close-up on the setting. Use Animate All Views or Loop All Views to present them as a guided tour.
Per-View Buttons
Each saved Camera View has three action buttons:
- Focus View — Flies the camera to this saved position
- Delete View — Permanently removes this view
- Update View — Overwrites the saved coordinates with the current canvas position
WARNING
Delete View and Update View are irreversible. There is no undo — once you delete or update a view, the previous data is gone.
General Settings
Action Buttons
- Animate All Views — Plays the full transition sequence through all saved views
- Record All Views — Records the camera view animation as an MP4 video and downloads it to your computer. This is the same as Export → Video Export → Record Camera Views
- Add Current View — Saves the current canvas camera position as a new view
- Focus Next — Jumps to the next saved view
- Focus Previous — Jumps to the previous saved view
Common Mistakes
Changing Field of View breaks Camera Views
If you change the Field of View setting in Viewer → Camera, all previously saved Camera Views will become inaccurate — the framing and zoom will shift. You will need to delete and re-create your Camera Views after changing Field of View. Always set your Field of View before creating Camera Views.
Video Tutorial
iJewel3D Video Rendering — Camera Paths & Animated Lightmaps
Related Pages
- Export Videos — Export camera view animations as video files
- Animations — Overview of all animation sections
- FAQ: Cameras & Animations — Common questions about cameras and camera paths
- Cameras (Loaded) — Working with cameras imported from 3D software