Modifiers — Object Rotation
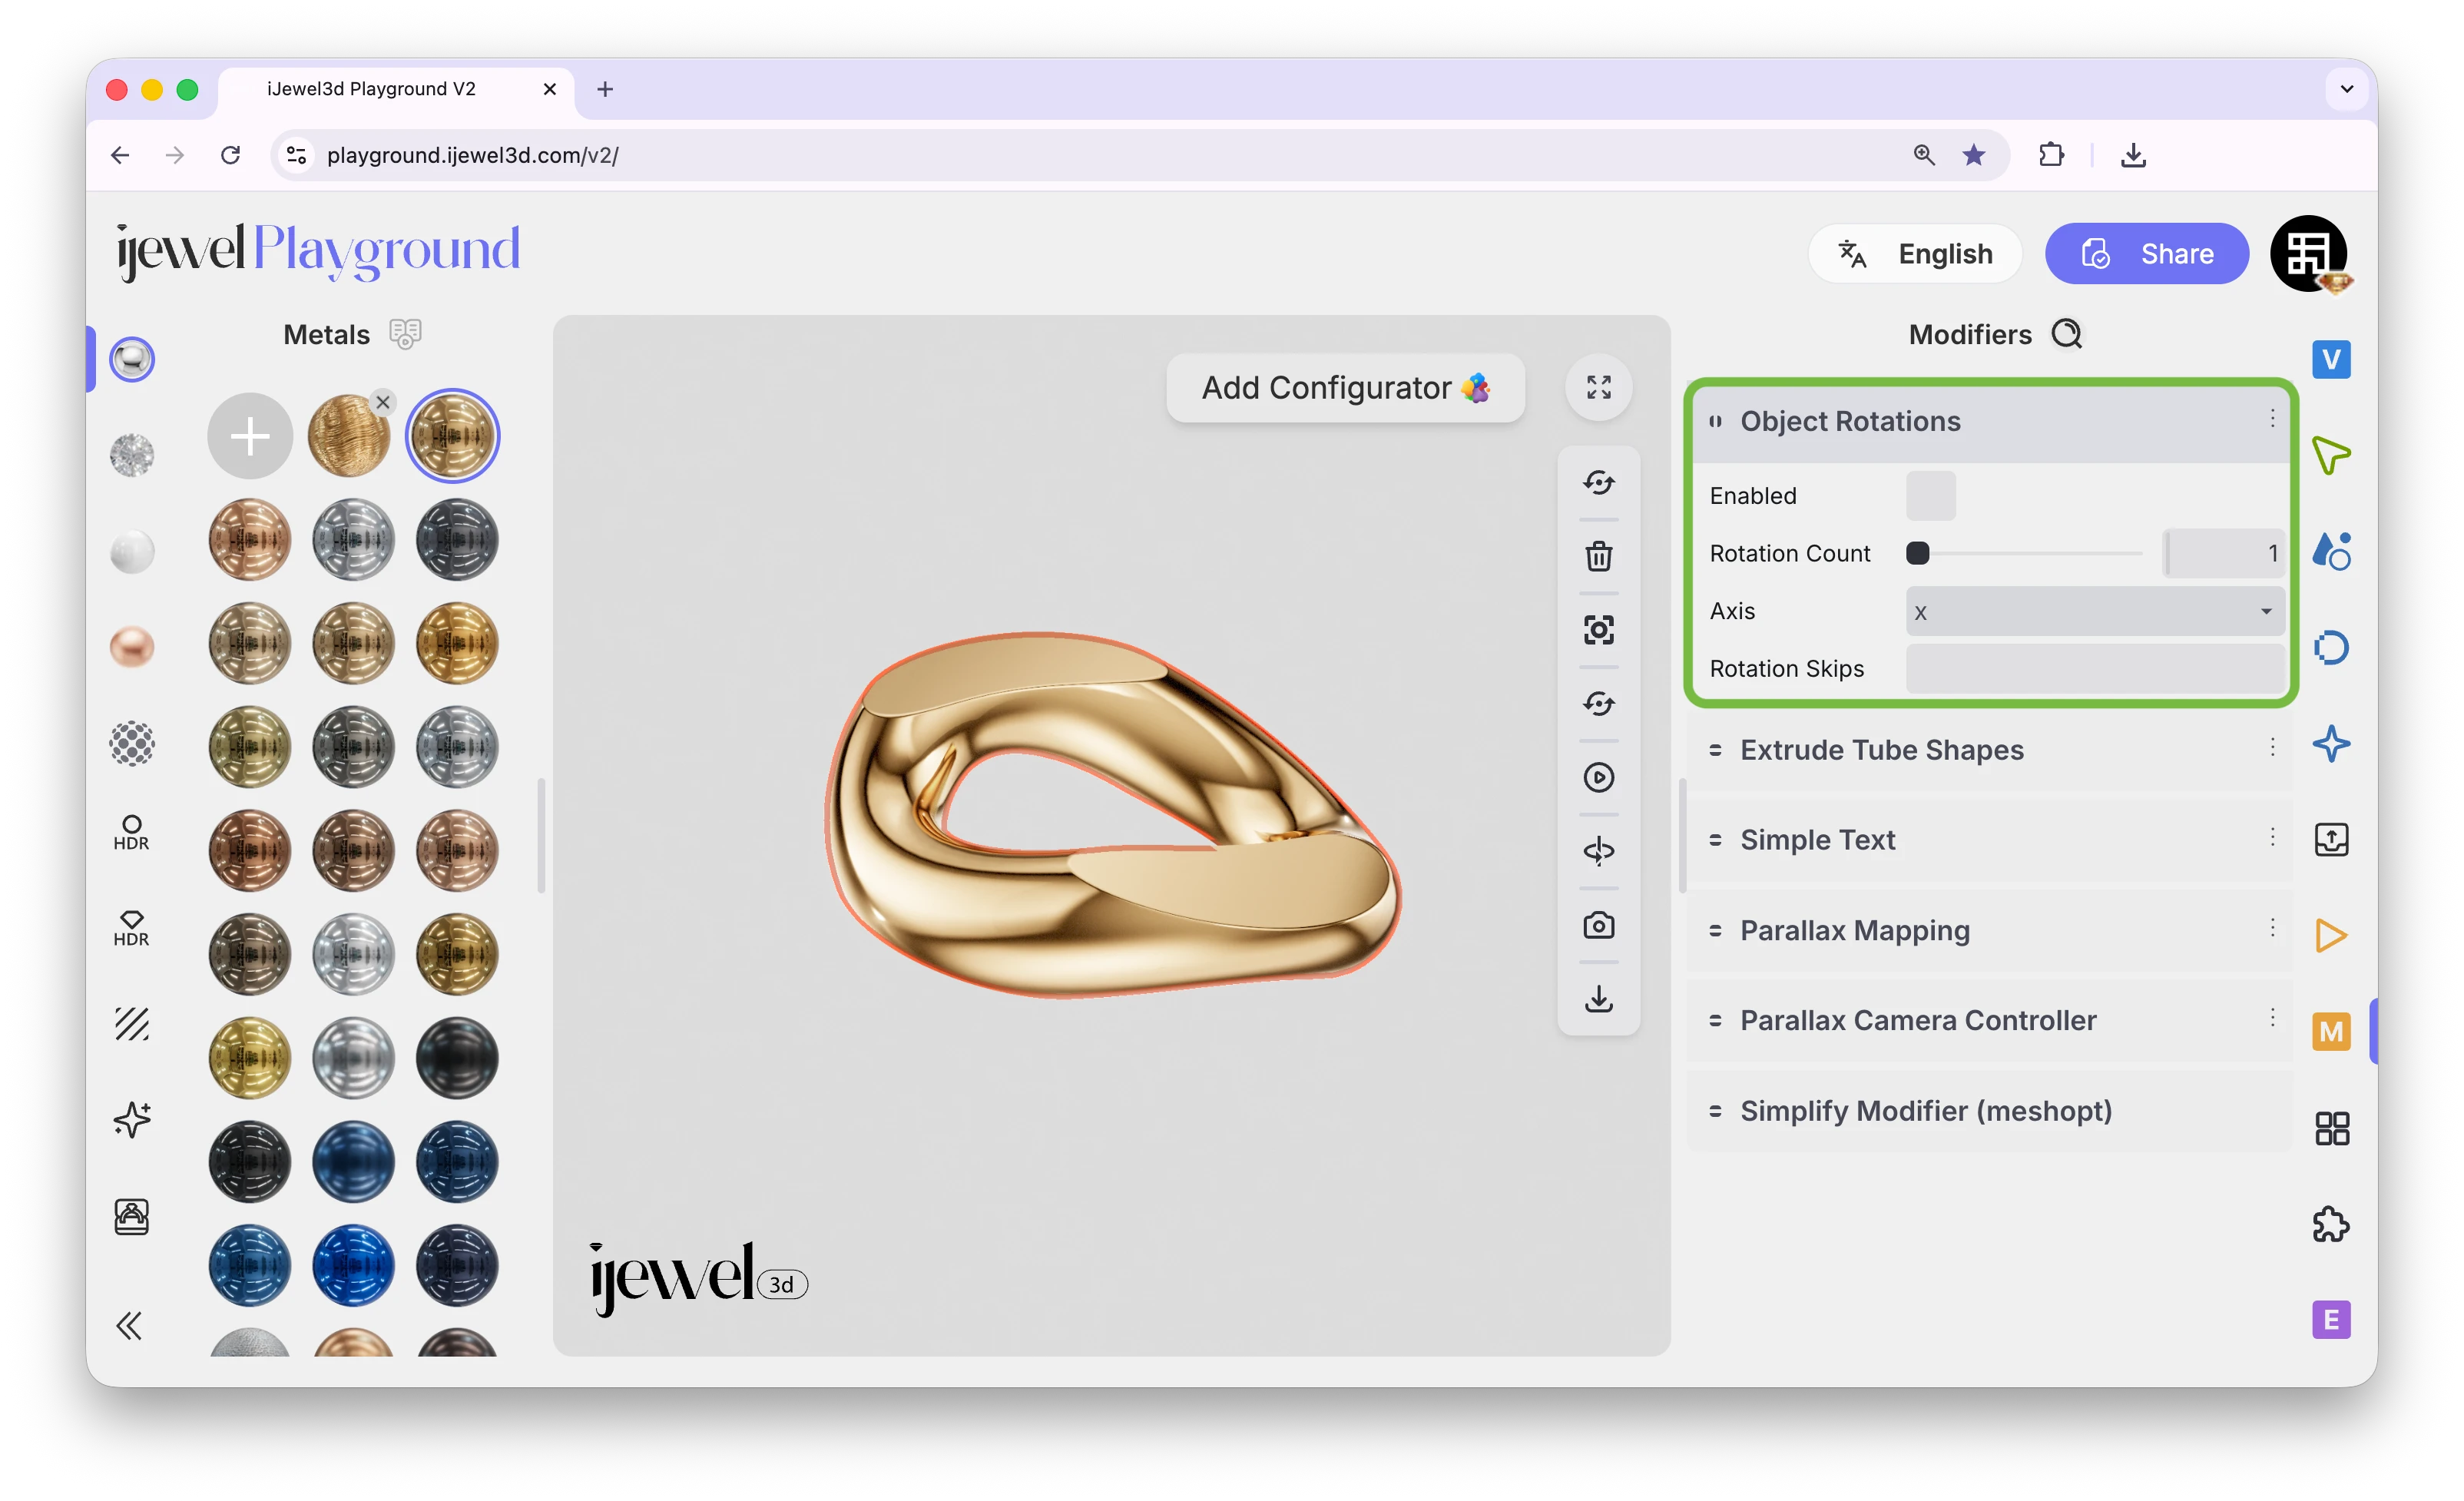
The Object Rotation modifier duplicates an object around a circle using instanced copies. Because it creates instances (not full copies), your scene stays lightweight and fast — even with dozens of duplicates. This is especially useful for creating chain links, repeating gemstone patterns, halo settings, and other circular arrangements common in jewelry design.
Where to Find It
This section is located on the right panel, inside the ![]() Picking tab, in the Modifiers section. Select an object in the canvas to see the modifier controls.
Picking tab, in the Modifiers section. Select an object in the canvas to see the modifier controls.
Settings
0,1,3,5,7). Skipped positions will be empty, allowing you to create patterns with gaps. Instance numbering starts at 0Pivot Point
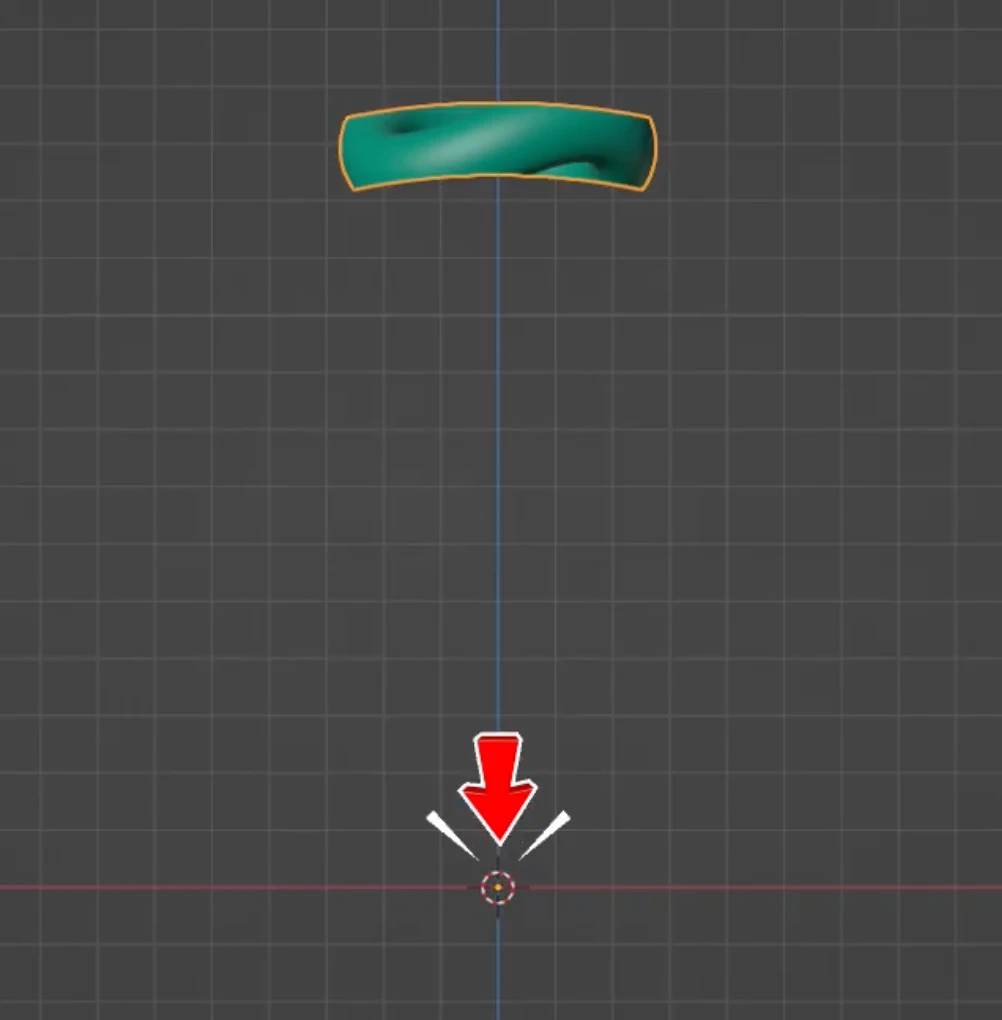
Make sure your object's pivot point is at the center of the scene, not inside the object itself. If the pivot is inside the object, all copies will stack on top of each other instead of spreading around a circle.
Settings not appearing?
If the modifier settings don't appear after enabling the checkbox, simply deselect the object and select it again — the settings will show up.
Approach 1 — Single Object
Use this approach when you have a single piece (like a chain link) and want to repeat it around a circle.
Step 1: Select the Object
Click on the object in the canvas that you want to duplicate. The object will be highlighted and its properties will appear in the right panel.
Step 2: Enable the Modifier
In the right panel under Modifiers, check the Enable checkbox for Object Rotation. The object will immediately be duplicated around a circle.
Step 3: Set the Rotation Count
Use the Rotation Count slider to control how many copies are placed around the circle. Increase the value until your ring or pattern is complete.
Step 4: Choose the Correct Axis
Select the rotation Axis (X, Y, or Z) that matches your model's orientation. If the copies appear in the wrong plane, try a different axis.
Approach 2 — Parent Object with Rotation Skip
Use this approach when you have a parent object with multiple children (e.g., a chain link with a diamond) and want to skip certain positions so that only some instances include the child objects.
Step 1: Select the Parent Object
To select the entire parent group (including all its children like diamonds and prongs), go to the ![]() Picking tab, find the Hierarchy section, and click on the parent object's name in the hierarchy tree. This selects the parent along with all child objects beneath it.
Picking tab, find the Hierarchy section, and click on the parent object's name in the hierarchy tree. This selects the parent along with all child objects beneath it.
Step 2: Set the Rotation Count
Enable the modifier and set the Rotation Count to the total number of positions you need.
Step 3: Use Rotation Skip
In the Rotation Skip field, enter the instance numbers you want to hide, separated by commas. For example, if you have 30 total positions and want diamonds only at even-numbered positions, enter all the odd numbers: 1,3,5,7,9,11,13,15,17,19,21,23,25,27,29. Instance numbering starts at 0.
The skipped instances will be removed, creating a pattern where only certain positions show the full parent-child group.
Video Tutorial
Object Rotation Modifier
Related Pages
- Scene Basics — Overview of working with 3D objects
- Scene Hierarchy — Understanding parent-child relationships
- Transform Controls — Moving, rotating, and scaling objects
- PBR Materials — Physical material editor for metals and surfaces
- Diamond Materials — Diamond material editor for gemstones