Tonemapping
Tonemapping controls color grading of the final render — exposure, saturation, and contrast. Small adjustments here can dramatically improve the look of your jewelry. This section also contains Clip Background, the key setting for transparent background exports.
Where to Find It
This section is located on the right panel, inside the ![]() Post Processing tab, in the Tonemapping section.
Post Processing tab, in the Tonemapping section.
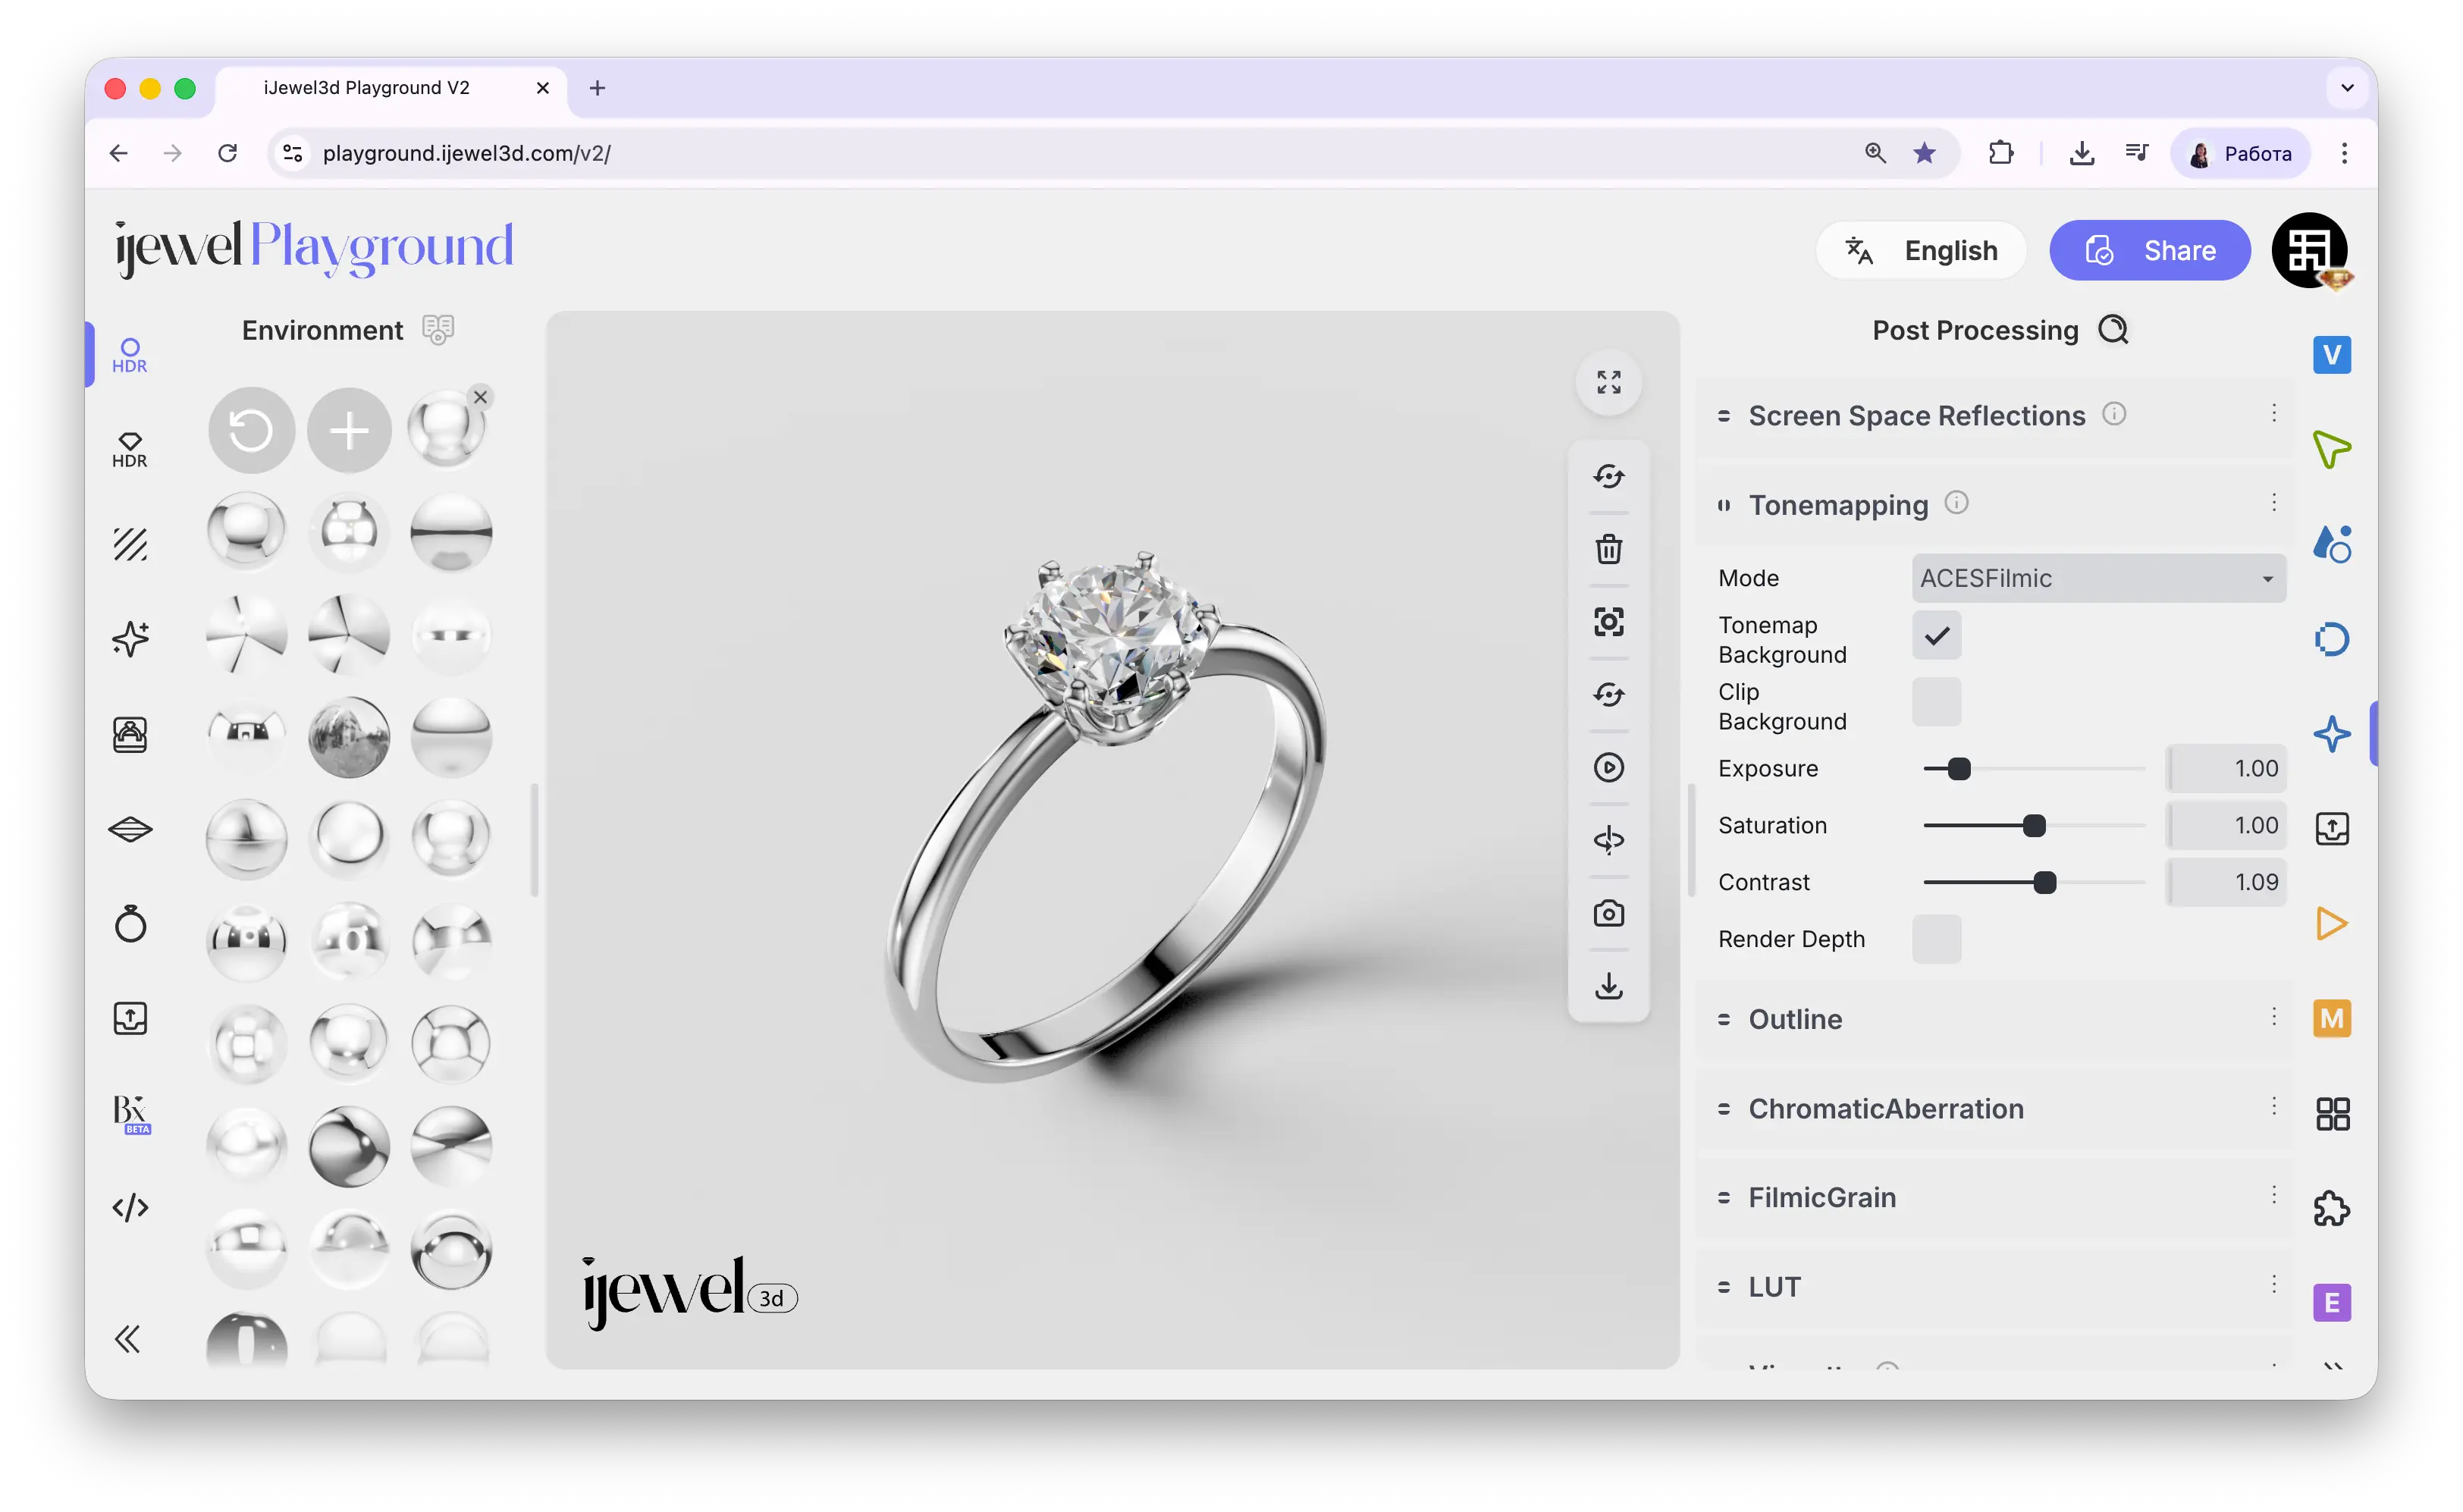
Mode
The Mode dropdown selects the tonemapping algorithm. Each mode produces a different color response.
ACESFilmic
Default. Cinematic colors with natural highlight rolloff. Recommended for most jewelry renders
Linear
No tonemapping — raw HDR values. Useful for post-production color grading
Reinhard
Classic curve — softer, less contrasty than ACES
Cineon
Kodak film response — warm, slightly desaturated analog film look
Uncharted 2
Filmic curve — good balance between contrast and highlight detail
AgX
Modern approach — handles bright saturated areas better than ACES, prevents color burn-out
Settings
Tonemap Background
Checkbox — applies tonemapping to the background as well. When off, only the 3D model is affected
Clip Background
Key setting for transparent exports. Removes the background and sets alpha to 0 — export as PNG to get a transparent image
Exposure
Slider — overall brightness. Default 1.00
Saturation
Slider — color intensity. Increase for more vivid rose gold or colored gemstones. Default 1.00
Contrast
Slider — difference between light and dark areas. A common adjustment is bumping this to 1.01–1.05 for a more polished look. Default 1.00
Render Depth
Checkbox — shows a black-and-white depth visualization instead of the color render. Useful for previewing Depth of Field ranges or creating depth maps for compositing
Transparent Background
Enable Clip Background, disable Scene → Ground → Visible and Progressive Shadow, then export as PNG. Watch the How to Make Pure White and Transparent Background tutorial.
Related Pages
- Screen Space Reflections — SSR settings for realistic reflections
- Background / Environment — Background color, HDRI maps, and environment settings
- Export Images — Image export with quality and format settings
- Ground — Ground plane visibility and shadow settings
- FAQ: Scene, Lighting & Environment — Common scene setup questions